
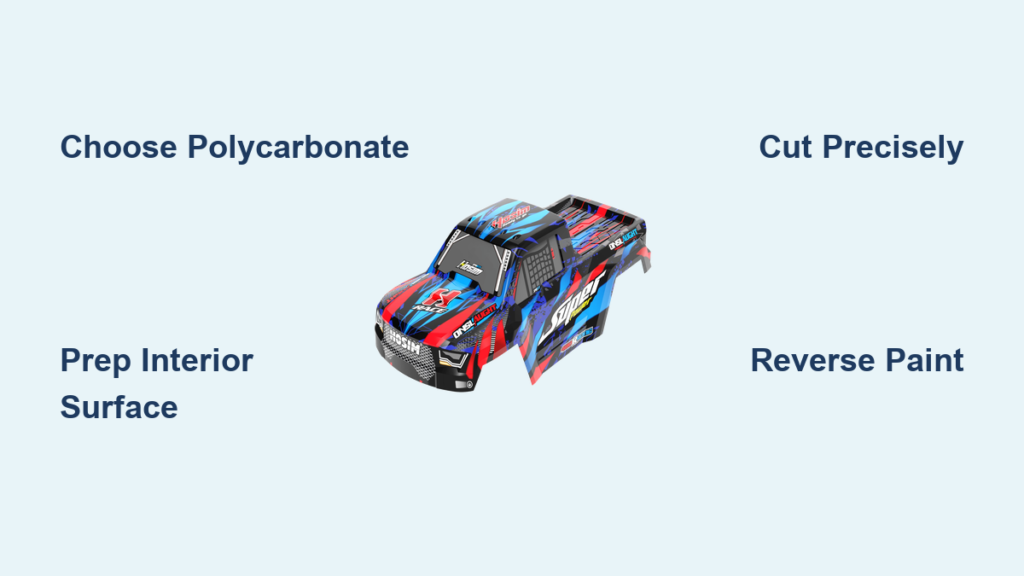
Ever struggled with a poorly fitting RC car body that cracks after your first serious jump or peels paint after just a few bashes? You’re not alone. Creating a custom RC car body shell transforms your miniature vehicle from a generic collection of parts into a head-turning replica that withstands crashes while looking factory-fresh. This guide reveals the exact process top hobbyists use to craft professional-quality shells that survive hard impacts and showcase stunning paintwork. Whether you’re building a rally legend replica or designing your own unique drift machine, mastering these techniques elevates your RC experience from casual bashing to serious craftsmanship.
The magic happens through polycarbonate—a material that balances flexibility with durability when handled correctly. Unlike regular plastic, polycarbonate requires specific preparation and painting techniques because you apply paint to the interior surface. Skip any step, and you’ll face cracked shells, peeling graphics, or wheel arches that rub against tires during hard cornering. By following this guide, you’ll avoid the frustration of redoing work and create shells that look professionally finished while handling real-world RC abuse.
Choose the Right Materials
Your shell’s success begins with selecting appropriate polycarbonate thickness for your specific RC application. Thinner 0.5mm sheets work best for lightweight touring cars where every gram counts on the track, while 0.8-1mm material provides the extra durability needed for bashers and monster trucks that regularly encounter jumps and crashes. Medium 0.7mm thickness offers the ideal compromise for beginners, providing enough flexibility for proper fitment without being so thin that it tears during handling.
Quality polycarbonate makes all the difference between a shell that yellows after six months and one that maintains crystal clarity for years. Reputable brands like Pro-Line and HPI maintain strict quality control that ensures consistent thickness and proper flexibility throughout the sheet. Dollar-store alternatives often contain impurities that cause paint to peel or create visible waves in the material. When holding two sheets side by side, quality polycarbonate feels uniformly smooth with no noticeable variations in thickness—this consistency prevents warping during painting and ensures even stress distribution when mounted.
Investing in proper cutting tools saves frustration later. While scissors work for rough cuts, a Dremel with plastic-cutting bits delivers precision for intricate wheel arches and cooling vents. Always keep multiple blade types on hand—fine-tooth blades for tight curves and straight cuts, and wider blades for removing larger sections. A cutting mat protects your work surface while providing measurement guides, and masking tape prevents accidental scratches during handling. Remember that quality tools pay for themselves in saved materials—each ruined shell represents wasted time and money that could have purchased proper equipment.
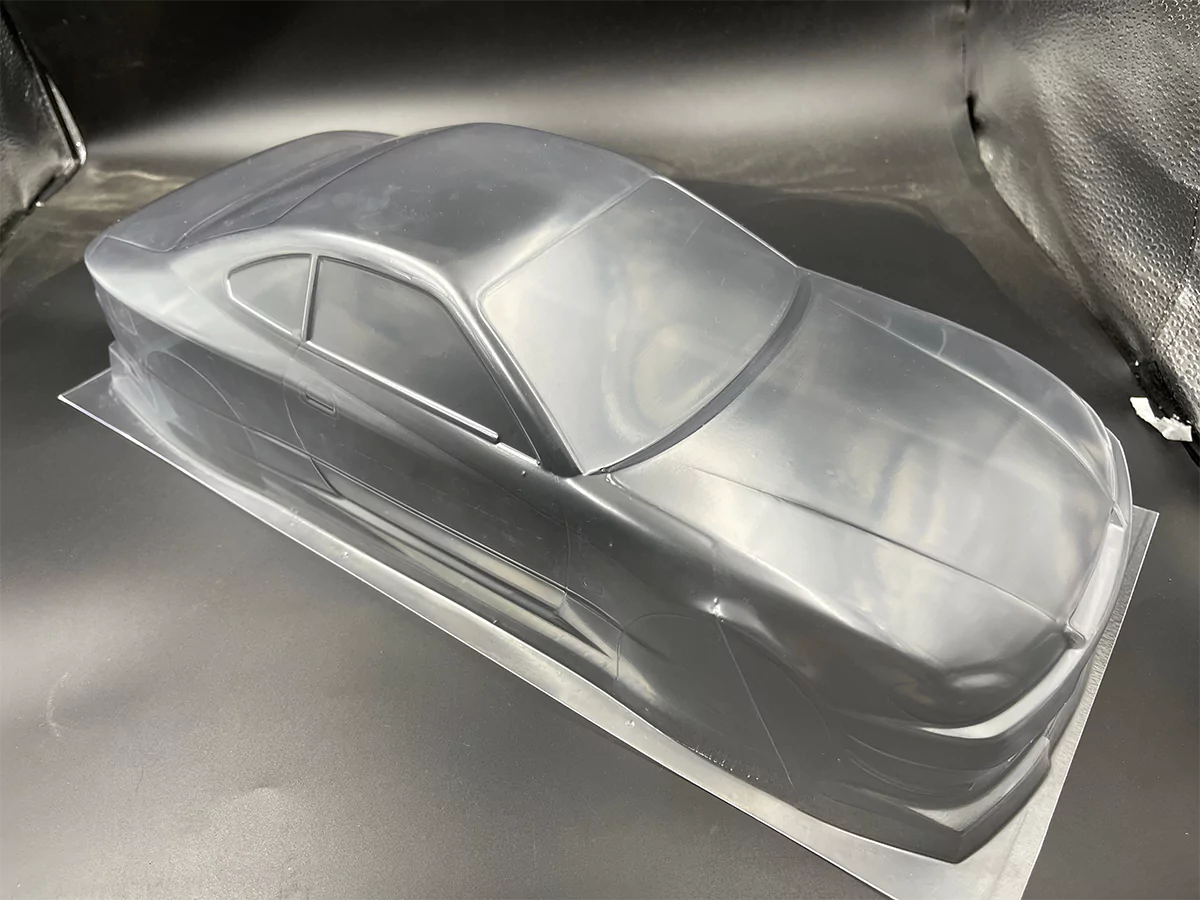
Prepare Your Body Shell
Removing protective film requires patience—peel slowly from one corner while holding the shell firmly to prevent stretching. Start with the exterior surface, then flip and repeat for the interior side. Mark the interior surface with a light pencil dot in an inconspicuous area to avoid confusion during painting. This simple step prevents the common mistake of painting the wrong side, which ruins hours of work when you realize your colors appear reversed through the clear exterior.
Thorough cleaning eliminates invisible contaminants that cause paint to peel. Fill a sink with warm water and a few drops of Dawn dish soap, then gently scrub both sides with a microfiber cloth using circular motions. Rinse under running water while holding the shell at an angle—this allows water to sheet off evenly rather than beading up, which indicates remaining oils. For stubborn residues, dip a cotton swab in isopropyl alcohol and wipe problem areas, but avoid saturating the entire shell as excessive alcohol can cause cloudiness.
Sanding creates microscopic texture that paint grips effectively. Use 600-grit wet/dry sandpaper soaked in soapy water, working in straight lines from top to bottom with light pressure. Focus on maintaining consistent coverage—missed spots show as shiny patches after painting. Check your progress by holding the shell at an angle to a light source; the entire surface should reflect light evenly without shiny spots. Wipe away residue with a tack cloth before the surface dries to prevent dust from embedding in the texture.
Cut and Trim Precisely
Marking cut lines accurately prevents costly mistakes. Place your chassis inside the shell and trace wheel positions with a fine-tip marker, accounting for full suspension travel by compressing each corner completely. For pre-cut shells, verify wheel arch size by rolling the assembled vehicle across a flat surface—tires should clear arches by at least 3mm at full compression. Use painter’s tape to create clean reference lines around windows and other features before cutting.
Wheel arch trimming demands particular attention to suspension geometry. Start by cutting slightly smaller than your marked line—you can always remove more material, but you can’t add it back. Use a rotary tool at low speed with a cutoff wheel, keeping the tool moving steadily to prevent melting. For smooth curves, wrap sandpaper around a marker or small dowel to refine the shape. Test fit frequently by mounting the shell loosely on your chassis and working the suspension through its full range.
Cutting vents and cooling ducts requires strategic planning. Position side vents just ahead of the rear tires to maximize airflow while minimizing dirt ingestion. Use a step drill bit to create clean mounting holes that won’t crack under screw pressure. When cutting large openings, start with small pilot holes at each corner, then connect them with your rotary tool. Always test fit after each major cut—your shell should sit flush against the chassis without gaps or tension points.
Paint Like a Pro

Reverse painting technique creates durable finishes that resist chipping. Apply painter’s tape to the interior surface, pressing firmly along edges with a credit card to prevent bleed-through. For complex designs, mask background elements first, then work toward foreground details. Remove tape while paint remains slightly tacky—fully dried paint often cracks when peeled, ruining crisp lines.
Polycarbonate paint requires specific application techniques. Shake the can vigorously for at least two minutes after the mixing ball starts rattling, then let it rest for thirty seconds before spraying. Hold the can 8-10 inches from the surface and use light, sweeping motions from side to side. Apply first coats so thin they’re almost transparent—this prevents runs while establishing even color. Allow 5-10 minutes between coats for proper flash drying; touching the surface should leave no fingerprint but feel slightly tacky.
Metallic and pearl finishes need special handling. Apply base color first, then mist on the metallic layer using even, overlapping passes. Too much metallic creates splotchy areas, while too little shows through as dull patches. Clear coat must be flexible enough to move with the shell—rigid automotive clears will crack during impacts. Apply two light coats minimum, allowing 15 minutes between applications for proper curing.
Apply Decals and Graphics
Water-slide decals require precise placement. Cut decals with sharp scissors, leaving a small border around the design. Soak in room-temperature water for 20-30 seconds until they slide freely on the backing paper. Position carefully on the shell, then use a soft cloth to squeegee out water from center to edges. For complex curves, apply decal softener to help the film conform to surface contours.
Vinyl graphics offer customization beyond standard decals. Design your pattern in software, then cut from high-quality cast vinyl for maximum durability. Weed away excess material using a precision knife, taking care not to cut through the transfer tape. Apply masking tape over problem areas like thin lines to prevent lifting during transfer. Burnish firmly with a squeegee before peeling away the backing paper.
Clear coat seals your graphics while adding depth. Apply two thin coats minimum, allowing 30 minutes between applications. Avoid heavy coats that create orange peel texture—multiple light applications produce superior results. Let the shell cure for 48 hours before handling to ensure full chemical bonding.
Avoid Common Mistakes
Cracking often originates at stress points like body post holes. Prevent this by reinforcing mounting points with clear tape on the interior surface before installation. Round all cut edges with fine sandpaper to eliminate stress concentrators—sharp corners act like fault lines during impacts. When mounting, hand-tighten screws just until resistance is felt; over-tightening creates immediate stress that leads to premature cracking.
Paint problems typically stem from rushed preparation. Peeling paint indicates inadequate cleaning—re-wash with isopropyl alcohol and sand lightly before repainting. Orange peel texture results from spraying too close or in cold conditions; maintain consistent distance and work in temperatures above 70°F. Runs occur when applying too much paint too quickly—remove affected areas completely and restart with lighter coats.
Poor fitment ruins even the best paint jobs. Always perform a “suspension dance” test before final mounting—compress and extend each corner while watching for tire contact points. Trim incrementally, checking fitment after each adjustment. If gaps appear at body seams, use polycarbonate-safe filler applied with a toothpick for precise control.
Creating custom RC body shells blends technical precision with artistic expression. By selecting appropriate materials, following careful preparation procedures, and mastering painting techniques, you produce shells that look professionally finished while handling real-world abuse. Start with simpler projects to build confidence, then tackle increasingly complex designs as your skills develop. With practice, you’ll create custom bodies that transform ordinary RC vehicles into personalized machines that stand out at every bash session.


