
Your RC car sits motionless despite frantic trigger pulls because the controller isn’t communicating with the vehicle. This frustrating scenario happens to every RC enthusiast who skips or messes up the binding process—the critical first step that creates a digital handshake between your transmitter and receiver. Without proper binding, your expensive RC car becomes nothing more than a detailed plastic model. Whether you’ve installed a new transmitter, replaced a faulty receiver, or unboxed a fresh vehicle, mastering how to bind controller to RC car correctly saves hours of troubleshooting and gets you back to the track faster.
Binding establishes a secure communication channel where your transmitter’s unique identification code syncs with your receiver’s memory. This exclusive pairing prevents signal interference from other RC vehicles operating nearby—a crucial feature at races or group driving sessions. Modern 2.4GHz systems automatically handle frequency selection, but the binding process locks this connection for seamless control. Different manufacturers implement binding differently, but the core principles remain consistent across Traxxas, Losi, Axial, and Spektrum systems. This guide delivers the precise steps to bind any controller to your RC car successfully, plus troubleshooting solutions when the connection fails.
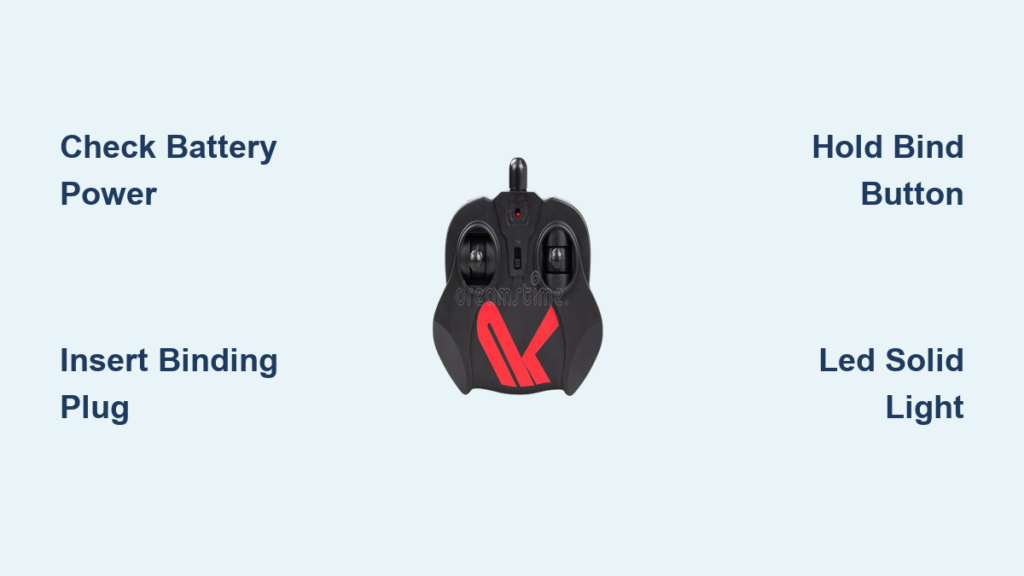
Power Up Components Before Binding
Insufficient power causes more binding failures than any other factor. Before attempting to pair your controller with your RC car, verify both systems have adequate battery charge. A transmitter running on weak AA batteries or an RC car with a partially charged LiPo pack often fails binding attempts because the process demands consistent voltage to establish the digital handshake.
Check your transmitter battery voltage with a multimeter—most require at least 7.2 volts for reliable binding. For RC car batteries, ensure they’re at full charge according to your charger’s indicator. Never attempt binding with a battery that’s below 50% capacity. While checking power levels, inspect battery contacts for corrosion or debris that could create resistance and voltage drops. Clean tarnished contacts with isopropyl alcohol and a cotton swab for optimal conductivity.
Position your RC car on a stable surface with wheels elevated or blocked to prevent accidental movement if binding succeeds unexpectedly. Move away from potential sources of radio interference like WiFi routers, Bluetooth speakers, and microwave ovens that operate in the same 2.4GHz spectrum as your RC system. An outdoor location with clear line-of-sight typically provides the cleanest radio environment for successful binding.
Execute Standard Binding Sequence

Every 2.4GHz RC system follows a similar binding pattern regardless of brand, though button combinations and indicator behaviors vary. Mastering this universal sequence works for most systems when brand-specific instructions are unavailable.
First, prepare the receiver by locating its binding port—typically a two-pin header near the antenna wire. Insert the binding plug (a small jumper connector included with your receiver) across these pins. Some systems use a dedicated BIND button instead; press and hold this while powering up. The receiver LED should begin flashing rapidly, confirming binding mode activation.
Next, power on your transmitter while holding the designated bind button—usually labeled SET, MENU, or BIND. Consult your manual for exact positioning, as some require holding the button during power-on while others need a post-power sequence. The transmitter display should indicate binding mode through flashing icons or text messages like “LINKING.”
With both components in binding mode, position them 3-6 feet apart with antennas parallel. Wait for visual confirmation—typically the receiver LED changing from rapid flashing to solid illumination, which takes 5-30 seconds. A solid light means successful pairing; if flashing continues beyond 30 seconds, restart the process.
Finally, power off the transmitter first, remove the binding plug, then power cycle both components. The receiver LED should now transition from slow flashing (searching) to solid (connected) within seconds of transmitter power-on. Test steering and throttle response before driving to verify full functionality.
Decode Receiver LED Signals

Your receiver’s LED communicates binding status through distinct flash patterns—learning these codes prevents unnecessary part replacements when connection issues arise. A rapidly flashing LED (5+ flashes per second) indicates active binding mode, meaning the receiver is ready to pair but hasn’t found its transmitter yet.
A slow, steady flash (1-2 flashes per second) signals the receiver is bound but not currently connected to its transmitter—normal behavior when powering up the vehicle before turning on your controller. This pattern should change to solid illumination within 5 seconds of transmitter activation.
If your LED displays a solid light immediately after binding, congratulations—your transmitter and receiver have established a stable connection. Test all channels thoroughly before driving, as some binding failures only manifest under specific control inputs.
Watch for diagnostic flash patterns that indicate problems: double flashes often mean low voltage, alternating colors may signal interference, and completely dark LEDs suggest power delivery issues. Consult your manual for brand-specific error codes, but most common problems resolve with battery checks and interference reduction.
Fix Common Binding Failures
When binding fails repeatedly, systematic troubleshooting isolates the problem without unnecessary part replacements. Start with the most frequent culprit: battery issues. Even if batteries appear charged, weak cells can deliver insufficient current during the binding handshake. Install fresh alkaline batteries in your transmitter or use a fully charged spare LiPo pack for your RC car.
Timing errors between transmitter and receiver activation cause many failed binding attempts. The receiver typically enters binding mode immediately when powered with the binding plug installed, while the transmitter may require holding its bind button for 2-3 seconds after power-on. Synchronize your actions precisely—have a helper count seconds while you activate both components.
Radio interference remains a persistent binding obstacle, especially indoors. If binding works outdoors but fails inside your garage, nearby WiFi networks or wireless devices are likely culprits. Temporarily disable competing 2.4GHz devices during binding attempts, or move to an open outdoor area away from buildings.
Check antenna positioning during binding—holding the transmitter antenna horizontally while the receiver antenna hangs vertically creates polarization mismatch that weakens signal strength. Orient both antennas vertically during the pairing process for optimal signal transfer.
Master Traxxas TQi Binding Method
Traxxas vehicles use a distinctive binding process that eliminates physical binding plugs through their TQi transmitter system. To bind a Traxxas controller to your RC car, power on the transmitter while holding both MENU and SET buttons simultaneously. Continue pressing until the display shows “LR” in the model position, indicating Link Receiver mode.
With the transmitter in binding mode, connect your RC car battery. The receiver LED will flash rapidly as it searches for a transmitter. Within 10 seconds, the transmitter display should show your model number and the receiver LED turns solid—confirmation of successful pairing. Power cycle both components to verify the connection persists.
Traxxas owners appreciate that TQi transmitters support multiple vehicles. After binding your first car, select an empty model slot and repeat the process to pair additional vehicles. The transmitter automatically connects to whichever model you’ve selected through the model menu.
Configure Spektrum Receiver Pairing
Spektrum systems use a dedicated bind button on their receivers rather than physical plugs. Locate the small BIND button on your SR310 or SR315 receiver—typically a red or black button near the antenna wire. Press and hold this button while connecting power to the receiver. Continue holding until the LED flashes rapidly, indicating binding mode.
With the receiver activated, power on your Spektrum transmitter while holding its bind button (usually on the back panel). Both LEDs should flash in sync during pairing. Wait 10-15 seconds for the receiver LED to turn solid, confirming successful binding.
For more reliable pairing, access the bind function through your transmitter’s menu system. Navigate to SYSTEM SETUP > BIND, select your model slot, and confirm. The transmitter enters binding mode automatically without requiring button holds during power-on—a preferred method for many Spektrum users.
Maximize Operating Range After Binding
Binding success doesn’t guarantee maximum range—proper antenna management extends your effective control distance significantly. Keep your transmitter antenna fully extended and vertical during operation, as tilting it 30 degrees forward improves signal strength when driving away from yourself.
Inside your RC car, route the receiver antenna away from electrical noise sources like motor wires and ESC power cables. Ensure at least 2-3 inches of antenna wire remains straight and unobstructed—coiling or bunching the wire reduces reception range by up to 50%. Many vehicles include antenna tubes that elevate the wire above the chassis for cleaner signal reception.
Environmental factors dramatically impact range performance. Open fields with clear line-of-sight provide optimal conditions, while dense vegetation, metal structures, and hilly terrain create signal obstacles. If experiencing range limitations, experiment with different driving positions to find locations with fewer radio obstructions.
Maintain Binding Stability Long-Term
Preserve your controller-to-RC car connection through simple preventive measures that avoid unexpected signal dropouts. Before each driving session, verify binding integrity by checking that the receiver LED transitions from slow flash to solid within 5 seconds of transmitter power-on. Delays indicate developing connection issues that will worsen over time.
Secure all electronic connections against vibration damage—rough terrain can gradually loosen receiver plugs. Periodically check that your receiver sits firmly in its case and all connectors are fully seated. Replace any frayed antenna wires immediately, as even small breaks cause intermittent signal loss.
Update transmitter and receiver firmware when manufacturers release improvements—many updates enhance binding reliability and interference resistance. Use official programming software to install updates following manufacturer instructions precisely.
Successfully binding your controller to an RC car creates the essential foundation for responsive, reliable control. By following proper preparation steps, executing the binding sequence accurately, and understanding diagnostic indicators, you’ll establish rock-solid connections every time. When problems occur, systematic troubleshooting isolates issues quickly without unnecessary part replacements. Brand-specific variations like Traxxas’s button-hold method and Spektrum’s dedicated bind button require only minor adjustments to the universal process. With your transmitter and receiver permanently paired, you’re ready to enjoy precise control and maximum performance from your RC vehicle.


