
Nothing slows down your RC maintenance workflow like constantly bending over your vehicle on the floor or balancing it precariously on makeshift supports. A dedicated RC car stand transforms your workspace by elevating your vehicle to eye level, keeping it secure during repairs, and preventing costly drops that damage delicate components. Whether you’re a weekend hobbyist or competitive racer, a custom-built stand pays for itself in saved time and frustration during your next gear change or suspension adjustment. This guide reveals exactly how to construct professional-quality stands using materials from your local hardware store, with designs ranging from $20 quick builds to tournament-ready workstations that outperform commercial options costing three times as much.
Most RC enthusiasts waste hours searching for the “perfect” commercial stand only to discover it doesn’t fit their specific vehicle, workspace, or workflow. Building your own eliminates this problem entirely—you control the height, width, mounting system, and accessories to match your exact needs. The best part? You can complete a basic stand in under two hours with common tools, giving you immediate access to comfortable working positions that protect both your car and your back during extended maintenance sessions.
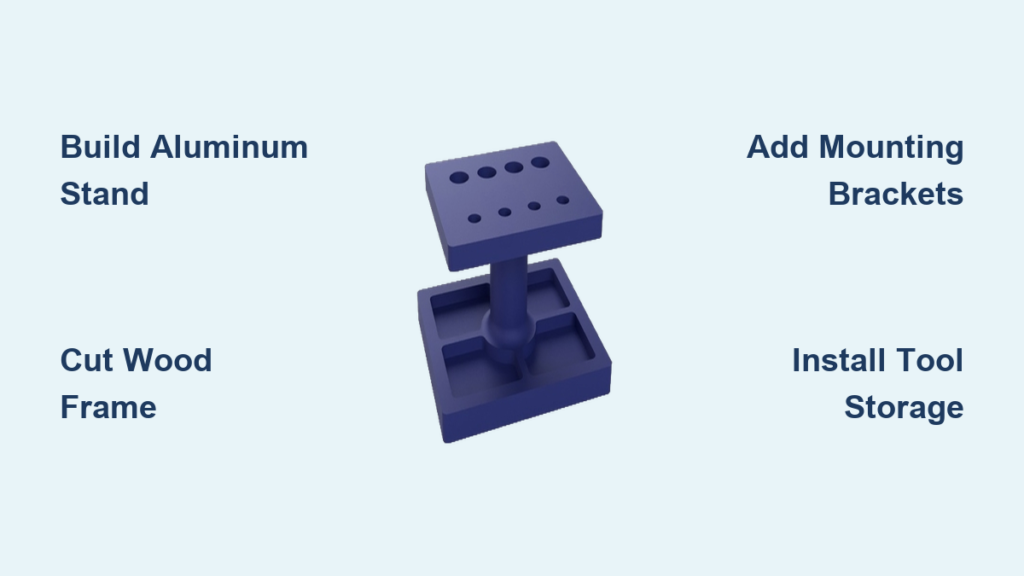
Select the Right Stand Design for Your Needs
Choosing the appropriate stand design determines how effectively your build serves your specific RC activities. Most hobbyists benefit from one of three specialized configurations, each addressing different maintenance challenges.
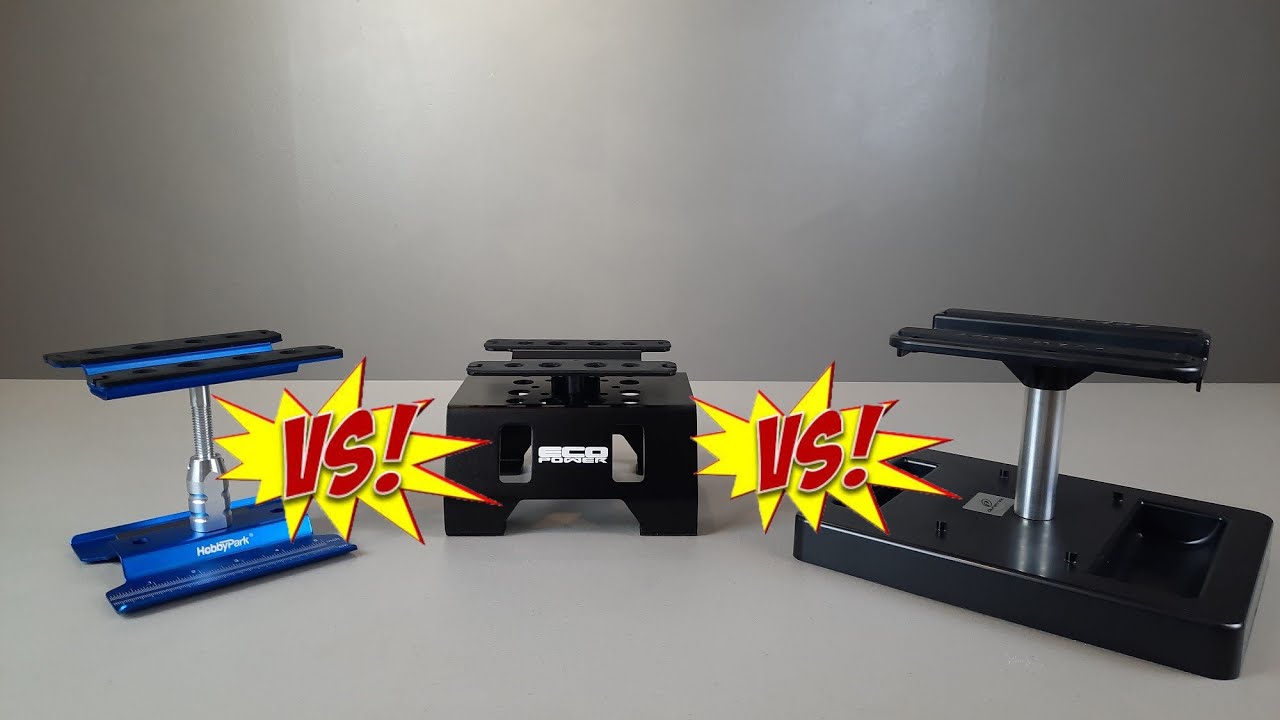
Pit stands provide professional race-day functionality for serious maintenance work. These elevated platforms (typically 24-36 inches tall) feature secure mounting systems that hold your vehicle perfectly still while you access the underside, transmission, and suspension components. Unlike commercial alternatives with fixed wheelbase settings, DIY pit stands let you position mounting points exactly where needed for your specific vehicle. Competitive racers particularly appreciate how pit stands eliminate awkward bending during critical pre-race adjustments—saving energy for actual competition rather than struggling with poor ergonomics.
Display stands showcase your collection with style while providing basic protection. These builds focus on aesthetics through polished materials, integrated lighting, and sometimes rotating bases that transform your prized vehicles into conversation pieces. While less functional for active repairs, display stands prevent accidental bumps and dust accumulation when your vehicles aren’t in use. Many collectors build hybrid designs that incorporate quick-release mounting systems, allowing the same stand to transition from showpiece to work platform in seconds.
Workbench-integrated stands maximize limited space for apartment dwellers or those with crowded hobby rooms. These compact designs clamp directly to your work surface or mount underneath the bench, providing stable vehicle positioning without consuming valuable floor area. The fixed height works well for electronics repairs and body painting where precise hand movements matter more than full underside access. When space is tight, a well-designed workbench stand keeps your vehicle secure while leaving room for soldering stations, paint booths, and other essential hobby equipment.
Gather Essential Materials and Tools
Your material selection dramatically impacts both construction complexity and final stand performance. Each option delivers unique advantages depending on your budget, tools, and intended use.
Aluminum extrusion creates professional, modular stands that rival commercial products. The T-slot profile allows infinite adjustment points without permanent modifications—simply slide mounting hardware to new positions as your vehicle collection grows. Standard 2020 aluminum extrusion (20x20mm profile) costs $3-5 per foot and requires only basic tools for assembly. Budget approximately $40 for a complete pit stand using 2020 extrusion, including T-nuts, bolts, and end caps. Aluminum’s corrosion resistance makes it ideal for humid environments or outdoor use, though the higher initial cost pays off through decades of service.
Plywood and dimensional lumber offer budget-friendly alternatives that most hobbyists can build with existing tools. A sturdy wood stand costs under $25 using standard 2×4 lumber for the frame and 3/4-inch plywood for the platform. The heavier weight provides excellent stability, though wood lacks aluminum’s precision adjustment capabilities. When building with wood, prioritize straight, knot-free lumber to prevent warping—check each piece at the hardware store by sighting down its length before purchase. Pre-cut plywood panels save time but add $5-10 to material costs.
PVC pipe delivers the quickest, cheapest solution for temporary or display stands. Standard 1-inch schedule 40 PVC pipes connect with simple elbow and T-fittings to create surprisingly stable platforms in under an hour. While PVC lacks the rigidity for heavy maintenance work, it’s perfect for showcasing vehicles or providing basic support during simple battery swaps. A complete PVC stand costs under $15 and requires only a hacksaw and PVC cement for assembly—ideal for beginners testing stand concepts before committing to permanent builds.
Your tool requirements depend on chosen materials but generally include a tape measure, level, drill with assorted bits, saw appropriate for your material, and basic hand tools. Aluminum builds benefit from a hex key set for bolt tightening, while wood projects require a clamping system to hold pieces during assembly. Most RC enthusiasts already own these basic tools from vehicle maintenance work.
Build a Professional Aluminum Pit Stand
The aluminum pit stand represents the gold standard for serious RC maintenance, offering precise adjustability and rock-solid stability. This design creates a 30-inch working height stand compatible with most 1:8 and 1:10 scale vehicles.
Begin by cutting your aluminum extrusion to size: four 30-inch vertical legs, two 24-inch top crossbars, and two 28-inch base rails. Many hardware stores with metal cutting services will perform this for free or minimal cost if you lack appropriate tools—take advantage of this to ensure clean, square cuts. Smooth any rough edges with fine-grit sandpaper to prevent cuts during assembly and ensure smooth hardware movement in the T-slots.
Assemble the top frame first by connecting your two crossbars with corner brackets. Insert T-nuts into the slots before joining pieces, then drive bolts through matching holes to create a rigid rectangle. The frame should measure approximately 24×28 inches externally—large enough for any standard RC vehicle but compact enough for benchtop storage. Keep bolts slightly loose at this stage to allow final alignment adjustments.
Attach vertical legs to the bottom of the top frame at each corner, ensuring all T-slots face inward toward the center. This orientation prevents dirt accumulation in the tracks and keeps mounting hardware accessible during vehicle changes. Stand the assembly upright and verify all legs are perfectly vertical using a bubble level before fully tightening connections.
Construct the base frame using your remaining two extrusion pieces, positioning it approximately 4 inches above ground level. Connect base rails to legs with identical T-nut hardware, then add diagonal bracing using shorter extrusion pieces for maximum rigidity. The cross-braces eliminate wobble that would otherwise compromise precision during delicate maintenance tasks.
Create mounting points using adjustable aluminum brackets or custom-cut acrylic blocks that accept your vehicle’s wheel hex pattern. Position these sliding components along the top frame rails to match your specific vehicle’s wheelbase, then secure them with T-nuts. Test your mounting system with an actual vehicle before final assembly—properly positioned mounts hold your car securely without stressing suspension components.
Construct a Budget Wood Stand in Under Two Hours

Wood stands deliver excellent functionality at minimal cost using materials available at any hardware store. This design creates a stable 28-inch working height platform with integrated storage—perfect for beginners or those with limited workshop space.
Cut four 28-inch legs from 2×4 lumber and two 24-inch top rails from the same material. For the platform surface, use 1×4 pine boards cut to 30 inches to create a slight overhang that protects vehicle bodies from accidental impacts. Assemble the top frame first by securing platform boards to the 24-inch rails with 2-inch wood screws, pre-drilling holes to prevent splitting near board edges.
Attach legs to the top frame corners using 3-inch deck screws driven through the platform into leg tops. Reinforce each joint with metal corner brackets for added stability—this prevents wobble during use and extends the stand’s lifespan. Check that all legs sit perfectly vertical using a carpenter’s square before proceeding to the next step.
Create wheel mounts using 2-inch PVC pipe sections with 1/2-inch center holes for axle pins. Secure these to the platform corners with small L-brackets, positioning them to match your vehicle’s wheelbase. The PVC provides smooth rotation that won’t damage wheel hexes while allowing height adjustment by adding or removing pipe segments.
Add a lower storage shelf using 1/2-inch plywood cut to 22×26 inches, attaching it 6 inches above ground level with shelf brackets. This creates valuable space for tool storage while adding structural rigidity to the entire stand. Finish all surfaces with sandpaper followed by your choice of stain or paint, then seal with polyurethane for durability against spills and grease.
Optimize Your Stand with Essential Accessories

Transform a basic stand into a complete workstation with these practical upgrades that pay dividends during every maintenance session.
Integrated charging stations eliminate cable clutter by mounting your power supply directly beneath the platform. Install a weatherproof power strip with USB ports in the stand’s lower section, running charging leads through small access holes in the platform surface. Dedicated battery trays sized for your common pack configurations keep everything organized and prevent accidental short circuits.
Tool storage solutions keep essential implements within arm’s reach during work sessions. Mount magnetic strips to the stand’s underside for metal tools, and attach small bins to legs for screws, washers, and small parts. PVC pipe sections cut to size create perfect holders for hex drivers and screwdrivers—simply glue them in place with epoxy for permanent installation.
Task lighting improvements make detailed work significantly easier. Battery-powered LED strips mounted underneath the platform provide shadow-free illumination of the vehicle underside without tangled cords. For electronics work, add an adjustable gooseneck lamp that positions light exactly where needed for threading tiny screws or inspecting solder joints.
Height adjustment mechanisms add versatility to single-vehicle stands. Building with extendable legs or adjustable mounting points lets multiple users share the same stand comfortably. Aluminum stands benefit from sliding T-nuts that allow infinite height adjustment, while wood versions can incorporate threaded inserts for discrete height options at 2-inch intervals.
Maintain Your Stand for Long-Term Reliability
Your RC car stand requires minimal upkeep but benefits from regular attention that prevents small issues from becoming major problems.
Keep mounting surfaces clean between uses with a slightly damp cloth to remove grease, dirt, and debris that accumulates during maintenance. For aluminum stands, occasional lubrication of T-nuts with silicone-based spray prevents galling and ensures smooth adjustment—apply sparingly and wipe away excess to avoid attracting dust.
Inspect mounting hardware monthly, especially if you frequently change vehicles. Vibration and regular use can loosen bolts over time, creating wobble that affects precision work. Keep spare hardware on hand to replace any stripped or damaged fasteners immediately—nothing disrupts your workflow like searching for the right replacement bolt mid-repair.
Store your stand in a dry location when not in use. While aluminum and treated wood tolerate humidity reasonably well, prolonged exposure accelerates corrosion and warping. If storing in non-climate-controlled spaces, consider a simple cover that protects against direct moisture exposure while allowing air circulation.
Building your own RC car stand delivers immediate workflow improvements that make every maintenance session more productive and enjoyable. Start with a basic design matching your current needs, then expand as your hobby evolves—your future self will appreciate the time and money saved compared to commercial alternatives. The perfect stand is the one you build yourself, precisely tailored to your unique vehicles, workspace, and maintenance habits.


