
When your RC car’s steering feels sluggish or unresponsive during high-speed maneuvers, replacing the servo often provides the most dramatic performance improvement you can make. A properly installed servo transforms your vehicle’s handling from vague and inconsistent to razor-sharp and predictable, giving you the precision needed for competitive racing or technical crawling. Whether you’re upgrading from a basic analog unit to a high-torque digital model, replacing a damaged servo after an accident, or simply performing routine maintenance, mastering this essential skill puts you in control of your vehicle’s most critical handling component.
The servo serves as the mechanical translator between your transmitter inputs and your RC car’s physical movement, converting electrical signals into precise rotational force that steers your front wheels. Without a properly functioning servo, even the most advanced radio system becomes useless—you might as well be pushing your car around the track with your hands. This detailed installation guide walks you through every critical step, from selecting compatible components to final calibration, ensuring your new servo delivers maximum performance without damaging your valuable RC investment. Let’s get your RC car steering like new again.
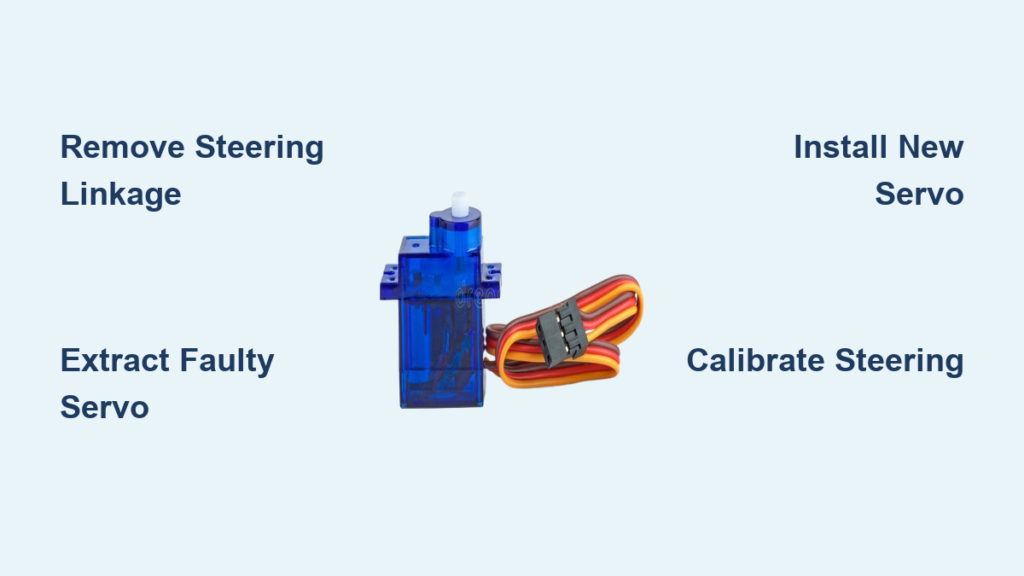
Remove Existing Steering Components Safely
Begin your servo replacement by carefully disconnecting the steering linkage without damaging the delicate plastic components. Locate the small clip securing the steering arm to the servo horn—most RC vehicles use either a push-pin clip or a small screw that holds the linkage in place. Use needle-nose pliers to gently remove push-pin clips, taking care not to bend or lose the tiny metal clip in your workspace. If your vehicle uses screw-secured linkages, note the exact position of the linkage on the servo horn before removal, as this precise positioning affects your steering geometry and centering.
With the steering linkage disconnected, document the exact orientation of your current servo horn on the output shaft. Many servos feature multiple mounting positions on the horn, and installing your new servo with the horn in a different position creates immediate steering issues. Take a clear photograph showing the horn’s alignment relative to the vehicle’s chassis, noting which spline tooth the flat portion of the shaft aligns with. This visual reference proves invaluable when installing your replacement servo, saving you time during calibration and preventing unnecessary wear on your new components.
Extract the Faulty Servo Without Damaging Wiring

Now that the steering linkage is clear, focus on removing the servo mounting hardware while protecting the wiring harness. Most RC cars secure the servo using two to four small Phillips-head screws that attach to a servo tray or directly to the chassis. Before removing these screws, examine how the servo wires route through your vehicle—many models use zip ties, wire clips, or dedicated channels to keep wiring secure and away from moving parts. Carefully cut any zip ties securing the servo wires using wire cutters, preserving as much wire length as possible for your new installation.
As you remove the final mounting screw, support the servo with one hand while gently guiding the wires through their routing path. Never pull directly on the wires to extract the servo, as this can damage the delicate internal connections at the servo or receiver end. If your vehicle uses a servo saver assembly (a spring-loaded coupler between the servo and steering linkage), remove this component along with the servo and set it aside for potential reuse. Inspect the mounting tray for any stripped screw holes or cracks that might compromise the stability of your new servo installation before proceeding.
Position and Secure Your Replacement Servo
Before installing your new servo, verify compatibility with your specific RC model by checking three critical factors: mounting pattern, spline count, and physical dimensions. Most standard servos use a 32mm x 19mm mounting footprint with screw holes 23mm apart, but specialty vehicles may require different configurations. The output shaft spline must match your existing servo horn—common configurations include 24-tooth (24T) and 25-tooth (25T) splines, with the tooth count typically stamped on the servo case. Measure your new servo against the old unit to confirm it fits within your vehicle’s available space without interfering with other components.
Apply a small drop of medium-strength thread locker to each mounting screw before installation, especially if you race on rough terrain where vibration can loosen fasteners over time. Position the new servo in the mounting location with the output shaft facing the correct direction—most vehicles require the shaft to face toward the front of the vehicle, but some crawler chassis mount servos backward. Insert the mounting screws finger-tight first, then gradually tighten them in a crisscross pattern to distribute pressure evenly across the servo case. Stop tightening when you feel firm resistance—over-tightening can crack plastic servo trays or damage the servo housing.
Reconnect Wiring and Steering Components Properly
Route the new servo’s wires through the same path as the original installation, maintaining adequate slack for full suspension travel while preventing contact with hot components or moving parts. Most modern RC vehicles feature designated wire channels that protect servo leads from damage, but if your model lacks these features, use small zip ties to secure excess wire length without creating tension points. Ensure the servo connector reaches the receiver without strain, but avoid excessive slack that could tangle with drive shafts or suspension components during operation.
Connect the servo to your receiver’s steering channel (typically channel 1), matching the wire orientation so the signal wire (usually white or yellow) aligns with the receiver’s signal pin. Most connectors feature a keyed design that prevents incorrect insertion, but double-check that the connector seats fully by pressing straight down until you feel the locking tab engage. Reinstall your servo horn onto the output shaft in the exact position documented earlier, ensuring the flat portion of the shaft aligns with the horn’s set screw. Tighten the horn screw firmly against the flat portion of the shaft to prevent slippage during operation.
Calibrate Steering Response and Travel Limits
Power up your transmitter and receiver to begin the critical calibration process that ensures optimal steering performance. First verify basic functionality by moving the steering wheel through its full range—your front wheels should respond smoothly without hesitation or jitter. If the steering direction is reversed (turning right makes wheels go left), access your transmitter’s channel reversal menu and toggle the steering channel until directionality matches your inputs.
Adjust your steering endpoints using the End Point Adjustment (EPA) or Travel Volume (TV) settings on your transmitter to prevent servo strain at full lock positions. Gradually reduce the travel limits until the servo operates smoothly at full left and right positions without buzzing or grinding noises. Next, fine-tune your center point using the sub-trim function so that neutral transmitter position produces perfectly straight-ahead wheel alignment. Proper centering prevents uneven tire wear and ensures balanced handling during acceleration and braking.
Conduct Final Verification and Performance Testing
Before declaring your installation complete, perform a thorough mechanical verification by manually rotating your front wheels through their full steering arc. Check for binding, resistance, or interference at all points in the steering travel, as these issues indicate incorrect linkage geometry or component interference. Verify that your servo saver (if equipped) operates smoothly under pressure, providing the right amount of give to protect your servo during impacts without introducing excessive slop in normal driving conditions.
Conduct a brief test session on a controlled surface to evaluate real-world performance. Start with slow, deliberate turns to confirm smooth operation before progressing to higher speeds. Pay attention to any unusual noises from the servo compartment, which could indicate wiring interference or inadequate mounting. After your initial test run, recheck all mounting screws and linkage connections, as vibration during operation can sometimes loosen fasteners that seemed secure during installation.
Routine Servo Maintenance for Long-Term Reliability
Extend your new servo’s lifespan with simple maintenance practices that prevent common failure points. After each driving session, blow compressed air through the servo’s ventilation slots to remove accumulated dust and debris that can cause internal damage over time. Periodically check mounting screw tightness, as vibration during operation can gradually loosen these fasteners, leading to steering slop and inconsistent handling. Inspect servo wires for signs of fraying, kinking, or heat damage near the motor or exhaust components, replacing damaged wiring immediately to prevent electrical failures.
Consider upgrading to silicone servo leads if your vehicle experiences extreme temperatures or heavy vibration, as these flexible connectors withstand stress better than standard wire harnesses. For competitive racers, establish a regular replacement schedule for high-stress servos—many serious competitors replace steering servos after 10-15 tank runs regardless of apparent condition to avoid mid-race failures. Store your RC car with the servo in a neutral position to prevent internal spring tension from causing premature wear during extended storage periods.
Installing a servo in your RC car properly transforms your vehicle’s handling characteristics, giving you the precise steering control needed for competitive performance or technical trail navigation. By following these detailed steps and taking time to verify each stage of the installation, you ensure your investment in a new servo delivers maximum performance and reliability for countless driving sessions. Whether you’re a casual hobbyist maintaining your first RC vehicle or a competitive racer fine-tuning your race setup, mastering servo installation puts you in complete control of your vehicle’s most critical handling component.


