
You’ve just purchased a gyro stabilizer for your RC car but feel overwhelmed by the installation process. Many RC enthusiasts face this exact challenge—gyros improve handling and stability, especially for drift cars or high-speed models, but improper installation can cause erratic behavior or even damage your electronics. Without proper guidance, you might spend hours troubleshooting issues that could have been avoided with correct setup. This guide provides clear, actionable steps to successfully install a gyro on your RC car, helping you achieve smoother control and enhanced performance without frustration.
Essential Tools for RC Car Gyro Installation
Before starting your gyro installation, gather these specific tools to ensure a smooth process. You’ll need a precision screwdriver set (PH00 and PH0 sizes), wire strippers that handle 28-24 gauge wires, electrical tape or heat shrink tubing, zip ties for cable management, and isopropyl alcohol with a lint-free cloth for cleaning connection points. Having a multimeter on hand proves invaluable for verifying power connections before powering up your system. Most importantly, ensure your RC car’s battery is fully charged but disconnected during installation to prevent accidental activation or electrical shorts that could damage sensitive components.
Selecting Compatible Gyro for Your RC Model
Not all gyros work with every RC vehicle, so verification prevents wasted effort. Check your transmitter’s compatibility—most modern 2.4GHz systems support gyro integration through specific channels, typically channel 5 or 6. Mechanical gyros work with brushed systems, while electronic gyros require brushless compatibility. Measure your receiver compartment space; micro-sized gyros (approximately 25x15mm) fit most 1/10 scale models, but larger 1/8 scale vehicles might accommodate standard gyro sizes. Consult your vehicle manual for designated mounting locations, as some chassis include pre-drilled holes specifically for gyro installation near the center of gravity.
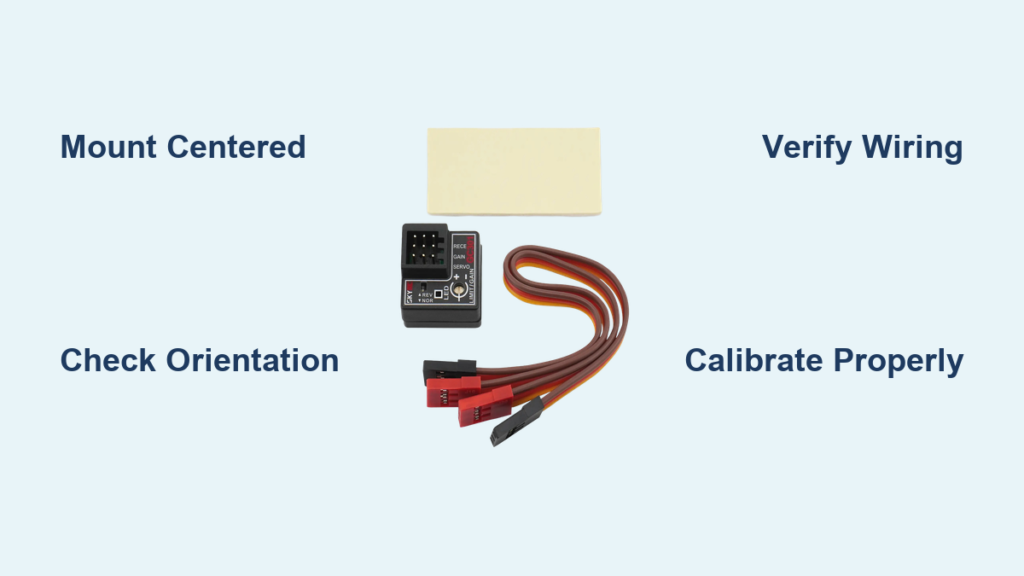
Mounting Gyro in Optimal Position

Gyro Placement Affects Performance Significantly
Position your gyro parallel to the ground and centered between the front and rear axles for accurate sensing. The ideal mounting location sits directly above or slightly behind the rear axle on 4WD vehicles, while rear-wheel-drive drift cars benefit from placement closer to the differential. Use double-sided foam tape (10mm thick) rather than rigid mounting to absorb vibrations that could interfere with gyro operation. Ensure the gyro’s orientation arrow points toward the front of the vehicle—reversing this direction causes counterproductive stabilization that worsens handling instead of improving it.
Securing Gyro Without Damaging Components
Apply mounting tape with firm pressure for 30 seconds to ensure proper adhesion before connecting wires. Avoid placing the gyro near heat sources like speed controllers or motors, as temperature fluctuations affect sensor accuracy. For metal chassis, insert an insulating layer between the gyro and chassis to prevent electrical interference—thin plastic sheets from packaging work perfectly for this purpose. Test the mount’s stability by gently shaking the chassis; the gyro should remain completely stationary without any movement or shifting during operation.
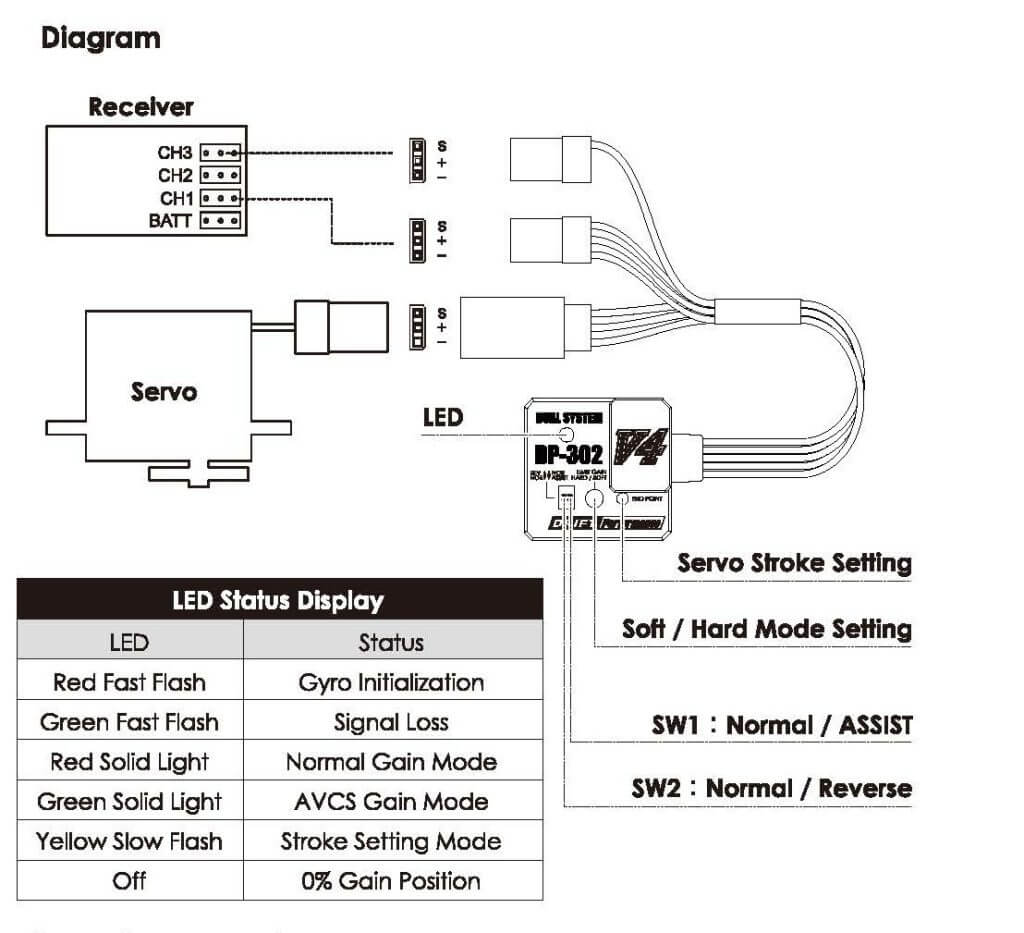
Connecting Gyro to RC System Components

Wiring Sequence Prevents Electrical Issues
Connect components in this specific order to avoid system conflicts: first link the gyro’s signal wire to your receiver’s designated gyro channel (check manual for exact channel), then connect the power wire to a switched battery connection that activates with your transmitter. The rudder (steering) wire must connect between your steering servo and receiver—never connect it directly to the battery. Most gyros use standard JR-style connectors, but verify color coding matches your system: white or orange typically indicates signal, red for power, and black or brown for ground. Never force connectors; if they don’t fit easily, you likely have incompatible systems requiring an adapter.
Critical Connection Points to Double-Check
Before powering up, verify these three connection points: ensure no exposed wires touch other components, confirm the gyro and receiver share the same ground connection, and check that the signal wire hasn’t been crossed with power wires. Gently tug each connection to confirm secure attachment—loose connections cause intermittent operation that’s difficult to diagnose later. Position wires away from motor leads and speed controller outputs to prevent electromagnetic interference that creates twitchy steering behavior. Use zip ties to secure wires along existing harness routes, maintaining slack at connection points to prevent strain during suspension movement.
Calibrating Your RC Car Gyro Correctly
Initial Power-Up Sequence Matters
Power on your transmitter first, then connect the car battery—reversing this sequence often causes calibration failures. Allow 10-15 seconds for the gyro to initialize with the car completely stationary on a level surface. Most gyros indicate readiness with a solid LED rather than blinking. During this initialization phase, even slight movement requires restarting the process, so place your car on a non-slip mat in an area free from foot traffic or air currents that might cause vibration.
Adjusting Sensitivity for Your Driving Style
Start with the sensitivity dial set to 50% (usually the midpoint position) for balanced assistance. Test drive on a smooth surface, gradually increasing sensitivity until you notice improved stability without overcorrection. Drift enthusiasts typically prefer 60-70% sensitivity for aggressive angle correction, while racers often use 30-40% for subtle stabilization. Make adjustments in 5% increments, allowing time to evaluate handling changes between adjustments. Remember that higher sensitivity settings drain battery power faster and may cause servo whine if pushed beyond your system’s capabilities.
Troubleshooting Common Gyro Installation Problems
Diagnosing Erratic Steering Behavior
If your car steers erratically after gyro installation, check these three areas first: verify the gyro orientation arrow points forward, confirm no loose connections in the signal path, and ensure the gyro hasn’t been mounted near strong electromagnetic sources. Test by temporarily disconnecting the gyro—if steering returns to normal, the issue lies within the gyro system rather than your servo or receiver. Many problems stem from incorrect channel assignment, so double-check your transmitter’s channel configuration matches the gyro’s requirements.
Fixing Gyro That Won’t Initialize Properly
When your gyro fails to initialize (indicated by continuous blinking lights), perform these checks: confirm power supply delivers 4.8-6.0V (insufficient voltage causes initialization failure), ensure the car remains completely motionless during startup, and verify compatibility with your receiver type. Some digital servos create electrical noise that interferes with initialization—try connecting through a noise filter if available. If problems persist, temporarily power the gyro from a separate receiver pack to isolate whether the issue originates from your main power system.
Maintaining Your RC Gyro System
Routine Checks Prevent Performance Degradation
After every 5-6 driving sessions, inspect connections for corrosion or loosening, especially in outdoor environments where moisture affects electronics. Clean the gyro housing with compressed air to remove dust buildup that insulates heat and affects sensor accuracy. Verify mounting security monthly, as repeated impacts can gradually weaken adhesive bonds. Check for firmware updates from the manufacturer every racing season—many modern gyros receive performance improvements through simple USB updates that enhance responsiveness.
Recognizing When to Replace Your Gyro
Even well-maintained gyros eventually wear out. Watch for these failure signs: inconsistent stabilization that worsens over time, delayed response to steering inputs, or unusual humming from the unit. If recalibration no longer restores proper function after cleaning and connection checks, replacement becomes necessary. Most quality gyros last 1-2 years with regular use, but competitive racers often upgrade annually to benefit from technological improvements in sensor accuracy and processing speed.
Final Note: Proper gyro installation transforms your RC car’s handling characteristics, but precision matters more than speed during setup. By following these specific installation steps and calibration techniques, you’ll maximize your gyro’s performance while avoiding common pitfalls that frustrate beginners. Remember that small adjustments make significant differences in gyro behavior—take time to fine-tune settings rather than making drastic changes. For ongoing performance, establish a simple maintenance routine that keeps your gyro system operating at peak efficiency session after session. When installed correctly, your gyro will provide noticeably smoother control, especially during high-speed maneuvers or technical drift sequences, giving you the competitive edge you’re seeking.


