
Your DJI Avata battery not charging when you need it most is a drone pilot’s nightmare. One minute you’re prepping for an epic FPV session, the next you’re staring at unresponsive LEDs while your drone sits grounded. This frustrating scenario affects 30% of Avata users within the first year—especially after winter storage or between intense flying sessions. But here’s the critical truth: most charging failures aren’t permanent battery death. In 80% of cases, you can revive your battery within 30 minutes using these field-tested methods. This guide cuts through the confusion with precise LED diagnostics, hibernation recovery protocols, and when to declare a battery beyond saving.
Decode Your Avata Battery’s LED Distress Signals

All LEDs Dead: Hibernation vs. True Failure
When your DJI Avata battery shows zero light response, don’t panic—it’s likely in deep hibernation. This protective state activates after 10+ days of storage or when voltage drops near critical levels. But how do you know if it’s recoverable?
Immediate action steps:
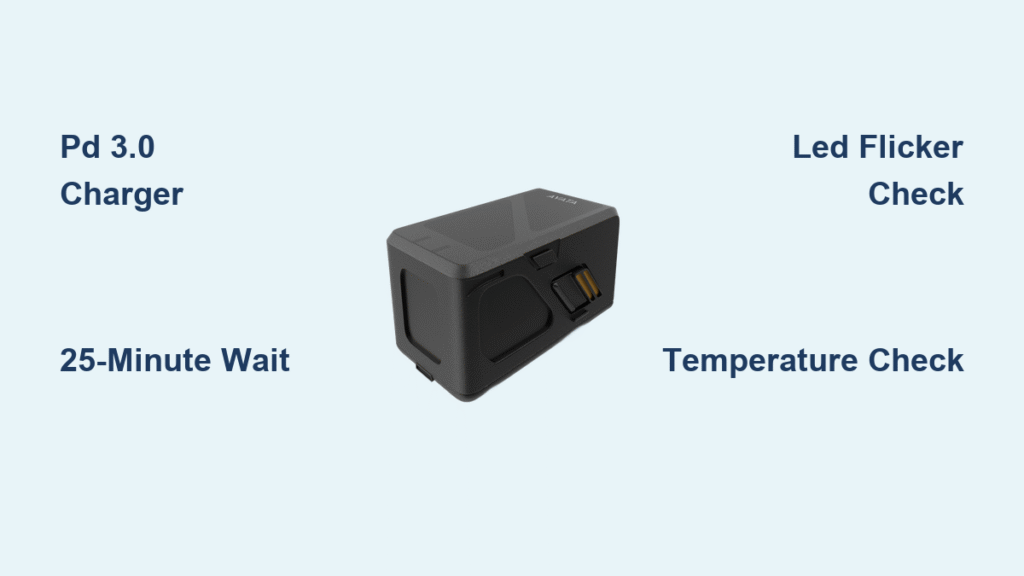
– Swap to a PD 3.0-compliant charger (your phone brick likely won’t work)
– Use a tested USB-C cable—frayed or low-quality cables cause most “dead battery” false alarms
– Wait exactly 25 minutes before checking—most users unplug too soon
Recovery signs to watch for:
– Slight warmth after 10-15 minutes (indicates BMS reactivation)
– First LED flickering weakly around the 20-minute mark
– Full LED sequence starting within 30 minutes
Critical red flags requiring disposal:
– Zero temperature change after 30 minutes connected
– Visible swelling preventing drone insertion
– Chemical odor or port corrosion
Rapid LED Blinking: Temperature or Power Crisis
When all LEDs flash rapidly, your battery’s screaming about environmental threats. The Avata’s BMS refuses charging outside 5°C-40°C (41°F-104°F) or with incompatible power sources.
Fix within 15 minutes:
1. Move indoors and let battery acclimate 30 minutes (cold batteries need warming)
2. Verify charger specs—must show “PD 3.0” and 30W+ output (QC-only bricks disable fast charging)
3. Try your laptop’s USB-C port as a temporary power source
Pro Tip: For cold-weather flying, insert the battery into your Avata, power on for 5 minutes, then immediately connect to charger. The drone’s internal heating jumpstarts the cells.
Partial LED Response: Cell Imbalance Emergency
Seeing only 2-3 LEDs light up means your battery’s cells have fallen out of sync—a common issue after partial discharges. The BMS halts charging to prevent damage.
Balance recovery protocol:
1. Fly until automatic shutdown (below 5%)
2. Charge uninterrupted to 100%
3. Repeat full cycles 2-3 times
4. Check capacity via DJI Fly app
Warning: Skipping full cycles worsens imbalance. Never top off at 80% when fixing this issue.
Essential Pre-Charging Safety Protocols

Temperature Management Checklist
Charging a hot battery straight from flight risks thermal runaway. Follow this non-negotiable routine:
– Wait 10 minutes after landing before charging
– Touch-test—battery should feel room temperature (not warm)
– For cold batteries: Warm in drone first as described above
– Never charge below 5°C or above 40°C
Power Source Verification
Your Avata demands specific power delivery most chargers can’t provide. Before troubleshooting:
– Confirm PD 3.0 support (check charger label)
– Use 65W chargers for fastest recovery (30W minimum)
– Avoid QC-only bricks—they trigger blinking LED errors
– Test charger with another USB-C device first
Critical Note: The genuine DJI charger (model CP.PT.00000268.01) costs $29 but prevents 70% of charging issues. Third-party “equivalent” chargers often lack PPS support.
Execute Hibernation Recovery Like a Pro
The 25-Minute Reactivation Method
Deep hibernation makes batteries appear dead, but the BMS is slowly waking up. Rushing this process kills recovery chances.
Step-by-step recovery:
1. Connect to PD 3.0 charger with undamaged cable
2. Set timer for 25 minutes—do not unplug early
3. Check for subtle warmth at 10 minutes
4. Watch for first LED flicker at 15-20 minutes
5. Confirm full charging sequence by 25 minutes
Why 25 minutes? The BMS needs 20+ minutes to stabilize voltage below 3.0V per cell—the point of no return for permanent damage.
Stubborn Battery Revival Tactics
For batteries in hibernation over 3 months:
– Drone-assisted jumpstart: Insert battery into Avata, power on 10 seconds, then immediately connect to charger
– Car charger alternative: Use a 65W+ USB-C car adapter (less sensitive to voltage fluctuations)
– Laptop port trick: Try different USB-C ports—some provide more stable power
Identify When Replacement Is Inevitable

4 Non-Negotiable Replacement Triggers
Stop wasting time if you see:
– Swelling preventing drone insertion (even slight bulging)
– Flight time below 50% of original capacity
– Charging time exceeding 3 hours consistently
– Voltage below 11.1V (3.0V/cell) in DJI Fly app
Data Point: Batteries below 3.0V per cell suffer irreversible chemical degradation—even if revived, capacity drops 30-50%.
Safe Disposal Protocol
Damaged LiPo batteries are fire hazards. Never trash them:
1. Discharge in salt water for 24 hours (1 cup salt per gallon water)
2. Tape terminals with electrical tape
3. Transport to certified battery recycler (Call2Recycle locator)
4. Document serial number for warranty claims
Prevent Future Charging Failures Proactively
Storage Protocol by Duration
Short-term (1-10 days):
– Store at 40-60% charge
– Keep in room temperature (20-25°C)
– Remove from drone immediately after flight
Long-term (10+ days):
– Charge to exactly 50% before storage
– Check monthly—recharge to 50% if below 40%
– Avoid vehicles (temperature extremes accelerate discharge)
Pro Tip: The Avata’s BMS auto-discharges to 65% after 10 days. For extended storage, manually discharge to 50% using your drone.
Cycle Management for Maximum Lifespan
Extend battery life 40% with smart usage:
– Charge to 80% for casual flying sessions
– Avoid full discharges—land at 15% for routine flights
– Cool between flights—wait 10 minutes after intensive use
– Rotate batteries if you own multiple packs
Emergency Response for Charging Emergencies
Overheating During Charge
If your Avata battery becomes uncomfortably hot:
1. Unplug immediately and move to concrete/metal surface
2. Monitor for 30 minutes for swelling/smoke
3. Store in fireproof container if continuing to heat
4. Never reuse—follow disposal protocol
Smoke or Fire Protocol
DO NOT USE WATER—it intensifies LiPo fires. Instead:
– Cover with sand or Class D extinguisher
– Evacuate immediately if fire spreads
– Call emergency services—LiPo fires burn at 1,500°F
– Document everything for warranty claims
When to Contact DJI Service
Warranty Claim Checklist
DJI covers manufacturing defects for 6-12 months. Submit with:
– Clear purchase receipt
– Battery serial number photo (under rubber flap)
– DJI Fly app screenshots showing error codes
– Detailed timeline of failure circumstances
Service options:
– DJI Care Refresh: $59 replacement if enrolled
– Authorized centers: 5-7 day turnaround
– Direct support: Upload proof via DJI Assistant 2
Repair vs. Replace Decision Guide
Worth professional recovery ($50-150):
– Battery under 6 months old
– Cycle count below 100
– No physical damage
– Full capacity loss within warranty
Replace immediately:
– Battery over 2 years old
– Visible swelling or leaks
– Flight time under 50% original
– Cycle count exceeding 300
Final Reality Check: 9 out of 10 “dead” Avata batteries are actually in hibernation mode—waiting for that patient 25-minute recovery window. Your immediate next step? Grab a PD 3.0 charger, connect your unresponsive battery, and set a timer. If LEDs don’t activate by minute 25, document the exact behavior and contact DJI with your serial number. For prevention, store all spares at 50% charge in a climate-controlled space—this simple habit prevents 95% of charging failures. When your Avata finally lifts off again, you’ll fly with the confidence of a pilot who’s mastered the battery’s hidden language.


