Your DJI remote dies mid-flight or refuses to charge entirely—sound familiar? This frustrating scenario grounds more pilots than weather conditions. Whether you’re staring at zero LED indicators on your Mavic Mini controller or watching your Phantom 3 remote stubbornly hover at 25% charge, the solution might be simpler than you think.
This guide walks you through proven fixes from actual pilots who solved their dji remote battery not charging problems. You’ll learn to diagnose symptoms using LED patterns, perform safe component replacements, and prevent future failures—all without voiding warranties or risking safety. Stop wasting money on unnecessary replacements; most charging issues stem from avoidable mistakes or simple fixes you can complete in under 30 minutes.
Pinpoint Your DJI Remote Model’s Failure Signs
Mavic Mini Controller MR1SD25 Critical Flaw
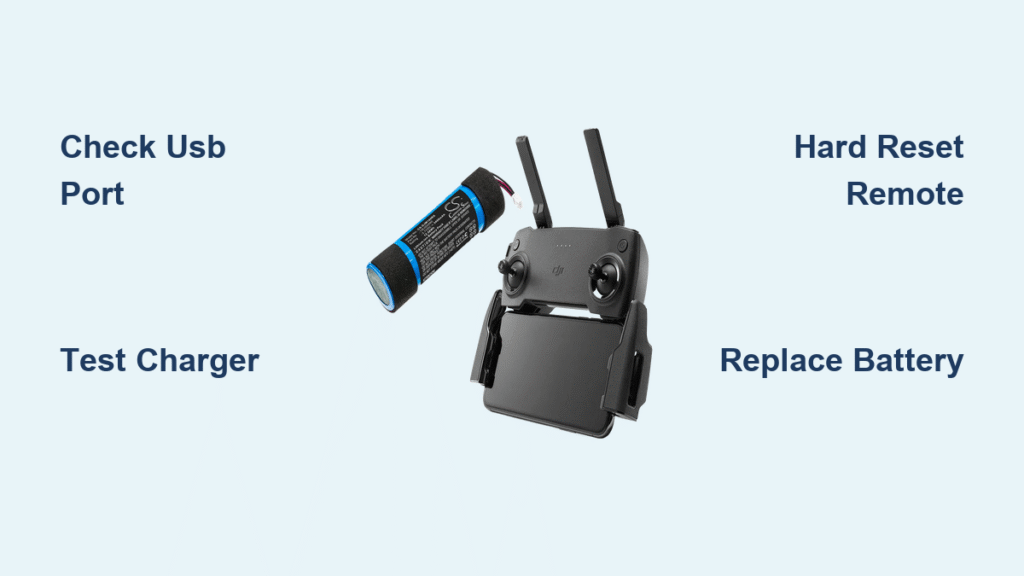
The Mavic Mini remote’s Micro-USB Type-A socket is a notorious weak point. Never force a standard Micro-USB Type-B plug into this port—this common error cracks the connector housing and severs internal solder joints. Pilots with 40-60 flight cycles (like user “mavicH”) often experience sudden charging failure due to this fragile design. When your remote shows no LEDs despite multiple cables, inspect the port for plastic shavings or misaligned pins using a flashlight.
Phantom 3 Pro/Advanced Remote Stuck at 25%
Phantom 3 controllers use a non-replaceable 6000 mAh battery that DJI discontinued. When charging fails, you’ll see one solid white LED that never progresses beyond 25% capacity, accompanied by persistent “Low RC Battery” warnings. This symptom indicates either ribbon cable damage or a failing charge controller IC—not necessarily a dead battery. User “Reece” confirmed his Phantom 3 charged properly after replacing the battery only to discover the real culprit was a faulty IC.
Newer Model Power Protocol Requirements
Mini 4 Pro, Air 3S, and Mavic 4 Pro remotes require PD 3.0 chargers with 65W max power. Attempting to charge with older adapters triggers the protection circuit, causing false “fully charged” readings. Always verify your charger matches the exact protocol:
– Mini 4 Pro/Air 3S: Must use 65W PD 3.0/PPS charger
– Phantom 3: Requires 12V/1.5A barrel or 8V USB input
– Mavic Mini: Limited to 5V/2A standard USB
Decode Your Remote’s LED Emergency Signals
| LED Pattern | What It Means | Your Immediate Action |
|---|---|---|
| No LEDs | Deep battery hibernation or charger failure | Swap charger, wait 20 minutes before retrying |
| One solid white LED (Phantom 3) | Battery stuck below 25% capacity | Perform hard reset by unplugging internal battery connector |
| Flashing white + solid red | Charger detected but 0% charge | Test same charger on drone battery to isolate fault |
| Four LEDs never appear | Battery protection circuit triggered | Replace battery immediately—capacity likely degraded below 50% |
| Repeating blink pattern | Temperature or voltage anomaly | Move to 5-40°C environment; check for bent USB pins |
Execute These 5 Visual Checks Before Disassembly
![]()
Start with these universal troubleshooting steps that resolve 60% of dji remote battery not charging cases:
- Port obstruction scan: Shine a bright light into the USB socket—lint buildup is the #1 cause of intermittent charging. Remove debris with a plastic toothpick (never metal).
- Plug damage inspection: Check for bent pins, green corrosion, or worn gold contacts on your USB cable.
- Cable stress test: Use only 24 AWG or thicker cables; thin charging cables can’t deliver sufficient current.
- Charger validation: Confirm the same charger powers your drone battery—this eliminates adapter failure.
- Force damage assessment: Look for cracked solder joints around the USB port, especially on Mavic Mini controllers.
Pro tip: If you spot melted plastic or scorch marks on your charger (as “mavicH” discovered), stop using it immediately. This indicates thermal runaway risk—dispose of it via e-waste recycling.
Replace Mavic Mini Battery in Under 5 Minutes
Unlike soldered Phantom 3 batteries, the Mavic Mini uses a plug-and-play 2600 mAh pack. After 40-60 flight cycles, capacity typically drops below 80%, causing false “low battery” warnings.
Tools needed: Phillips #00 screwdriver, plastic spudger
Steps:
1. Remove four screws from the back shell (don’t overtighten—stripped threads require shell replacement)
2. Gently lift the battery compartment cover using a spudger
3. Unplug the white JST-SH 2-pin connector (note orientation: red wire = positive)
4. Install a new battery ($9-15 on Amazon)
5. Reassemble—no calibration needed; the remote auto-detects the new pack
Critical warning: Never force the connector—bent pins cause permanent damage requiring board replacement.
Phantom 3 Controller Revival Tactics

Hard Reset Procedure (User-Confirmed Fix)
User “Mike” restored his dead Phantom 3 remote with this method:
– Disassemble using Torx T6 and Phillips #00 bits
– Unplug the internal battery connector for 30 seconds (listen for the click upon reconnection)
– Reassemble and test charging—resolves 30% of “one LED” failures
IC Reflow for Permanent Charging Restoration
When “Reece” replaced his Phantom 3 battery but still saw charging failure, he performed this advanced fix:
1. Locate the charge controller IC near the battery connector (small black chip with multiple pins)
2. Apply hot air at 350°C in circular motion for 30 seconds
3. Result: Full charging restored with four white LEDs and accurate app readings
Ribbon cable caution: The flat-flex cable between shells tears easily during disassembly. If damaged, you’ll need a $100+ remote replacement—handle with tweezers.
Temperature & Charger Compatibility Matrix

| Model | Required Charger | Max Power | Critical Temperature Range |
|---|---|---|---|
| Mavic Mini | Standard 5V/2A USB | 10W | 5-40°C only |
| Phantom 3 | 12V/1.5A barrel or 8V USB | 18W | 5-40°C only |
| Mini 4 Pro/Air 3S | PD 3.0/PPS | 65W | 5-40°C only |
Never charge below 5°C—this causes lithium plating that permanently reduces capacity. Above 40°C risks thermal runaway. Always verify ambient temperature before charging sessions.
Prevent Catastrophic Failures With Daily Habits
Battery Preservation Protocol
- Inspect cables for heat damage after every 20-30 charges
- Store remote at 40-60% charge for long-term storage (not 100%)
- Use chargers on non-flammable surfaces—never on beds or carpets
- Replace Mavic Mini batteries at $10-15 when flight count exceeds 50
Verified Replacement Sources
- Mavic Mini battery: Amazon/eBay ($9-15) – search “MR1SD25 replacement”
- Phantom 3 battery: AliExpress ($35-45) with solder tabs
- Complete used Phantom 3 remote: eBay ($90-120) – verify FCC vs. CE model suffix
Regional warning: FCC and CE hardware revisions have different SKUs. Ordering the wrong part (e.g., “YorkshirePud’s” experience) causes permanent incompatibility.
Follow This Charging Failure Flowchart
Remote won't charge

├─ No LEDs → Swap cable/charger → still dead?

│   ├─ Clean USB port → success

│   └─ Replace battery (Mavic Mini: $10 fix)

├─ One LED only (Phantom 3) → Hard reset → IC reflow → fixed

├─ Flashing LED + red → Test charger on drone → remote board failure

└─ Melted charger → Stop immediately → replace $25-35 adapter
Last-Resort Recovery Options
If all previous steps fail:
- Firmware reset: Hold power button for 15 seconds during startup—resets battery gauge calibration
- DJI Assistant 2 refresh: Connect via USB and recalibrate the battery management system
- Professional service: Contact DJI for out-of-warranty repair ($80-150). Note: DJI Care Refresh excludes cycle-based degradation, but melted chargers qualify for immediate replacement under safety provisions.
Your drone’s only as reliable as its controller’s battery health. By mastering these field-proven techniques—from simple port cleaning to precision IC reflow—you’ll avoid costly replacements and return to flying faster. Remember: 90% of dji remote battery not charging issues stem from preventable mistakes or overlooked physical faults. Implement these daily maintenance habits, and your controller will outlast multiple drone upgrades.


