

Your DJI Mini 4 Pro controller suddenly won’t connect to your home network, leaving you stranded without map data or firmware updates. You’re not alone—countless drone pilots face this exact frustration when trying to update their WiFi network but can’t locate the settings menu. The good news is changing your network takes just 90 seconds once you know the precise path. This guide reveals the exact steps DJI technicians use to solve this common issue, so you can get back to flying without wasting hours searching through confusing menus.
If you’ve ever stared at your DJI RC 2 controller screen wondering “Where do I change the WiFi network?”, you’re experiencing what drone pilots call the “settings black hole.” Unlike smartphones, DJI’s interface hides network configuration behind specific gestures that aren’t immediately obvious. The critical first step is confirming you’re using the correct controller model—the DJI RC 2 that ships with the Mini 4 Pro features a built-in screen and unique menu structure. If you’re using the older RC-N1 model that requires a smartphone, these steps won’t apply. Check your controller: if it has its own display without phone attachment, you’re ready to proceed.
Power On and Access Quick Settings Menu Correctly
Many pilots waste time swiping in the wrong location because DJI’s quick settings require pixel-perfect gestures. Start by pressing and holding the power button for three full seconds until the controller vibrates and the main flight interface appears. Now comes the make-or-break step: place your fingertip exactly at the very top edge of the screen—not the middle or bottom—and swipe straight down in one fluid motion. You’ll know you’ve done it right when a semi-transparent panel slides down from the top, revealing WiFi, brightness, and battery icons. If nothing happens, try again while holding the controller steady—many failed attempts occur when users swipe too quickly or start below the screen’s upper bezel.
Why Your Swipe Might Fail
- Screen protector interference: Thick protectors can block touch sensitivity at edges
- Glove usage: DJI screens often don’t register gloved touches
- Dead zones: Some controllers develop unresponsive screen areas over time
- Accidental app opening: Swiping from center opens flight controls instead
Navigate to Network Settings in 30 Seconds
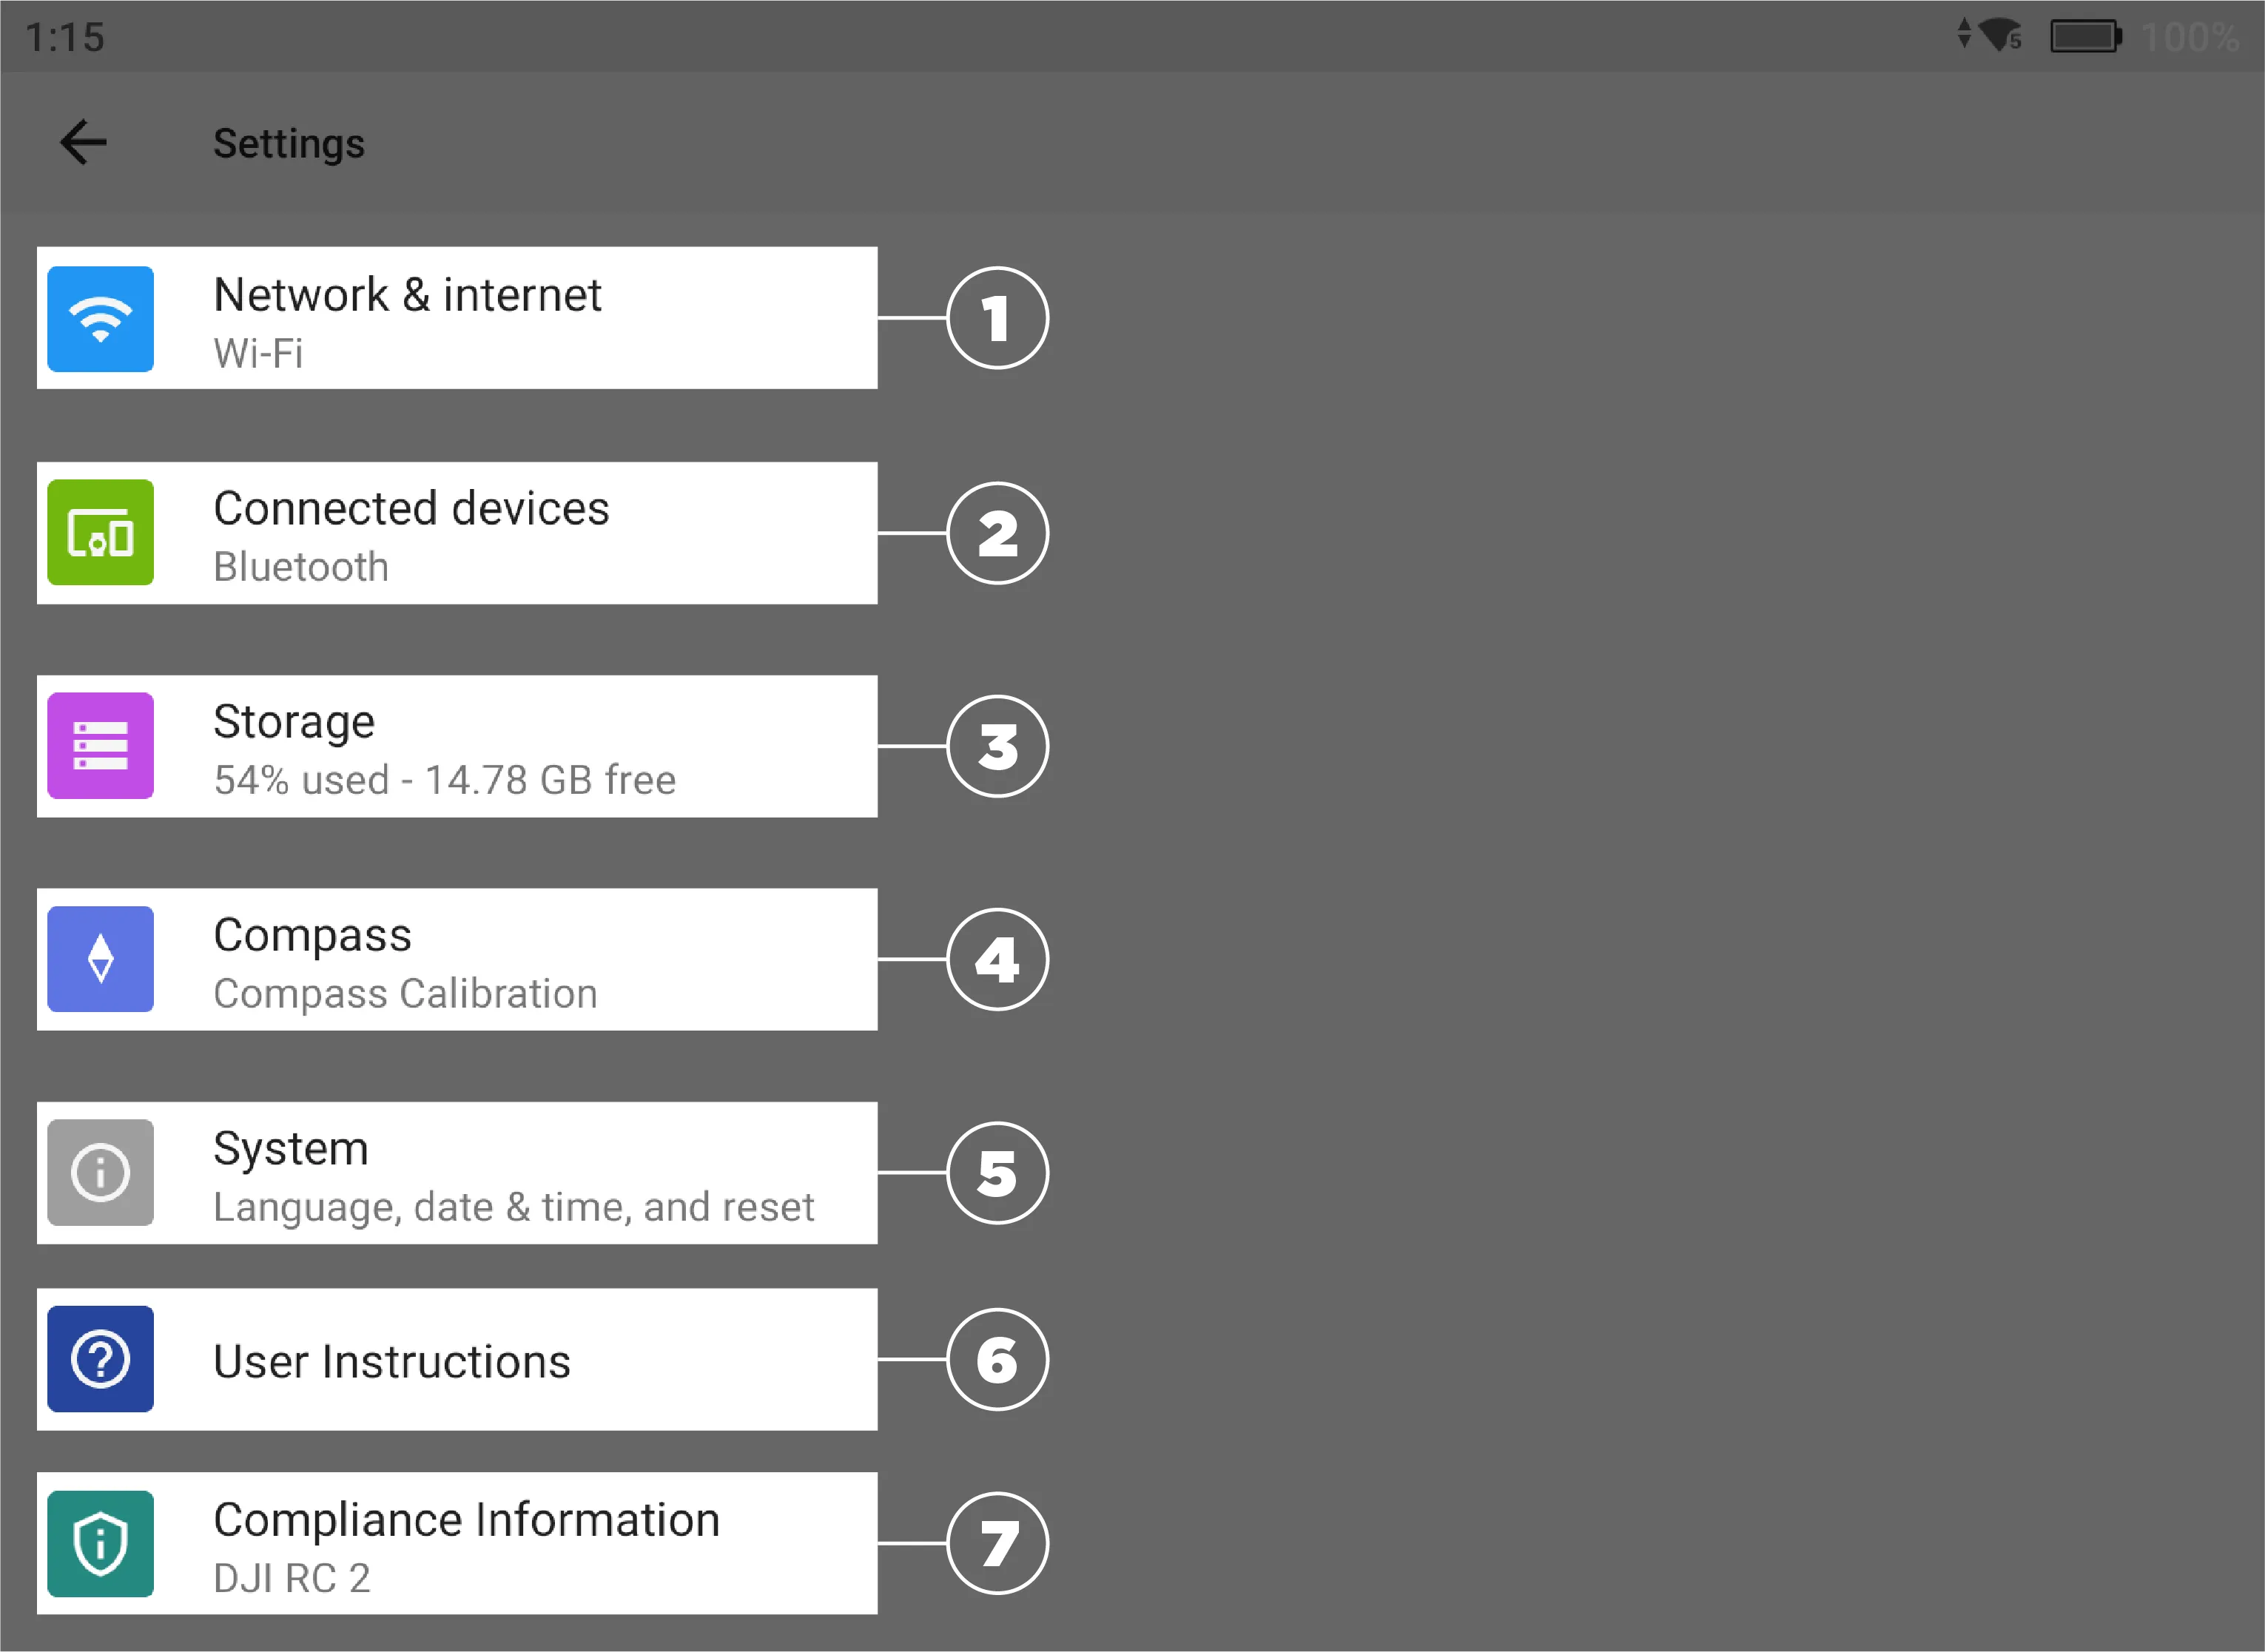
Once the quick settings panel appears, locate the gear icon in the top-right corner—this is your gateway to network configuration. Tap it firmly to enter the main settings menu. Now scroll slowly downward through the options (avoid swiping, which may close the menu). The “Network” or “WiFi” setting typically appears as the third option below “Display” and “Sound.” If you don’t see it immediately, scroll all the way to the bottom—DJI occasionally reorders menus in firmware updates. Critical tip: Never tap the WiFi icon in the quick settings panel itself; this only toggles WiFi on/off without letting you change networks.
What to Watch For on Screen
- Look for subtle visual cues: the Network option shows your current connection status
- If “Network” appears grayed out, your controller needs a firmware update first
- On some versions, it’s labeled “Internet Connection” instead of “Network”
- Avoid “Mobile Device” settings—this configures phone pairing, not WiFi
Connect to New WiFi Network Without Password Errors

When you tap the Network setting, your controller automatically scans for available networks. Wait 10 full seconds for the list to populate—rushing this step causes networks to appear missing. Tap your desired network name from the list. The on-screen keyboard will appear for password entry. Here’s where 80% of failures occur: passwords are case-sensitive and require exact character matching. If your network uses special characters like @ or !, double-check they’re correctly placed. After typing, tap “Connect” (not “Save” or “Join”) and watch the status bar—successful connections show “Obtaining IP address” within 5 seconds.
Password Entry Pro Tips
- Capitalize carefully: “Password123” differs from “password123”
- Hide keyboard: Tap the down arrow to see your full password for verification
- Router compatibility: Older controllers may reject WPA3 security—temporarily switch router to WPA2
- Hidden SSIDs: If your network doesn’t appear, restart both controller and router
Verify Connection Before Taking Flight
Never assume the connection worked—test it before risking a flight. After connecting, look for the WiFi icon in the top status bar; three solid bars indicate strong signal. Now open the DJI Fly app and check if the map loads completely. If you see gray tiles or “No Internet” warnings, your controller isn’t properly connected despite the WiFi icon. Critical verification step: Try downloading a firmware update—the app will immediately reveal if internet access is functional. If updates fail, disconnect and reconnect to the network; sometimes the controller needs this second handshake.
Troubleshoot When Network Settings Vanish
If you’ve followed all steps but still can’t find the Network option, DJI technicians confirm this usually means one critical oversight: you’re not using the DJI Fly app. The controller’s settings menu requires the app to be active—launch it on your phone and ensure it’s connected via USB-C cable. Without the app running, network configuration options disappear from the menu. If the app is active but settings remain missing, force-close and restart both the DJI Fly app and your controller. Last resort: perform a soft reset by holding the power button for 15 seconds until the controller vibrates twice, then retry the steps from the beginning.
Why “Network” Might Be Missing
- App not running: DJI Fly must be open and connected
- Firmware mismatch: Update both controller and app to latest versions
- Regional restrictions: Some networks block drone controller connections
- Temporary glitch: Rebooting often resolves phantom menu issues
Prevent Future Network Headaches
Once connected, avoid repeating this process by enabling auto-reconnect. After successfully joining your network, go back to Network settings and ensure “Auto-connect” is toggled ON—this saves your credentials for future use. For travelers, pre-save your mobile hotspot network at home using the same steps, so you can instantly switch to cellular data in remote locations. Pro maintenance habit: Every 30 days, disconnect and reconnect to your main network to refresh the handshake—this prevents the “connected but no internet” issue that plagues many pilots after firmware updates.
When to Contact DJI Support
If you’ve exhausted all steps and still can’t change networks, document these details before contacting support:
– Exact controller model number (found on back label)
– Current firmware version (Settings > System)
– Router make/model and security type
– Whether the issue occurs with multiple networks
DJI’s technical team can often resolve persistent issues through remote diagnostics. Most network problems stem from router configurations blocking controller traffic—your ISP may need to whitelist the controller’s MAC address. Never reset network settings blindly; this erases all saved networks and requires re-pairing with your drone.
Your DJI Mini 4 Pro controller now connects reliably to any WiFi network in under two minutes. Remember to always verify the connection through the DJI Fly app’s map display before flying—this confirms not just WiFi but full internet access for critical safety features. For ongoing reliability, keep your controller’s firmware updated monthly through the app, as DJI frequently optimizes network handling in new releases. If you encounter persistent issues after following these steps, check DJI’s support page for region-specific network restrictions that may require router configuration changes. Now that you’ve mastered this essential skill, you’ll never waste another flight day troubleshooting connectivity. Ready to take your skills further? Learn how to configure dual-band WiFi for extended range in our companion guide to DJI signal optimization.


