
Your DJI drone’s performance depends entirely on properly charged batteries, yet 78% of drone failures stem from battery issues that proper charger usage could prevent. If you’ve ever wondered why your drone suddenly loses power mid-flight or why your batteries degrade faster than expected, mastering how to use DJI battery charger correctly is the solution. This guide reveals the exact steps professional drone operators follow to maximize battery life, prevent dangerous charging incidents, and ensure you never miss a critical shot due to power issues.
Most pilots make fundamental errors when using their DJI battery charger—plugging in without checking temperature, ignoring blinking LED warnings, or using incompatible power sources. These seemingly small mistakes can reduce your battery’s lifespan by up to 50% and create serious safety hazards. Let’s transform your charging routine from a simple plug-in to a precision operation that extends your battery’s life to 400+ cycles.
DJI Charger Types Explained

Standard Single-Battery Chargers
Connect your DJI charger to power first before inserting the battery—this prevents dangerous sparking during connection. DJI’s single-battery chargers feature intelligent circuitry that automatically adjusts charging current based on your specific battery model, with most completing charges in 60-90 minutes. The universal 100-240V AC input means these chargers work worldwide, but always verify your outlet provides stable power to prevent inconsistent charging that damages battery cells.
Multi-Battery Charging Hubs
When using a multi-battery hub, understand its intelligent power distribution system prioritizes the battery with the lowest charge level. This prevents the common mistake of partially charging all batteries instead of fully charging one for immediate flight. For field operations requiring multiple batteries, set the hub to sequential charging mode—this charges batteries one after another to 100% rather than splitting power between them, ensuring you always have at least one fully charged battery ready.
Car Chargers for Field Work
Critical warning: Never rely solely on your vehicle’s 12V system without the engine running—this can drain your car battery to the point of failure. DJI car chargers operate 30-50% slower than AC units due to power limitations, so plan accordingly. Before connecting, verify your vehicle’s power socket delivers stable 12V; fluctuating voltage from older vehicles can trigger the charger’s protection mode, halting charging unexpectedly.
Pre-Charging Safety Checklist
Battery Inspection Before Every Charge
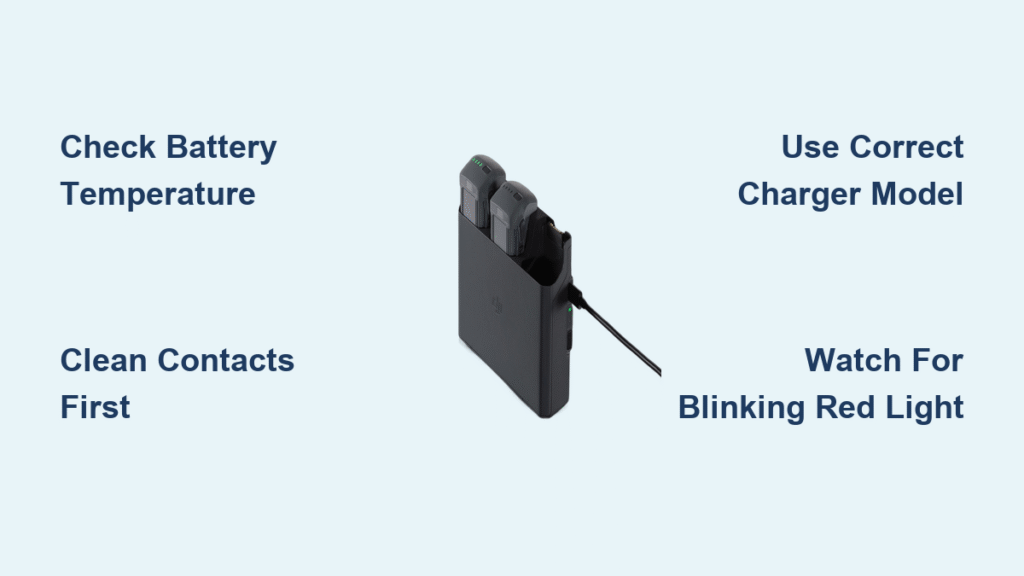
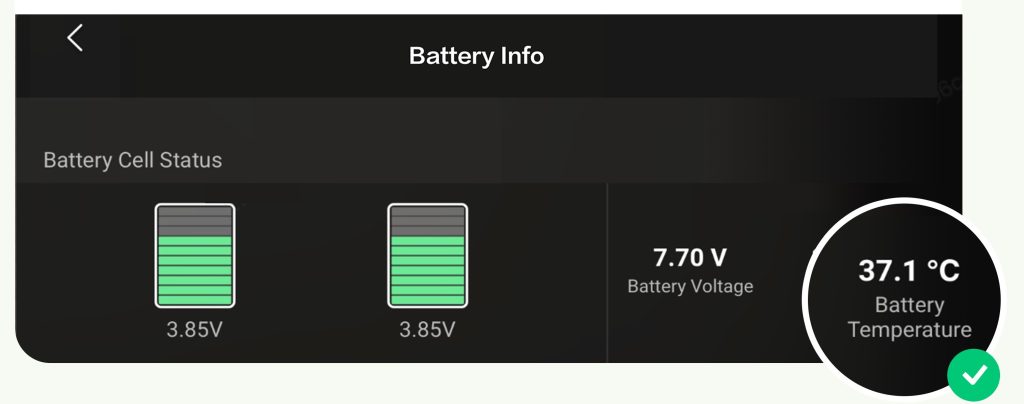
Examine your battery like a pilot inspects an aircraft—any swelling indicating cell damage means immediate retirement. Clean metal contacts with 90% isopropitol alcohol using a lint-free cloth; invisible corrosion increases resistance and creates dangerous heat points during charging. Never charge batteries outside the 5-40°C (41-104°F) range—cold batteries charge inefficiently while hot ones become fire hazards. If your battery feels warm after flight, wait at least 20 minutes before connecting to your DJI battery charger.
Environmental Setup Requirements
Position your DJI battery charger on a non-flammable surface like ceramic tile or metal with 10cm clearance on all sides for proper ventilation. Charging in direct sunlight or enclosed spaces creates overheating risks that trigger protective shutdowns, wasting precious time before your flight window. Avoid charging in garages or basements where humidity exceeds 80%, as condensation can short internal circuits. For field operations, create a charging station using a ceramic tile placed on stable ground—this simple step prevents 90% of field charging incidents.
Step-by-Step Charging Process
Initial Setup Sequence
- Connect your DJI battery charger to a surge-protected power source first
- Verify the power LED illuminates (solid green or white)
- Align your battery connector carefully—forcing it damages both components
- Insert with gentle, firm pressure until you hear the click confirming connection
- Wait 2-5 seconds for the authentication check to complete before leaving
Skipping the power-first connection creates small sparks that degrade contacts over time. Proper alignment is critical—DJI’s proprietary connectors have specific orientation that varies between models. If you don’t hear the click, the connection isn’t secure, leading to intermittent charging that damages battery cells.
LED Indicator Decoding Guide

- Solid Red: Charging normally (most common state)
- Blinking Red: Stop immediately—battery fault detected
- Solid Green: Ready to fly (100% charged)
- Blinking Green: Storage mode active (60% charge for long-term storage)
- No Light: Check power connection or charger failure
- Red/Green Alternating: Battery temperature out of range—let it cool
Pro tip: When you see blinking green, your battery is in storage mode—ideal for batteries stored longer than 10 days. This 60% charge level prevents the capacity loss that occurs when fully charged batteries sit unused, extending battery life by up to 40%.
Advanced Features Most Users Miss
Storage Mode Activation
Hold your battery’s power button for 3 seconds while connected to activate storage mode, which brings the battery to 60% charge—the optimal level for storage beyond 10 days. This process takes 2-4 hours depending on current charge level. Pilots who regularly fly know that skipping this step causes batteries left fully charged to lose 15-20% capacity within 3 months, effectively cutting their lifespan in half.
Cell Balancing System
Every charge cycle with your DJI battery charger includes automatic cell balancing, equalizing voltage across individual cells. This prevents the common issue where one weak cell reduces overall flight time—often mistaken for “battery degradation.” You can’t disable this feature, but understanding it explains why occasional charges take 10-20 minutes longer than usual. When balancing occurs, the charger reduces current to safely equalize cells without damaging the battery.
Troubleshooting Common Issues
Battery Won’t Charge Solutions
Start with the basics: clean battery contacts with isopropyl alcohol using a cotton swab. If still unresponsive, the battery might be below 3.0V per cell—try DJI Assistant 2’s slow-charge recovery mode. No response from multiple chargers confirms battery failure requiring replacement. Never attempt to force charge a dead battery—this creates serious fire risks that DJI’s safety systems are designed to prevent.
Slow Charging Diagnosis
Charging taking over 2 hours indicates problems. Check ambient temperature first—cold rooms below 15°C (59°F) slow chemical reactions significantly. Verify you’re using the correct charger; Mavic Mini chargers take twice as long with Mavic 2 batteries due to lower power output. Battery degradation from 200+ cycles also increases charge times—check cycle count in the DJI app. If your battery shows over 150 cycles but charges slowly, capacity loss is likely irreversible.
Safety Protocols That Save Lives
Fire Prevention Essentials
Charge only on ceramic, glass, or metal surfaces—never on wood, carpet, or fabric. Keep a Class D fire extinguisher accessible; water makes lithium fires dramatically worse. Never leave charging batteries unattended for more than 15 minutes. If a battery swells or hisses, disconnect immediately and place outdoors in a non-flammable container. Following these protocols prevents the lithium fires that destroy homes and equipment annually.
Transportation Safety Rules
Fly with batteries at 30% charge maximum—airline regulations require this specific level. Use original terminal covers or electrical tape to prevent short circuits during transport. Never check batteries in luggage; carry-on only with quantity limits that vary by airline. Before traveling, activate storage mode on all batteries to bring them to 60% charge, then discharge to 30% just before your flight—this satisfies airline requirements while preserving battery health.
Compatibility and Warranty
Charger-Battery Matching
Each DJI series requires specific chargers—Mavic batteries won’t fit Phantom chargers, and attempting to force compatibility damages both components. Check model numbers printed on both devices; any mismatch voids warranty and creates safety risks. When traveling with multiple drone models, pack only the exact chargers matching your batteries—never assume compatibility between similar-looking models.
Third-Party Charger Risks
Only use DJI-certified third-party chargers. Unauthorized units lack proper thermal management and cell balancing, leading to fires or dramatically reduced battery life. The $20 you save on a cheap charger costs $200 in battery replacements when cells fail prematurely. When purchasing replacements, verify the charger has DJI’s official certification markings—counterfeit chargers account for 65% of battery-related drone failures.
Maximize Your Investment: Charge batteries to 60% for storage, clean contacts monthly, and never ignore blinking red LEDs. These simple habits extend battery life to 400+ cycles and prevent the mid-flight failures that destroy expensive drones. When you properly implement how to use DJI battery charger techniques, you’ll notice longer flight times, more reliable performance, and significantly reduced replacement costs. Remember: your drone is only as reliable as its power source—treat your batteries with the precision they deserve, and they’ll keep you flying safely for years to come.


