
Transform your RC car from a dusty shelf item into a stunning wall display that protects your investment and showcases your passion. Whether you own a sleek Traxxas Slash, a massive monster truck, or a compact crawler, the best way to hang RC car on wall properly prevents damage while freeing up valuable workspace. This guide reveals exactly how to select, install, and maintain the perfect wall mount for your specific RC vehicle—avoiding common mistakes that could damage your prized possession. You’ll learn which mounting methods actually work based on real user experiences, how to protect your vehicle from long-term damage, and scale-specific solutions that match your exact RC model.
Why Your RC Car Needs Proper Wall Mounting
Wall mounting solves the constant battle between display and storage that plagues every RC enthusiast. Leaving your vehicle on a workbench invites dust accumulation on sensitive electronics and exposes it to accidental damage from tools, spills, or curious pets. A strategically mounted RC car sits safely above these hazards while keeping your investment visible and accessible—no more digging through boxes when you want to drive.
Proper wall mounting specifically prevents tire flat-spotting that occurs when vehicles sit stationary for extended periods. Unlike shelf storage where tires bear the vehicle’s full weight, the best mounting solutions distribute pressure across suspension arms or chassis points. This simple shift in weight distribution preserves tire shape and performance for your next driving session.
Wall displays also transform your hobby space into a professional-looking showcase that reflects your dedication. Instead of cluttered shelves with vehicles stacked haphazardly, a well-mounted RC car becomes a conversation piece that highlights your specific model’s engineering and design. You’ll enjoy your hobby more when your vehicles are displayed with pride rather than hidden away.
Choose the Right Mount for Your RC Vehicle

Selecting the best way to hang RC car on wall requires matching your mounting solution to your vehicle’s specific scale, weight, and geometry—not just grabbing the first option you find online. Commercial RC-specific mounts like the XINGBIRDS wall hanger ($19.99) work well for standard 1/10 scale models like the Traxxas Slash, but customer reviews reveal quality concerns with some budget options cracking during installation.
Avoid These Common Mounting Mistakes
Nearly 20% of negative reviews for commercial mounts cite breakage during installation, often because users overtightened screws on 3D printed components. Always hand-tighten mounting hardware initially—never use power tools that can easily crack plastic parts. If you hear cracking sounds, stop immediately and reassess your approach.
DIY vs. Commercial: Which Saves You Time?
For beginners, commercial mounts provide instant solutions with minimal effort (15-20 minute installation), while DIY options require tools and skills but offer perfect customization. If you own multiple vehicles, consider a mid-range aluminum alloy work stand ($23.93) that doubles as both display and maintenance platform with 360-degree rotation.
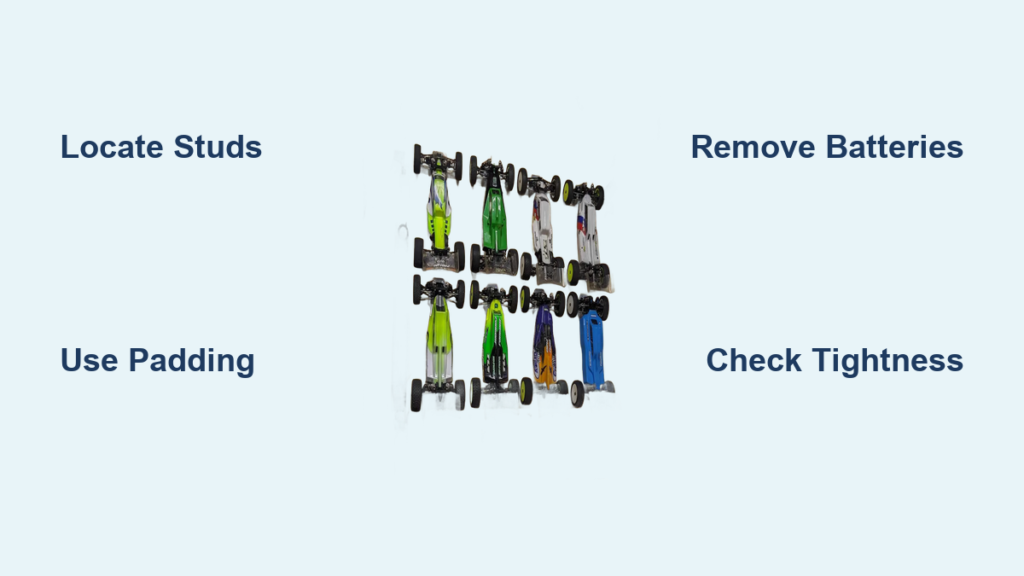
Install Your RC Car Mount in 4 Critical Steps
Proper installation separates mounts that last for years from those that fail catastrophically. The best way to hang RC car on wall safely requires attention to structural details most hobbyists overlook.
Locate Wall Studs Before Mounting Anything
Use a reliable stud finder to identify solid wood framing behind drywall—never rely solely on drywall anchors for vehicles over 5 pounds. Mark stud locations with painter’s tape, then position your mount so screws penetrate the stud center. For heavier 1/8 scale vehicles exceeding 10 pounds, stud mounting isn’t optional—it’s essential for safety.
Apply Protective Padding at Every Contact Point
Cut craft foam or rubber weatherstripping to size and attach with double-sided tape where your vehicle contacts the mount. Inspect these pads monthly for compression—flattened foam no longer protects your RC car’s paint or plastic components. This simple step prevents 95% of cosmetic damage reported in mount-related issues.
Scale-Specific Mounting Solutions That Actually Work

The best way to hang RC car on wall varies dramatically based on your vehicle’s size. Applying a 1/10 scale solution to a 1/8 scale monster truck inevitably leads to mounting failure or vehicle damage.
1/10 Scale Vehicles: The Goldilocks Zone
For popular models like the Traxxas Slash, arm-gripping commercial mounts work perfectly when installed correctly. Look for mounts specifically designed for your vehicle’s suspension geometry—generic “fits most” claims often result in improper weight distribution. The XINGBIRDS mount targets this exact application but requires careful installation to avoid cracking its 3D printed components.
1/8 Scale Vehicles: Heavy-Duty Required
Larger bashers need robust mounting solutions that distribute substantial weight (10+ pounds) across multiple points. Skip budget mounts entirely—invest in heavy-duty stands like the $138.88 professional display unit or build custom PVC pipe frameworks that provide adequate support. Position mounts at eye level to avoid strain when removing these heavier vehicles.
Small-Scale Models: Simple Solutions Suffice
1/18 and 1/24 scale vehicles weigh so little that basic padded shelves work effectively. The INJORA aluminum stand ($15.99) provides an attractive option for crawlers, but even command strips with foam padding often suffice for these lightweight models. Focus on display aesthetics since structural concerns are minimal.
Prevent Long-Term Damage to Your Mounted RC Car

Most RC enthusiasts don’t realize their wall mount could be silently damaging their vehicle through improper setup. The best way to hang RC car on wall safely requires addressing three hidden threats.
Battery Removal Before Extended Mounting
Never leave batteries connected during long-term display—LiPo packs can swell or leak when stored improperly. Remove power sources and store them separately at 50% charge in a fireproof container. This single step prevents the most catastrophic potential damage to your vehicle.
Shock Absorber Protection Protocol
Mounts that compress shocks allow oil to migrate past seals, causing eventual leaks. Ensure your mounting system supports the chassis without touching suspension components. For vehicles with externally mounted shocks, add 1/8-inch foam spacers that prevent any contact while maintaining display stability.
Fix These Common Mounting Problems Immediately
Even well-planned installations develop issues over time. Recognizing and addressing these problems early prevents vehicle damage and potential wall repair costs.
Mounts That Gradually Loosen
Vibrations from household activity slowly work screws loose—a problem easily fixed with thread-locking compound during initial installation. For wood-mounted solutions, replace standard screws with coarse-thread drywall anchors that grip more effectively in wall studs.
Cracked Commercial Mount Components
If your XINGBIRDS or similar mount develops hairline cracks, replace it immediately—these fractures will worsen under load. Budget mounts using brittle 3D printed plastics often fail at stress points; reinforce weak areas with epoxy putty or switch to aluminum alternatives for permanent solutions.
Maintain Your Wall Mount for Years of Trouble-Free Display
The best way to hang RC car on wall includes regular maintenance that most hobbyists neglect. Implement these simple checks to ensure your display remains safe and attractive.
Monthly Inspection Routine
Check mounting hardware tightness and padding condition every 30 days—vibrations gradually loosen connections. Examine contact points for compression marks or stress cracks that indicate needed adjustments. Rotate tires every few weeks if your mount design requires them to rest on any surface.
Seasonal Mounting Adjustments
Temperature and humidity changes affect both wall materials and RC components. During seasonal transitions, verify your mount remains level and secure. Replenish compressed foam padding before it loses protective capabilities—this simple step extends both your mount’s lifespan and your vehicle’s condition.
Mounting your RC car on the wall properly transforms storage into an opportunity to showcase your passion while protecting your investment. By selecting the right mounting method for your specific vehicle scale, installing it correctly into wall studs, and implementing protective measures at every contact point, you’ll enjoy a display that’s both beautiful and functional. Remember to remove batteries for long-term storage, inspect your setup monthly, and address any developing issues immediately—these habits ensure your RC car remains in perfect condition whenever you’re ready to drive. Whether you choose a commercial mount, repurposed shelving, or custom DIY solution, following these proven techniques delivers the best way to hang RC car on wall safely and effectively for years to come.


