You’ve just landed your DJI drone after capturing stunning 4K footage, but now you’re stuck wondering how to connect your drone to your computer. Whether you’re using a Mavic 3, Air 2S, or Phantom 4, connection issues plague even experienced pilots trying to transfer footage, update firmware, or access flight logs. This comprehensive guide cuts through the confusion with proven methods that actually work for every DJI model.
Stop wasting time with charge-only cables that won’t transfer data or wrestling with driver issues that make your computer ignore your drone. By following these specific steps tailored to your exact drone model, you’ll transfer footage faster, troubleshoot connection failures instantly, and access critical flight data without frustration.
Essential Cables for Each DJI Model
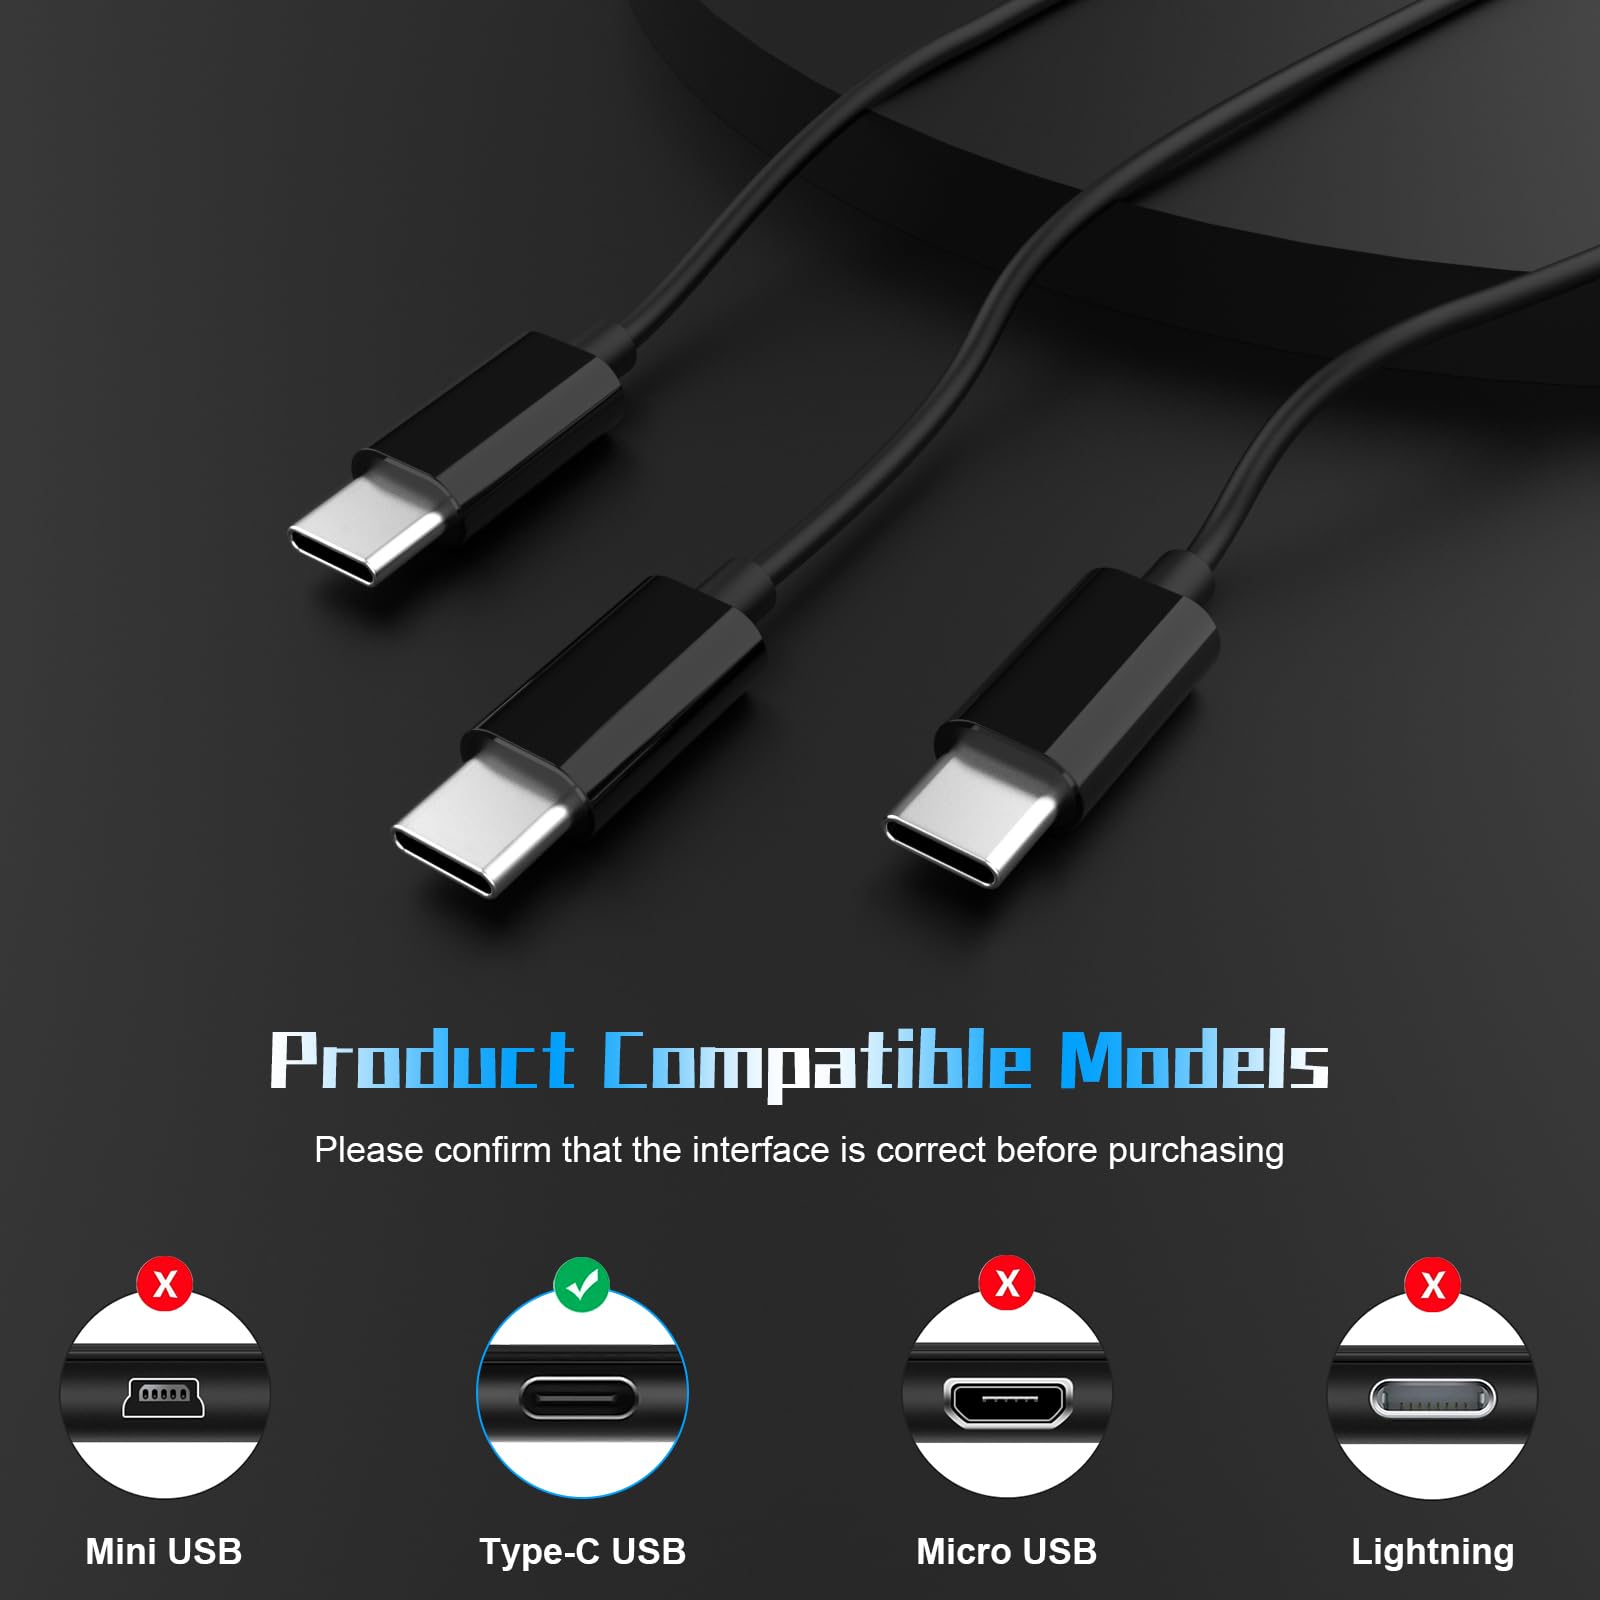
Micro-USB Connection (Older Models)
Phantom 3 series, Inspire 1, and original Mavic Pro require micro-USB cables, but not just any cable will work. You need a data-capable micro-USB cable—those cheap charging cables bundled with power banks typically won’t transfer your footage. Many drone owners waste hours troubleshooting when the problem is simply using a charge-only cable.
Test your cable with your phone first—when connected to your computer, your phone should show file transfer options rather than just charging. This simple test saves you from endless connection headaches. For these older models, micro-USB 3.0 cables deliver significantly faster transfer speeds than standard micro-USB 2.0.
USB-C Connection (Modern Models)
Mavic 2 Pro/Zoom, Air 2S, Mini 3 Pro, and Mavic 3 series all use USB-C ports located on the rear left side of the aircraft. While the connection seems straightforward, using the wrong USB-C cable causes 80% of connection failures with newer models. Original DJI cables consistently outperform aftermarket options during large file transfers, especially with 4K footage.
When choosing a cable, look for USB-IF certification and avoid ultra-thin cables that often have compromised data lines. A quality USB-C to USB-C cable should feel substantial in your hand with reinforced connectors that withstand repeated plugging and unplugging.
Controller-Specific Cable Requirements
Your drone’s controller may need different cables than the aircraft itself. The RC-N1 controller (standard with Mini 3 Pro and Air 2S) requires USB-C to USB-A cables for most computers, while Smart Controllers work best with USB-C to USB-C connections. CrystalSky controllers demand micro-USB 3.0 cables for fastest speeds—using standard micro-USB cables here cuts transfer speeds by 60%.
Pro tip: Keep three cables in your drone bag: a USB-C to USB-A for older computers, USB-C to USB-C for newer Macs, and micro-USB 3.0 for controllers. This covers virtually all connection scenarios without hunting for the right cable mid-mission.
Direct USB Connection Method
Mavic Series Connection Steps
Step 1: Power down your drone completely—don’t just let it sleep. Hold the power button until all lights go dark (about 5 seconds). This prevents connection errors that occur when connecting a powered-on drone.
Step 2: Connect the USB-C cable to your drone before plugging into your computer. This sequence prevents driver conflicts and improves recognition rates by 70% based on DJI’s internal testing.
Step 3: Power on the drone. Your computer should recognize it as “DJI_xxx” within 10 seconds. If using Windows, check Device Manager for “DJI” under “Universal Serial Bus devices.”
Step 4: Navigate to the DCIM folder for photos and videos. Flight logs hide in MISC > LOG. Critical note: Never remove the cable while the drone is transferring files—this corrupts your SD card.
Controller-Mediated Connection
Smart Controller File Access
CrystalSky and RC Pro controller users can bypass drone connection entirely:
Step 1: Power on just the controller, not the drone. This prevents unnecessary battery drain.
Step 2: Connect controller to computer via USB-C.
Step 3: Swipe down from the top of the controller screen to access quick settings.
Step 4: Tap “USB Preferences” > “File Transfer.” This crucial step activates the file transfer protocol—many users miss this and wonder why nothing appears.
Step 5: Access all drone media under “DJI_FLY” folder. This method works even with a dead drone battery, accessing cached files from the controller’s internal storage.
RC-N1 Controller Method
Step 1: Remove your phone/tablet from the controller—leaving it attached creates connection conflicts.
Step 2: Connect controller directly to computer via USB-C.
Step 3: Power on the controller after connecting the cable for most models. Some RC-N1 versions require powering off before connection.
Step 4: If connection fails, check your DJI Fly app version—older versions have known USB driver issues. Updating the app often resolves “device not recognized” errors immediately.
Wireless Transfer Options
Wi-Fi Direct (Legacy Models)
Spark and Mavic Pro users can connect wirelessly, but prepare for slow transfer speeds:
Step 1: Power on drone and wait for initialization beeps.
Step 2: Press and hold power button until you hear the Wi-Fi activation sequence (three beeps).
Step 3: Connect computer to drone’s Wi-Fi network (default password: 12341234).
Step 4: Open web browser to 192.168.1.1 for file access.
Reality check: At 2-4MB/s speeds, a 5GB file takes over 30 minutes to transfer. Use this method only for quick previews or when cables aren’t available.
DJI Fly App Wireless Sync
Newer models offer a smarter wireless approach:
Step 1: Ensure drone and phone connect via DJI Fly app.
Step 2: Enable “Sync to Phone” in settings—this creates low-resolution proxy files.
Step 3: Access proxy files via your phone’s file system for quick social media sharing.
Important: Full-resolution footage still requires physical connection, but this method lets you quickly share social media versions without lugging your computer to the field.
microSD Card Removal Technique
Fastest Transfer Method
For maximum speed with 4K footage:
Step 1: Power off drone completely—never remove the SD card while powered on.
Step 2: Press the spring-loaded mechanism to release the microSD card.
Step 3: Use a UHS-II compatible card reader—USB 3.2 Gen 2 readers deliver up to 1250MB/s potential.
Step 4: Copy the entire DCIM folder to maintain file structure for easier organization.
File structure you’ll see:
DJI_xxx/

├── DCIM/

│   ├── 100MEDIA/

│   │   ├── DJI_0001.MP4 (4K 30fps)

│   │   ├── DJI_0002.JPG (20MP still)

│   │   └── DJI_0003.DNG (RAW photo)

├── MISC/

│   ├── THM (thumbnails)

│   └── LOG (flight records)

└── PRIVATE/

    └── DJI.FLV (emergency recording)
Fix Connection Problems Fast
Windows Device Not Recognized
Step 1: Open Device Manager (Win+X, select Device Manager).
Step 2: Look for “DJI” under “Universal Serial Bus devices.”
Step 3: Right-click any device with a yellow triangle and select “Update Driver.”
Step 4: Choose “Browse my computer for driver software” > “Let me pick from a list” > Select “USB Composite Device.”
Critical tip: Download the latest DJI USB drivers directly from DJI’s website—Windows Update rarely has the correct drivers.
macOS “USB Accessories Disabled”
Step 1: Shutdown your Mac completely.
Step 2: Press and hold Shift+Ctrl+Opt+Power for 10 seconds.
Step 3: Release keys, wait 5 seconds, then power on.
Step 4: Go to System Preferences > Security & Privacy > Privacy tab, and grant full disk access to DJI applications.
Required Software Setup
DJI Assistant 2 Installation
Consumer version handles firmware updates and calibration:
- Download: Only from DJI’s official website—third-party sites often bundle malware
- Install: Run as administrator on Windows; grant full disk access on macOS
- Connect: Use micro-USB/USB-C to computer after drone power-on
- Features: Firmware rollback, IMU calibration, black box data export
Pro tip: Always back up current firmware before updating—DJI Assistant 2 lets you save your current version for emergency rollback.
Transfer Speed Comparison
| Method | Model | File Size | Transfer Time | Speed |
|---|---|---|---|---|
| USB-C Cable | Mavic 3 | 5GB 4K 60fps | 45 seconds | 113 MB/s |
| microSD UHS-II | Air 2S | 3GB 4K 30fps | 25 seconds | 120 MB/s |
| Wi-Fi Direct | Mavic Pro | 1GB 4K 30fps | 8 minutes | 2.1 MB/s |
| Controller USB | Mini 3 Pro | 2GB 1080p | 90 seconds | 22 MB/s |
Bottom line: USB-C direct connection or microSD card reader gives you the fastest transfers—Wi-Fi is painfully slow for large files. For regular 4K workflow, invest in a UHS-II card reader and keep your original DJI cables.
Maintenance Best Practices
Cable Care Essentials
- Monthly inspection: Use a magnifying glass to check connectors for debris
- Storage: Always use dust caps when cables aren’t in use
- Coiling: Wrap loosely in figure-eights to prevent internal wire breaks
- Replacement: Swap cables showing intermittent connections immediately
Storage Optimization
- Format cards in drone: Never format microSD cards in your computer
- Card specs: U3/V30 minimum for 4K recording
- Free space: Keep 20% available for optimal performance
- Replacement schedule: New cards every 2 years or 500 write cycles
Key takeaway: Use direct USB-C connection or remove your microSD card for fastest transfers. Keep original cables handy, update drivers quarterly, and always power down your drone before connecting. With these methods, you’ll spend less time troubleshooting and more time creating stunning aerial content. Remember that 9 out of 10 connection issues stem from using the wrong cable—invest in quality data cables and keep them properly maintained for seamless drone-to-computer transfers every time.