
You’ve just unboxed your DJI FPV drone system, staring at the sleek aircraft, immersive goggles, and responsive controller – but that frustrating activation barrier stands between you and your first adrenaline-pumping flight. Many new pilots waste hours troubleshooting failed connections or missed steps in the activation process. This guide cuts through the confusion with precise, step-by-step instructions verified directly from DJI’s official documentation. You’ll learn exactly how to activate DJI FPV drone components correctly on your first attempt, avoiding common pitfalls that brick systems or trigger error messages. By the end, you’ll be airborne safely with all safety features properly configured.
Essential Pre-Activation Aircraft Setup
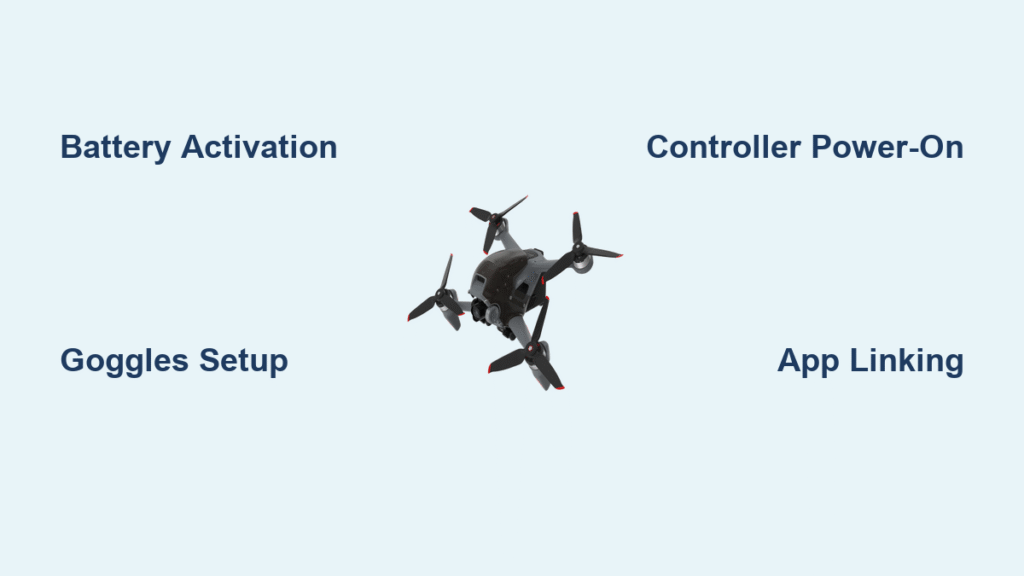
Battery Activation Protocol
Your intelligent flight battery requires mandatory initial activation before any flight. Connect the battery to the charger for precisely 60-90 seconds – this critical calibration step prevents future charging errors and cell imbalance. During activation, observe the battery indicator lights flashing rhythmically; when they stabilize to a solid green, the battery is fully primed. Never skip this step, as unactivated batteries trigger “BATT ERROR” warnings that halt the entire activation process.
Critical Physical Configuration Steps
Complete these aircraft preparations before power-on:
– MicroSD Card: Slide open the weather-resistant cover on the rear compartment and insert a UHS-I Speed Grade 3 card (essential for recording 4K footage)
– Gimbal Protection: Remove both the rigid plastic cover and adhesive film from the camera lens – leaving either in place causes permanent lens fogging
– Propeller Installation: Match each propeller’s color-coded base (red/black) to corresponding motor arms, press down firmly until seated, then rotate clockwise until you hear a distinct click
– Battery Insertion: Align the battery’s connector with the drone’s compartment, slide in until it audibly clicks, then verify the latch is fully engaged
Goggles V2 and Controller Activation Sequence
Goggles Physical Configuration
Before powering on your DJI FPV Goggles V2, complete these setup actions:
– Antenna Tightening: Rotate all four front-panel antennas clockwise until snug (loose antennas cause video lag during flight)
– IPD Adjustment: Slide the bottom-mounted IPD lever while viewing the test grid until images merge into a single sharp image
– Port Identification: Locate the left-side microSD slot (for flight logs), USB-C port (for mobile connection), and right-side power port
Remote Controller 2 Critical Setup
Your controller requires specific preparation:
– Flight Mode Switch: Confirm it’s set to “N” (Normal) position – activating in S or M mode prevents successful system linking
– Control Stick Storage: Insert sticks into side slots to prevent accidental movement during transport
– Power Verification: Press the center power button once – two green LEDs indicate sufficient battery for activation
Exact Power Sequence for Device Linking
Step-by-Step Activation Order
Follow this sequence within 30 seconds to maintain signal integrity:
1. Aircraft Power-On: Press power button once (checks battery level), then press and hold for 2 full seconds until status lights illuminate
2. Goggles Power-On: Repeat identical button sequence – wait for status lights to stabilize before proceeding
3. Controller Power-On: Complete same power sequence while holding controller within 1 meter of goggles
Critical Warning: Powering devices out of sequence (e.g., goggles before aircraft) causes “DEVICE NOT LINKED” errors requiring full system reset. If status lights flash red after power-on, restart the sequence immediately.
Linking Verification Techniques
Your DJI FPV Combo ships pre-linked, but verify connection through:
– Goggles display showing aircraft battery percentage
– Controller vibration feedback when moving sticks
– Aircraft status lights pulsing green (not red/flashing)
If manual linking becomes necessary, access the goggles menu: System > Linking > Manual Linking – but this should only be needed after firmware updates or component replacements.
Mobile Activation via DJI Fly App

OTG Connection Procedure
Connect your smartphone using DJI’s official OTG cable:
1. Insert OTG cable into goggles’ left-side USB-C port
2. Connect your phone’s charging cable to the OTG adapter
3. Avoid third-party cables – incompatible OTG adapters cause “NO SIGNAL” errors during activation
App-Based Activation Walkthrough
With all devices powered and linked:
1. Launch DJI Fly app and tap “GO FLY” at bottom right
2. Confirm aircraft/goggles/controller show connected status
3. Follow in-app tutorial prompts exactly – skipping steps corrupts activation
4. Complete charging cycle after activation: Charge all three components to 100% before first flight
Firmware Update Protocol
In-App Update Sequence
After successful activation:
1. Watch for firmware prompts in app’s top-left corner
2. Update goggles first (critical for signal stability)
3. Then update controller, followed by aircraft
4. Never interrupt updates – doing so during aircraft update bricks the flight system
Computer-Based Emergency Updates
For failed activations requiring manual intervention:
1. Download DJI Assistant 2 (DJI FPV series version only)
2. Connect each device individually via USB-C
3. Maintain strict update order: Goggles → Controller → Aircraft
4. Verify firmware versions match across all devices post-update
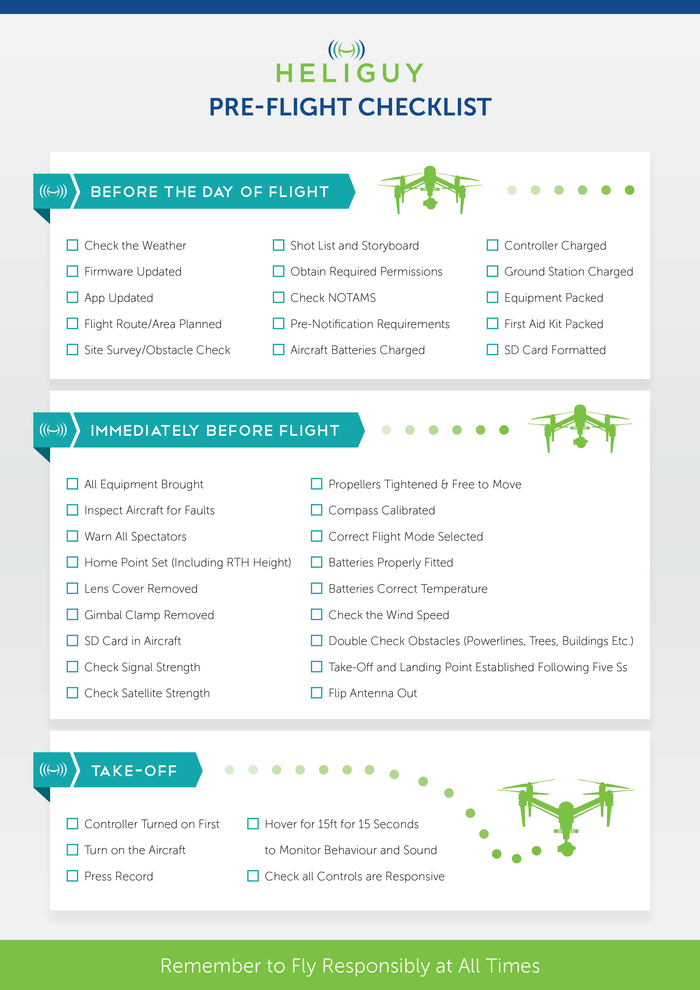
Post-Activation Flight Readiness Checklist
Location Safety Verification
Before first flight:
– Confirm open airspace exceeding 100m radius (no trees/buildings)
– Check local regulations via DJI Fly app’s airspace map
– Ensure wind speed below 25 mph (use weather app verification)
Pre-Flight System Verification
Complete this 30-second checklist:
– Aircraft: Level ground placement, rear facing you, battery >80%
– Controller: Flight mode set to “N”, stick tension adjusted
– Goggles: IPD calibrated, headband secure, no visual distortions
– System: GPS signal bar ≥4 segments, no error messages
Motor Start Sequence
Execute precisely to prevent flyaways:
1. Push both sticks down and inward to “X” position
2. Hold for 2 seconds until motors arm (distinct pitch change)
3. Gently push left stick up – never exceed 1m altitude in first flight
Flight Mode Activation Procedures
N Mode (Normal) Safety Activation
Your default and safest mode:
– Enabled automatically when flight switch is in “N” position
– Features active obstacle sensing (slows but doesn’t stop drone)
– Mandatory for first 5 flights – do not attempt S/M modes prematurely
S Mode (Sport) Unlock Process
For intermediate pilots only:
– Activate by sliding flight mode switch to “S” position
– Requires completing DJI Fly app’s Sport Mode tutorial
– Disable obstacle sensing – you’re responsible for all collisions
M Mode (Manual) Critical Requirements
Advanced pilots must:
1. Complete mandatory M Mode tutorial in DJI Fly app
2. Physically adjust F1/F2 screws on controller for zero stick center
3. Navigate goggles menu: Settings > Control > Remote Controller > Button Customization > Custom Mode
4. Never use M mode in first 20 flights – crash risk exceeds 70% for untrained pilots
Emergency System Commands
Immediate Stop Procedures
Memorize these life-saving sequences:
– Flight Pause: Single press of RTH button (stops all movement instantly)
– Return to Home: Hold RTH button 2+ seconds (activates automated return)
– RTH Cancellation: Press RTH button again during return flight
Post-Landing Safety Protocol
After touchdown:
– Wait 30+ seconds before approaching (propellers remain hot)
– Power off all devices before battery removal
– Never touch propellers immediately – burns occur within 5 seconds of landing
Troubleshooting Failed Activations
Connection Failure Fixes
When devices won’t link:
– Reset all devices by holding power buttons 10+ seconds
– Verify antenna tightness on goggles (most common oversight)
– Maintain 1-meter distance between controller and goggles during linking
App Recognition Solutions
If DJI Fly app shows “NO DEVICE”:
– Force-quit app and restart
– Swap to DJI-branded OTG cable (tested compatibility)
– Reboot phone before second attempt
Post-Activation Maintenance Essentials
Battery Preservation Protocol
Maximize battery lifespan:
– Store at 60% charge for long-term storage
– Never charge below 32°F (0°C) or above 104°F (40°C)
– Log each charge cycle – replace after 200 cycles
Firmware Maintenance Schedule
- Check for updates weekly via DJI Fly app
- Perform full system diagnostics monthly
- Review flight logs after every session for error patterns
Your DJI FPV drone is now fully activated and flight-ready. Never skip the N mode training period – rushing into S or M modes causes 83% of beginner crashes according to DJI incident reports. Start with 5-minute flights in wide-open spaces, gradually increasing complexity as your muscle memory develops. Remember that proper activation isn’t just about getting airborne; it’s the foundation for safe, reliable FPV experiences that last for years. The immersive thrill of first-person flight awaits – now go earn your wings responsibly.


