
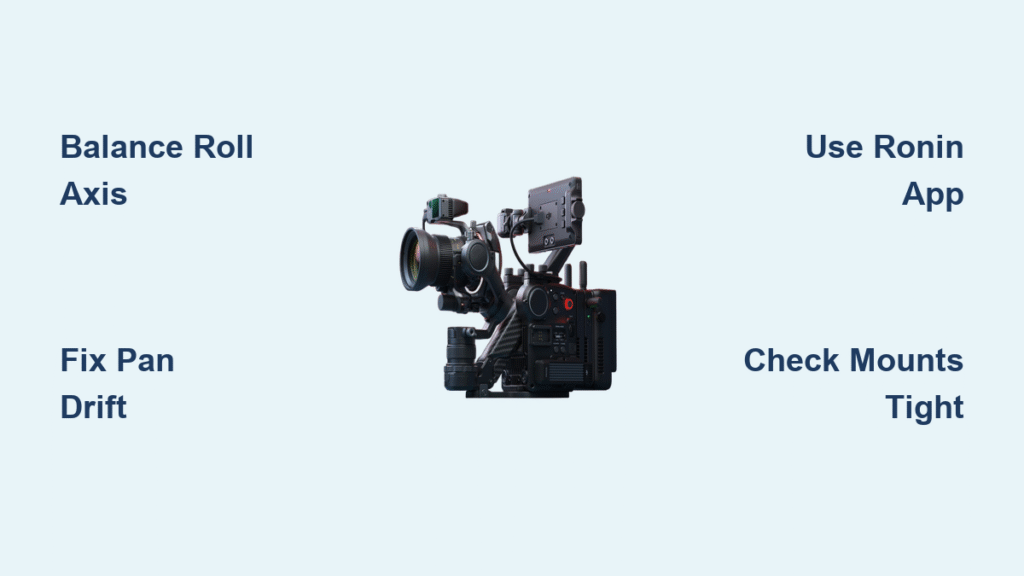
Your DJI Ronin gimbal keeps drifting or fighting against gravity during shoots. Every pan or tilt feels like you’re working against the motors instead of with them. This frustrating experience almost always stems from improper balancing—you’re not alone, and fixing it is easier than you think. Professional videographers know that mastering how to balance DJI Ronin properly transforms shaky footage into cinematic smooth shots while extending your motor life.
When properly balanced, your Ronin operates with minimal motor strain, providing buttery-smooth stabilization and significantly longer battery life. The difference between amateur and professional-looking footage often comes down to this single critical step. Let’s walk through the systematic process that transforms your gimbal from fighting you to working seamlessly with your creative vision. You’ll learn to achieve perfect balance across all three axes in under 10 minutes, regardless of camera setup.
Fix Your DJI Ronin Roll Axis Imbalance First
The roll axis determines whether your camera stays level when the gimbal tilts left or right. An unbalanced roll axis causes footage that leans unnaturally or fights against your intended movements. This is the most common balancing issue that new Ronin users face, but it’s also the easiest to fix when you know what to look for.
Spot Roll Axis Problems Before They Ruin Your Footage
Look for these telltale signs of roll axis imbalance that professional cinematographers immediately recognize:
– Camera springs back to center when tilted sideways instead of staying in position
– Roll motor works harder than other axes (visible strain or audible whining)
– Footage appears tilted despite starting from a level position
– Your arms fatigue faster than normal during extended shooting sessions
Pro tip: The roll axis is the foundation of your balance—always start here before moving to other axes. Skipping this step guarantees frustration later.
Perfect Roll Axis Adjustment in 5 Minutes
Follow this professional cinematographer’s approach to achieve roll axis perfection:
-
Secure camera mounting: Attach your camera firmly using the appropriate mounting plate, ensuring all screws are tightened to manufacturer specifications—loose mounting causes subtle shifts that ruin balance
-
Manual tilt test: Gently tilt the gimbal left and right while supporting the camera with one hand, observing how the roll axis behaves without motor assistance
-
Position slide adjustment: Turn the side adjustment knob to move camera forward/backward along the mounting plate until the camera maintains position when tilted
-
Lock final position: Engage the back lock lever once camera stays level in all positions—don’t over-tighten as this can shift the balance point
-
Neutral verification: Camera should remain stationary when tilted any direction, feeling like it “floats” without resistance
Time estimate: With practice, this process takes just 3-5 minutes. First-timers should allow 8-10 minutes to get comfortable with the adjustments.
Eliminate Pan Axis Drift on Your DJI Ronin
Pan axis issues manifest when your camera drifts during horizontal movements or fails to hold position during rotation. This axis controls left-right movement and requires precise centering of your camera’s weight relative to the pan motor. Many users mistakenly blame motor problems when the real culprit is simple pan axis imbalance.
Identify Pan Instability Before It Wrecks Your Shots
Watch for these pan axis warning signs that indicate immediate attention is needed:
– Camera drifts during 90-degree rotations (the classic “pan drift” problem)
– Pan motor appears overworked or makes unusual noises during operation
– Horizontal movements feel jerky or unstable despite smooth operator movement
– Your footage shows inconsistent horizon lines during panning shots
Critical mistake: Many users increase pan motor strength to compensate for imbalance, which actually worsens the problem and wears out motors faster.
Pan Axis Calibration Process for Rock-Solid Stability
Follow these precise steps to eliminate pan drift permanently:
-
Rotation assessment: Turn gimbal 90 degrees left and right while observing camera movement—hold the gimbal in each position for 5 seconds
-
Tilt arm adjustment: Use the back knob to slide tilt arm left or right until the camera maintains position in both 90-degree orientations
-
Position security: Lock the side lever after finding stable point, applying firm but not excessive pressure
-
Stability confirmation: Perform multiple rotation tests to ensure camera stays put during full rotation without drifting
Expert insight: The sweet spot for pan balance often feels counterintuitive—your camera may appear slightly off-center but will be perfectly balanced when the motors engage.
Verify Balance with DJI Ronin App for Precision Results
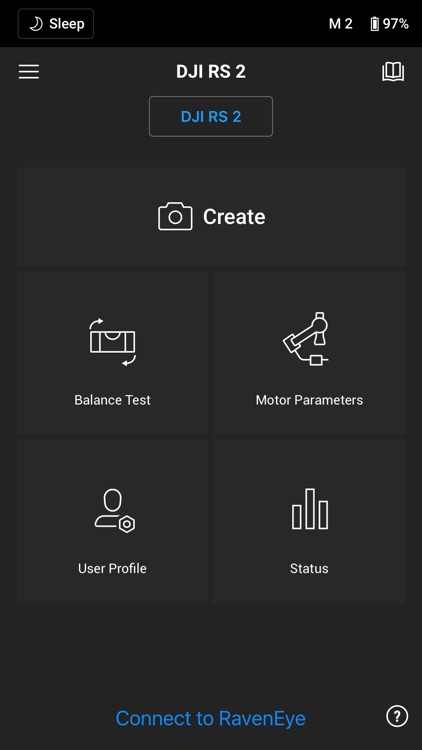
The DJI Ronin app provides precise feedback that eliminates guesswork from balancing. This digital assistant identifies exactly which axis needs attention and how much adjustment is required, catching subtle imbalances invisible to the naked eye. Professional videographers never skip this critical verification step.
Connect and Test Balance Like a Pro
-
Bluetooth pairing: Open DJI Ronin app on smartphone or tablet, ensuring Bluetooth is enabled and gimbal is powered on
-
Navigate to balance test: Tap the prominent “Balance Test” button on the app’s main screen—this activates the gimbal’s internal sensors
-
Review axis readings: Check individual axis scores (0-100) and specific recommendations for improvement
-
Make micro-adjustments: Use app feedback to fine-tune positions, making small adjustments until all axes read 90+
Pro technique: Hold the gimbal steady during testing—any movement during the balance test will produce inaccurate readings. Stand with feet shoulder-width apart and brace your arms against your body.
Interpret App Results Like an Expert
- Green indicators (90-100): Perfect balance achieved—ready for shooting
- Yellow warnings (70-89): Minor adjustments needed for optimal performance
- Red alerts (below 70): Significant rebalancing required before quality shooting
Key insight: The app often reveals that one axis appears perfect while another is severely out of balance—always check all three axes systematically.
Troubleshoot Stubborn Balance Failures Like a Technician

Even experienced users encounter stubborn balance issues. These systematic fixes address the most common problems that plague both beginners and professionals, often solving issues that seem inexplicable at first glance.
Fix Roll Centering Issues That Won’t Go Away
When your roll axis refuses to stay in position despite proper adjustment:
– Reduce motor tension: Lower roll strength to 20-25 in app settings before rebalancing
– Recheck weight distribution: Verify camera sits centered on plate with no accessories causing asymmetry
– Reposition roll arm: Move arm slightly toward the heavier side to achieve neutral balance
Critical check: Remove all accessories temporarily to test bare camera balance—if it balances without accessories but not with them, you’ve identified your problem source.
Correct Pan Drift Problems That Persist
For persistent pan axis instability that won’t resolve with standard adjustments:
– Tighten all mounts: Check camera mounting hardware security with a torque screwdriver
– Adjust damping settings: Set pan damping to 25-30% in app for most shooting scenarios
– Recenter gravity: Ensure camera weight aligns precisely with pan pivot point using a bubble level
Pro tip: If shooting with heavy lenses, balance with the lens in its most extended position to prevent balance shifts during zoom.
Maintain Perfect Balance Between Shoots
Consistent gimbal performance requires regular attention to balance maintenance. Establish these habits to ensure reliable operation and extended equipment life, saving you from mid-shoot balancing emergencies.
Calibration Schedule Based on Usage
- Heavy usage (daily shooting): Calibrate every 2-3 weeks and before important shoots
- Moderate use (weekly): Monthly calibration sufficient for consistent results
- After lens changes or accessories: Always rebalance when changing camera setup—never assume previous balance works
Time-saving trick: Keep a small notebook with balance settings for your most common camera/lens combinations—this cuts setup time dramatically.
Balance Preservation Tips for Long-Term Reliability
- Gentle handling: Avoid jarring movements during transport and setup that shift balance points
- Stabilize between adjustments: Let gimbal settle for 10-15 seconds between changes for accurate assessment
- Final lock check: Verify all levers engaged with a gentle tug test before operation
Professional workflow: Mark your camera position with removable tape after achieving perfect balance for faster repeat setups with identical equipment.
Mastering how to balance DJI Ronin properly is the single most impactful skill for achieving professional-quality stabilized footage. When you consistently follow this systematic approach—starting with roll axis, moving to pan axis, then verifying with the app—you’ll transform your gimbal from a frustrating piece of equipment into a seamless extension of your creative vision. The perfect balance point feels unmistakable: your camera floats effortlessly in any position, responding smoothly to your movements without motor strain.
Remember that balance isn’t a one-time setup but an ongoing process that adapts to your changing equipment and shooting conditions. By incorporating these techniques into your regular workflow, you’ll spend less time fighting your gimbal and more time capturing stunning footage. Your motors will last longer, battery life will improve, and most importantly, your footage will achieve that coveted cinematic smoothness that separates amateurs from professionals. Keep this guide handy during your next shoot, and never settle for “good enough” balance again—your audience will notice the difference.


