
Your DJI drone suddenly veers left without input. The horizon tilts like a carnival ride in your live feed. Red “IMU ERROR” banners flash urgently in the app. These aren’t random malfunctions—they’re critical warnings that your drone’s sensors need immediate calibration. Ignoring these signs risks crashes, lost footage, and expensive repairs. Proper sensor alignment transforms an unstable aircraft into a precision instrument that locks position like it’s nailed to the sky. This guide delivers exact calibration steps used by professional pilots to eliminate drift, correct gimbal tilt, and restore compass accuracy—no guesswork required. You’ll learn when to calibrate, avoid common pitfalls, and validate results with a 60-second flight test.
Drone calibration isn’t optional maintenance—it’s essential for flight safety. DJI’s IMU, compass, and vision systems constantly reference real-world data to maintain stability. When these sensors drift out of alignment (from temperature changes, impacts, or magnetic interference), your drone loses spatial awareness. The FAA reports 32% of recreational drone incidents stem from uncalibrated sensors. Whether you fly a Mini 3 Pro or Mavic 3, mastering these procedures prevents mid-air surprises and protects your investment. Let’s dive into the exact protocols that restore your DJI drone’s factory precision.
Diagnose Critical Calibration Failure Signs
Spot sensor issues before they cause crashes with these real-world indicators. Persistent sideways drift during stationary hover—exceeding 30 cm in 10 seconds—signals IMU misalignment. Watch for gimbal horizon tilt >2° where the camera view appears unnaturally slanted. Red compass error banners in DJI Fly or GO 4 apps demand immediate action; ignoring them risks flyaways near metal structures. After any propeller strike or hard landing, recalibrate even if no errors appear—the impact jolts micro-sensors out of position. Traveling over 300 km from your last flight location requires compass recalibration due to shifting magnetic fields. Finally, 30+ days in storage causes sensor drift—always calibrate before the first flight of the season.
Why First Flights Demand Mandatory Calibration
New drones ship with factory-calibrated sensors, but transit vibrations and temperature swings during shipping compromise accuracy. Skipping initial calibration risks erratic behavior during your maiden flight. Perform full IMU and compass calibration outdoors on level ground before liftoff—this establishes your drone’s baseline spatial awareness. Firmware updates also reset sensor parameters; always recalibrate after installing new DJI Fly or GO 4 versions. Treat this like pre-flight checks for manned aircraft: non-negotiable for safety.
Prepare for Calibration Success
Avoid wasted attempts with this critical setup checklist. Start with a battery charged above 50%—low power triggers “IMU warming up” delays. Update your DJI Fly app (Mavic Air 2+) or DJI GO 4 (older models) to the latest version; outdated apps cause calibration menu mismatches. For IMU and gimbal work, use a level wooden or plastic table—never granite countertops or steel benches that interfere with magnetometers. Compass calibration requires outdoor space 10+ meters from cars, buildings, or power lines; even rebar in concrete sidewalks skews readings. Crucially, remove all metal objects from your person—steel belt buckles, smartwatches, and phone cases with magnets sabotage compass accuracy.
Temperature Safety Thresholds You Can’t Ignore
Battery temperature between 5°C–45°C (41°F–113°F) is mandatory—colder batteries won’t initiate calibration, while overheated units display “Temperature Too High” errors. If flying in winter, warm batteries indoors for 20 minutes before calibration. After summer flights, cool the drone in shade for 15 minutes; never calibrate on hot asphalt. Verify temperatures in the app’s battery settings—proceed only when readings fall within safe limits. Skipping this step wastes 30+ minutes on failed attempts.
Fix DJI IMU Drift in 6 Precise Positions
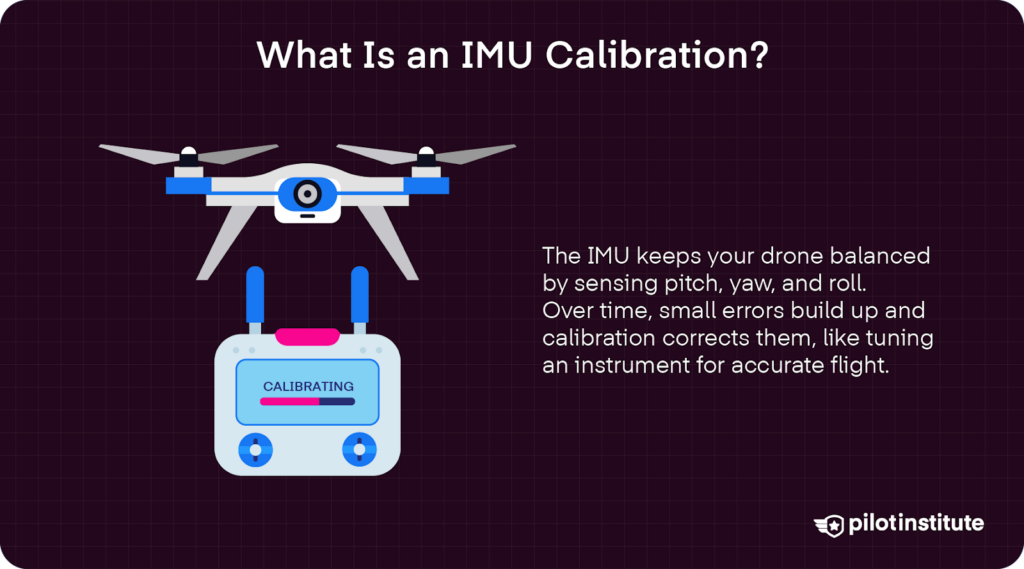
Follow these exact steps when your drone drifts or lists mid-flight. In DJI Fly, tap camera view → “…” → “Safety” → “Calibrate IMU” (GO 4: “Aircraft” tab → “Sensors”). The app guides a six-position sequence—hold each pose motionless until the green checkmark appears (2-5 seconds per position):
- Level position: Drone flat on belly, arms extended
- Left roll: Rotate 90° counterclockwise onto left side
- Right roll: Rotate 90° clockwise onto right side
- Nose down: Pitch forward 90° onto front arms
- Nose up: Pitch backward 90° onto rear arms
- Inverted: Flip completely upside down
Critical technique: Place hands only on the battery—not the frame—to prevent micro-vibrations. If “Excessive Movement” appears, set the drone on a folded towel for vibration damping. Complete the sequence within 90 seconds; delays restart the process. Total time: 30 seconds. For persistent “IMU Data Abnormal” errors after three attempts, power cycle the drone and controller before retrying.
Compass Calibration Without Outdoor Failures
Navigate same menu path → “Calibrate Compass” and move to your pre-vetted outdoor location. The two-phase rotation requires smooth 45° per second motion:
- Horizontal phase: Hold drone level with rear LEDs facing you. Rotate 360° clockwise until rear LEDs turn solid green
- Vertical phase: Tilt nose down 90°, then rotate 360° clockwise until LEDs stabilize green
Avoid these field mistakes: Jerky rotations (causes 78% of failures), standing near underground pipes, or calibrating over basalt/granite. If the app shows “Compass Weak,” walk 50 meters and retry—urban environments often require multiple locations. Always calibrate compass after IMU, as magnetometer data references IMU alignment.
Correct Gimbal Tilt & Horizon Errors
Fix tilted footage instantly with these gimbal protocols. For automatic correction: tap “…” → “Gimbal” → “Auto”. The gimbal performs a full-axis sweep to reset zero points—required after crashes or when horizon tilt exceeds 2°. For manual fine-tuning: “Gimbal” → “Manual Adjust”, then slide the roll bar (-5° to +5°) while watching live feed until the horizon straightens. Tap “Save”—settings persist until next auto-calibration. Never force gimbal movement during calibration; resistance indicates physical damage requiring professional repair.
Vision System Calibration for Obstacle Avoidance

Applies to Mavic 3, Air 2S, Mini 3 Pro, and Phantom 4 series when “Vision System Error” appears or hovering becomes unstable. Connect drone via USB-C to PC/Mac, launch DJI Assistant 2 (Consumer), then:
- Select “Calibrate Vision System”
- Print the official A4 calibration pattern (matte paper only)
- Place under 1000-3000 lux diffuse lighting (no direct sun glare)
- Position drone so pattern fills red boxes in six orientations (front/back/left/right/top/bottom)
Critical tip: Hold the drone 30 cm above the pattern—too close triggers “Pattern Too Large” errors. Complete all positions within 5 minutes to prevent lighting changes from disrupting calibration. Post-calibration, verify by hovering indoors at 1.5m; the app’s obstacle map should show solid depth points without red “X” blind spots.
Recalibrate DJI Remote Controller Sticks
Fix unresponsive controls with this 20-second fix. Connect mobile device to RC, open DJI Fly → Profile → “RC” → “Calibration”. Move both sticks in slow circles covering full range for 20 seconds. Follow prompts to exercise gimbal dial and mode switch through their full travel. Tap “Finish”—stick drift should vanish immediately. For integrated display remotes (RC-N1), add “Wheel Calibration”: rotate the wheel from minimum to maximum position three times. Recalibrate controllers every 6 months or when stick inputs feel sticky or delayed.
Prevent Future Calibration Emergencies
Schedule maintenance like a pro with this battle-tested timeline:
– IMU: Calibrate every 3 months or 50 flights (immediately after any crash)
– Compass: Monthly or 30 flights (mandatory when traveling >300 km)
– Gimbal: Every 6 months or 100 flights (or when horizon tilts >2°)
– Vision system: Annually or after physical impacts
– RC sticks: Every 6 months or when drift appears
Pro tip: Log calibration dates in your flight app notes. After winter storage, perform full IMU/compass calibration before installing fresh batteries—cold sensors need warming time. Always carry a non-magnetic calibration mat (folded cardboard works) for field recalibrations.
Validate Results with 60-Second Flight Test
Never skip this critical verification:
1. Hover manually at eye level for 60 seconds—drift must stay within 30 cm
2. Test full stick deflection while maintaining altitude (no oscillations)
3. Enable Tripod mode, yaw slowly—gimbal horizon must stay level
4. Fly toward obstacle at 1 m/s—vision system should brake at 2 meters
If drift exceeds 30 cm, repeat IMU calibration. Tilted horizon during yaw indicates gimbal recalibration is needed. Failed obstacle braking requires vision system redo. Perfect results? Your DJI drone now flies with factory-fresh precision.
Proper DJI calibration isn’t technical busywork—it’s the difference between shaky footage and cinematic gold, between a near-miss and a totaled drone. By following these exact procedures, you transform sensor errors from flight-ending threats into 30-second fixes. Schedule monthly compass checks before weekend shoots, calibrate immediately after travel, and always validate with the 60-second test. Your drone’s stability, safety, and creative potential depend on these precise alignments. Start applying these protocols today, and you’ll experience why professional pilots treat calibration as non-negotiable as pre-flight checks. The sky’s no longer the limit—it’s your perfectly calibrated playground.


