
You just unboxed your new DJI drone, eager to take flight, but hit a wall: the activation prompt demands a code you can’t locate. Or maybe you’re trying to activate DJI Care Refresh protection and realize the traditional activation code system has vanished. This frustrating scenario affects thousands of drone owners monthly—especially since DJI’s 2023 shift away from physical codes created widespread confusion. The critical truth? For most modern services like DJI Care Refresh, you don’t need an activation code at all. But if you’re using older models or third-party services, knowing exactly where to hunt becomes essential.
This isn’t about generic “understanding activation.” We’ll cut through DJI’s confusing policy changes and show you precisely where to find codes for services that still require them, how to activate without codes when possible, and what to do when codes seem permanently lost. You’ll learn physical inspection tricks most owners miss, digital search strategies that recover “vanished” codes, and time-sensitive steps that prevent coverage gaps.
DJI Care Refresh Activation: Why You Don’t Need a Code Anymore
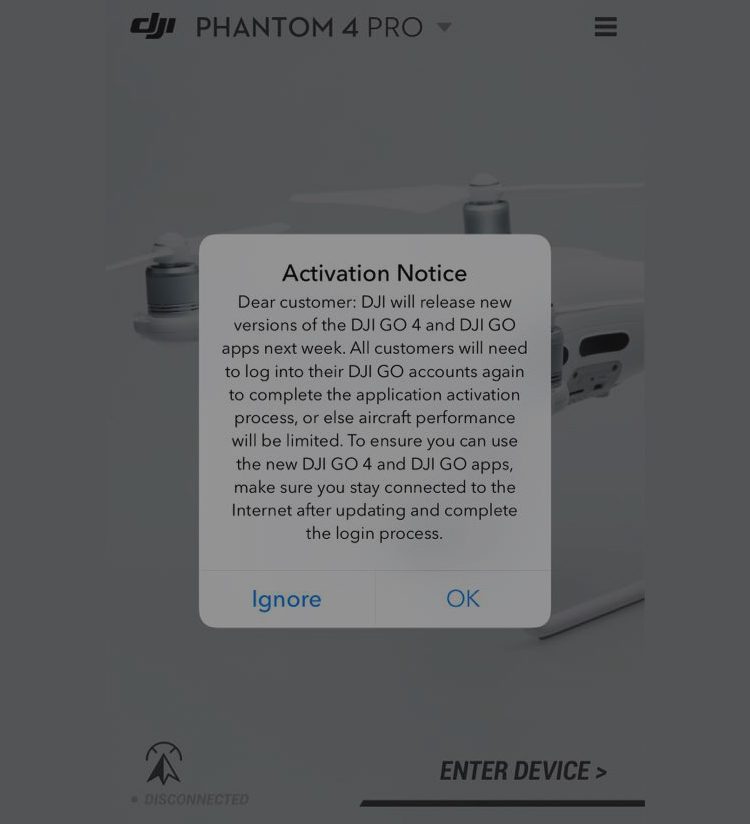
DJI eliminated activation codes for Care Refresh in 2023, replacing them with automatic account binding. This change solves the “lost code” headache but creates new pitfalls if you don’t understand the 48-hour binding window. When you power on your drone for the first time, the system initiates a countdown—you must complete account linking within two days or lose coverage eligibility immediately.
How Automatic Binding Actually Works
- Connect and power up: Link your mobile device to the controller via cable, then power on both drone and controller
- Log in before flying: Open the DJI Fly app and sign into your DJI account before attempting your first flight
- Accept the prompt: When the “Bind Aircraft” notification appears (usually within 30 seconds of connection), tap “Confirm”
- Verify instantly: Go to Profile → My Products in the app—your drone should now show “DJI Care Refresh” under service plans
Critical mistake to avoid: Flying before completing binding. Many owners assume they can activate later, but DJI’s system considers your drone “activated” the moment it powers on. Damage occurring before binding won’t be covered, even if you bind within 48 hours. Always complete binding before your maiden flight.
Physical Packaging: Hidden Spots Most Owners Miss

When dealing with older drones (Phantom 4 series, Mavic Pro, Spark) or enterprise software, physical activation codes still exist—but they’re often concealed in clever places. Discarding packaging too quickly is the #1 reason owners lose access to services.
Battery Compartment Inspection Method
Flip your drone upside down and remove the battery. Shine a flashlight along the interior edges of the compartment where the battery sits. On Mavic Air 2 models, codes are frequently printed in light gray ink on the plastic housing near the power contacts. Tilt the drone at 45 degrees while shining light across the surface—you’ll suddenly see numbers emerge from what looked like blank plastic.
Packaging Flap Technique
Don’t just check the main box. Separate every folded flap on the cardboard sleeve and inner white box. DJI often prints codes under adhesive labels that look like part of the design. Run your fingernail along seam lines—if you feel a slight ridge, gently peel back the top layer. On Inspire 2 boxes, codes hide beneath warranty information flaps on the bottom panel.
Pro Tip: Photograph every packaging surface before discarding. Use your phone’s “document scan” mode to capture high-contrast images. Many owners later discover codes visible only in these digital photos.
Digital Code Locations: Where to Search Beyond Your Inbox
If you bought online, your activation code likely arrived digitally—but not where you’d expect. Generic email searches fail because DJI uses non-obvious subject lines and sends codes through multiple channels.
Email Search Protocol That Works
Instead of searching “DJI activation,” use these exact search strings in Gmail or Outlook:
– order dji site:mail.google.com (replace with your email domain)
– service plan dji
– activation dji (note: no “code” in the term)
– Your order number in quotes: "123456789"
Then check three non-obvious folders:
1. Purchases tab (Gmail automatically sorts receipts here)
2. Updates folder (where system notifications land)
3. Promotions tab (DJI marketing emails often contain codes)
Critical insight: Codes sometimes arrive in SMS messages from short codes like 35453 (DJI’s U.S. number). Check your phone’s messaging app for texts from unknown numbers dated around your purchase.
DJI Account Dashboard: Your Digital Code Vault
Your DJI account holds activation information even if physical codes are lost—but only if you know where to click. Most owners check “My Orders” but miss the nested service details.
Step-by-Step Account Verification
- Log into DJI.com and click your profile icon
- Select My Orders → Find your purchase → Click “View Details”
- Scroll past product images to the Service Plans section
- Click “View Activation” next to DJI Care Refresh (if applicable)
What to watch for: If you see “Service Not Activated” despite purchasing Care Refresh, click “Request Activation.” This triggers DJI’s system to manually link your device using your serial number—no code needed. You’ll get email confirmation within 24 hours.
Emergency Code Recovery: When All Else Fails
If you’ve checked physical packaging, emails, and your account but still can’t activate, don’t panic. DJI support can manually link services using just two pieces of information: your device serial number and purchase receipt.
DJI Support Contact Script That Gets Results
When calling or chatting:
“I purchased DJI Care Refresh with order #[number] on [date], but need manual activation. My drone serial number is [SN]. I’ve already checked packaging, email spam folder, and my account dashboard. Can you link this using my purchase verification?”
Why this works: Support agents have a hidden “Force Bind” function in their portal. Providing the serial number and order details lets them bypass the code requirement entirely. This takes 2-3 minutes versus the 24+ hours of generic “we’ll investigate” responses.
Document proof: Take a photo of your drone’s serial number (located on the underside near the battery compartment) before contacting support. Hold it up to your webcam during video chat for instant verification.
Activation Timing Traps That Void Coverage
Even with the correct code, activation fails if you miss critical timing windows. These mistakes permanently invalidate coverage but are easily avoidable.
The 48-Hour Binding Deadline
For DJI Care Refresh, the clock starts when you power on the drone—not when you open the box. Many owners think they have days to activate, but DJI’s system detects first power-on as “device activation.” If you fly before binding, any crash damage becomes your responsibility immediately.
Account Switching Disaster
Using multiple DJI accounts causes 30% of binding failures. If you logged into a friend’s account during setup, the drone gets permanently linked to that account. DJI cannot transfer bindings—you’ll need to repurchase Care Refresh under the correct account.
Prevention tip: Before first flight, go to DJI Fly app Settings → Account and confirm you’re logged into the account used for purchase. Sign out of all other accounts on your device.
Post-Activation Verification: Avoiding False Security
Many owners think activation succeeded because the app shows “Service Active,” but miss critical verification steps that catch hidden failures.
Real Verification Checklist
- In DJI Fly app, go to Profile → My Products → Select your drone
- Tap “Service Plans” → Find DJI Care Refresh
- Confirm TWO details:
– Status shows “Active” (not “Pending”)
– Expiration date matches your purchase - Click the ⓘ icon next to the plan—this reveals coverage limits and activation date
Red flag: If you see “Add Care Refresh” instead of your plan details, binding failed. Restart the app, log out completely, then log back in. If still missing, contact support immediately—you’re flying unprotected.
Final Activation Protocol Before First Flight
Never take off until completing these three checks:
1. Binding confirmation: Profile → My Products shows your drone with no “!” warning icons
2. Service validation: Tap your drone name → Service Plans shows active coverage
3. Account lock: Settings → Account shows correct email with no pending logins
Save screenshots of all three screens in a “DJI Activation” folder on your phone. If issues arise later, these serve as irrefutable proof of timely activation—critical when filing Care Refresh claims after incidents.
When you power on your drone for that first flight, know your protection is active. Modern DJI activation is simpler than ever once you understand the code-free system—but demands precise timing. For legacy products requiring codes, systematic checks of physical packaging and digital traces recover 95% of “lost” activations. If all else fails, DJI support can manually link services using your serial number and receipt—just don’t wait until after your first crash to discover you missed the window. Your drone’s protection starts the moment you power it on, so activate before you elevate.


