
Your RC car’s steering suddenly feels loose, pulls to one side, or won’t respond properly—turning what should be an exciting run into frustrating downtime. When your RC car steering fails, you lose control and precision, making it impossible to navigate corners or maintain consistent speed. Most steering issues have straightforward solutions you can diagnose and repair with basic tools, getting you back to driving in under 30 minutes. This guide reveals the exact steps to identify and fix every common RC car steering problem, from simple adjustments to component replacements.
Understanding how your steering system works is crucial before attempting repairs. The interconnected components—including steering servo, servo saver, tie rods, steering arms, knuckles, and receiver—must work in perfect harmony for precise control. When any element fails or becomes misaligned, steering performance degrades in specific, identifiable ways. By following this systematic approach, you’ll pinpoint the exact cause of your steering issues and apply the correct fix without wasting time on unnecessary part replacements.
Diagnose RC Steering Issues Before Replacing Parts

Identify Steering Problem Type Through Observation
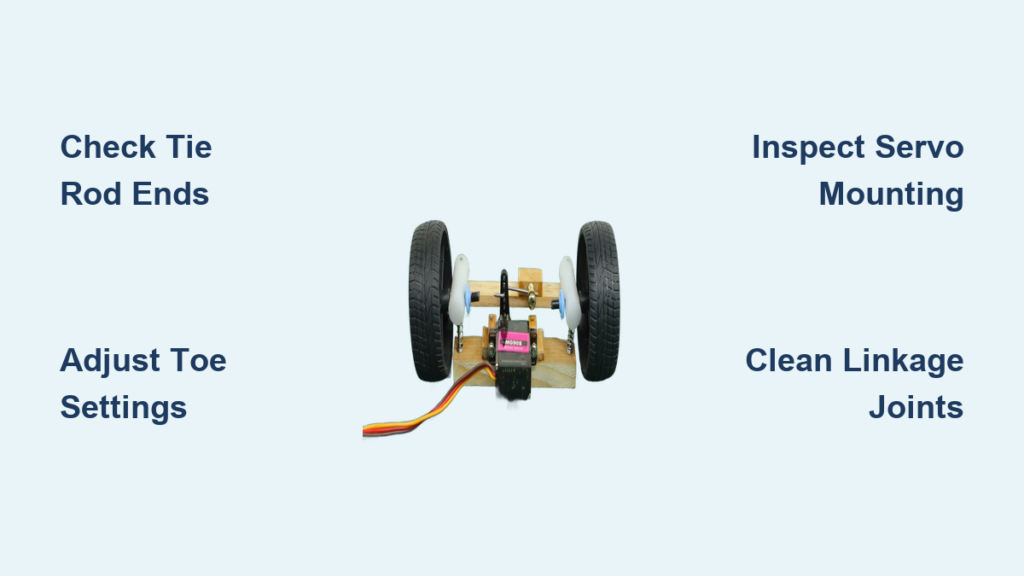
Start troubleshooting by elevating your RC car so the front wheels spin freely. Move the steering wheel through its full range while watching each component for binding, catching, or irregular motion. Pay close attention to where play occurs before the wheels actually turn—this reveals whether the problem lies in the servo, servo saver, linkage joints, or steering knuckles. If you notice 1-2mm of movement before wheel response, your issue is likely worn tie rod ends or loose connections.
Test electronic components separately to rule out receiver or transmitter issues. Connect your steering servo directly to a receiver and operate it through the transmitter. Watch for smooth, quiet operation throughout the range. Jerky movement, grinding sounds, or failure to respond to small inputs indicates servo problems. If the servo operates smoothly when tested directly but exhibits issues when connected to the steering linkage, the problem lies in the mechanical components rather than electronics.
Isolate Mechanical vs. Electronic Failures
Check all fastener tightness while your vehicle is elevated. Steering components experience significant forces during operation, and even thread-locked screws can loosen over time. Verify that steering servo mounting screws are tight, that the servo horn is securely fastened to the output shaft, and that all linkage connections are properly secured. Many steering problems resolve simply by tightening loose hardware—saving you from unnecessary part replacements.
Monitor servo temperature after extended operation—an overheating servo suggests internal damage or excessive friction in the steering system. If your steering servo feels unusually hot to the touch after just a few minutes of operation, it’s either failing internally or working too hard against binding components. This simple temperature check helps determine whether to replace the servo or investigate mechanical interference first.
Fix Common RC Car Steering Failures Immediately
Eliminate Loose or Sloppy Steering in Minutes
Loose steering creates excessive play in the steering wheel before any wheel movement occurs. To diagnose the exact source of slop, disconnect the servo horn from the servo saver and wiggle each connection point by hand. Any visible movement at the joints indicates worn components requiring replacement. Most commonly, you’ll find excessive play at the tie rod ends or where the tie rods connect to the steering knuckles.
Replace worn tie rod ends by disconnecting the rod from both the steering arm and servo saver, then unthreading the worn end. Measure the old rod length before removal to establish a starting point for toe adjustment. When installing new tie rod ends, ensure the rod is threaded evenly into both ends to maintain proper alignment. After installation, adjust tie rod length to achieve proper toe-in (typically 2-3mm for most RC cars), then secure jam nuts against the rod ends.
Correct Steering Pull to One Side Instantly
When your RC car consistently steers to one side without driver input, always check tire pressure first—this simple fix eliminates unnecessary component inspection. Uneven tire pressure between front tires creates measurable steering pull, especially on high-traction surfaces. Use a digital tire pressure gauge to verify both tires have identical pressure according to your vehicle’s specifications.
If tire pressure is equal, measure toe settings using a toe board or by sighting along the wheel rims. Toe misalignment ranks as the most common cause of steering pull. Adjust tie rod lengths equally on both sides to achieve proper toe-in (1-3mm for touring cars, 0-2mm for buggies). If the vehicle still pulls after adjustment, inspect for bent steering arms or tie rods that require replacement rather than simple adjustment.
Resolve Binding or Stiff Steering Quickly
Steering that requires excessive force to turn or binds at certain positions indicates interference in the steering linkage. Begin by inspecting your entire steering linkage for debris, bent components, or signs of damage. Pay special attention to ball joints and pivot points where dirt and debris accumulate, causing binding. Clean all exposed linkages with a soft brush and isopropyl alcohol to remove contaminants.
If cleaning doesn’t resolve the issue, check for proper clearance throughout the steering range. Sometimes suspension components interfere with steering linkage at full lock. Adjust suspension geometry or modify clearance points as needed. If the binding occurs within the servo itself, replace worn servo gears or install a higher torque unit capable of overcoming the resistance in your steering system.
Replace Critical Steering Components Properly
Install New Steering Servo Without Mistakes
When replacing a steering servo, select a unit with appropriate torque rating for your application. Standard RC cars typically require 3-8kg-cm torque, while high-performance models may need 10kg-cm or more. Ensure the new servo is mounted with all rubber grommets and washers in their original positions to provide vibration isolation—this prevents premature failure from road shock.
After installation, test steering operation before reassembling your vehicle. Verify that the servo horn clears all components throughout its range and that no binding occurs. Adjust transmitter sub-trim and endpoints to achieve proper centering and throw range. A properly calibrated servo should return precisely to center when input is removed—any consistent offset indicates further adjustment is needed.
Replace Servo Saver and Tie Rod Ends Correctly
Replacing a servo saver typically requires removing the servo horn, which may be press-fit or retained by a screw. Note the orientation of any alignment marks before disassembly. When installing the new servo saver, verify that it engages properly with the steering linkage and that all retaining hardware is properly tightened. Competitive applications often benefit from aluminum servo savers that provide more consistent performance while still protecting your servo.
For tie rod end replacement, measure the old rod length before removal to establish a starting point for toe adjustment. Many tie rods use left-hand threading on one end and right-hand threading on the other—verify which end connects to which component before final assembly. After installation, adjust tie rod length to achieve proper toe-in, then secure jam nuts against the rod ends to prevent loosening during operation.
Prevent Future Steering Problems Proactively

Establish Effective Inspection Routine
Create a regular inspection schedule based on usage frequency. For vehicles used weekly, inspect steering components before each run session. Monthly inspections suffice for occasional users. Your inspection should include checking for loose hardware, measuring play at all linkage joints, inspecting boot condition, and verifying smooth operation throughout the steering range.
Pay increased attention to steering components after any crash or impact, even if no immediate problems are apparent. Impact forces can bend components slightly, causing accelerated wear or handling changes that develop over time. Replace any components showing signs of damage rather than risking failure during critical moments—this small investment prevents bigger problems later.
Protect Components from Premature Wear
Install protective boots on all exposed linkages if not factory-equipped. Boot integrity is crucial for longevity—even small tears allow debris entry that dramatically accelerates wear. Replace boots at the first sign of damage, and inspect boot condition during every maintenance session. Competitive racers often replace boots proactively rather than waiting for visible damage.
Keep steering components clean and properly lubricated using silicone-based lubricants that resist contamination better than petroleum-based products. Apply lubricant sparingly at pivot points and ball joints, then wipe away excess to maintain clean operation. Over-lubrication attracts dirt and debris, actually accelerating wear rather than preventing it.
Essential Tools for RC Car Steering Repair
Successful steering repairs require the right tools: metric hex wrenches (1.5mm to 5mm), needle-nose pliers, and a servo tester for independent servo testing. Maintain inventory of common wear items including tie rod ends, a replacement servo saver, and spare servo mounting hardware to minimize downtime. High-performance applications benefit from aluminum servo savers, steel tie rod ends, and high-torque servos for superior response and durability.
For precise alignment adjustments, use a toe board to measure and set proper toe-in. Each full turn of a tie rod end typically changes toe by approximately 1-2mm—small adjustments make significant differences in handling. Verify that steering throw remains equal in both directions after adjustment for predictable handling characteristics during cornering.
Final Note: When you know how to fix RC car steering problems systematically, you transform frustrating downtime into quick repairs that keep you driving. By following these diagnostic steps and repair procedures, you’ll maintain precise steering control for optimal performance. Remember to establish a regular inspection routine and replace components at the first sign of wear—preventing small issues from becoming major failures. With the right tools and knowledge, you’ll spend less time troubleshooting and more time enjoying your RC car exactly as it was meant to perform.


