
That first-person view through your DJI FPV goggles transforms you from a drone operator into a virtual pilot, placing you right in the cockpit of your aircraft. But before you’re weaving through trees at breakneck speeds, you need to master the fundamentals of how to fly DJI FPV drone safely and effectively. Many beginners rush into high-speed flights only to crash within minutes, but with proper preparation, your first flight can be smooth and successful.
This guide cuts through the confusion to deliver exactly what you need to know to get airborne confidently. You’ll learn the precise setup sequence, activation process, and flight techniques that separate novice pilots from those who keep their expensive gear intact through the learning curve.
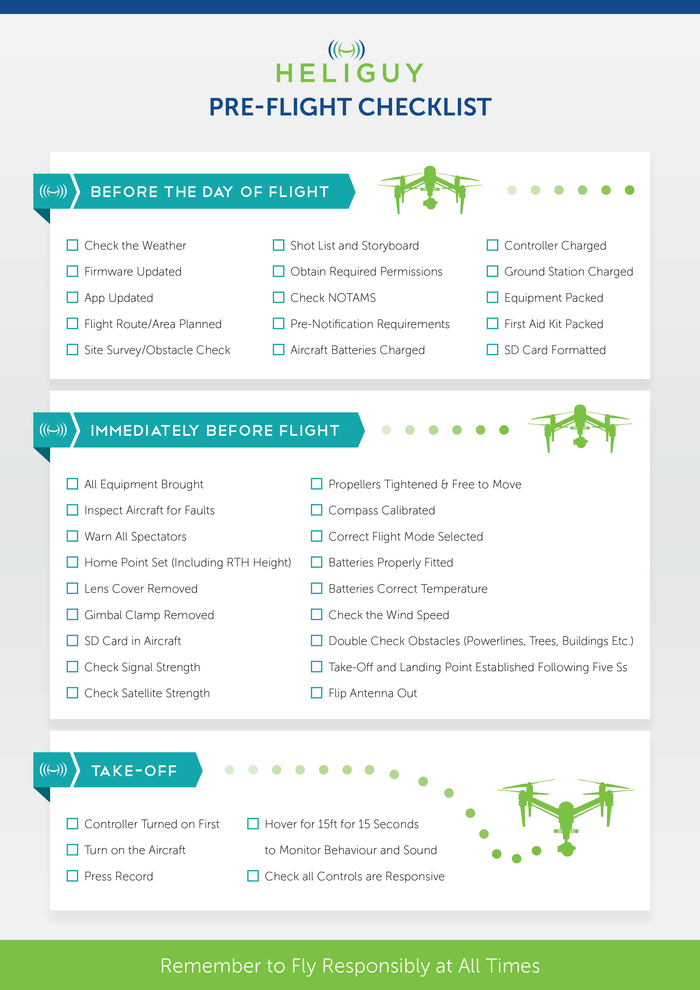
Essential Pre-Flight Setup Checklist
Install Memory Card and Remove Safety Covers
Before powering up your DJI FPV drone, open the microSD card compartment on the aircraft body and insert a compatible card—this captures your thrilling flight footage in high definition. Next, carefully remove the protective gimbal cover; this plastic shield must come off completely or you’ll damage your camera during flight. Many beginners overlook this step, only to wonder why their video looks distorted during that first exhilarating flight.
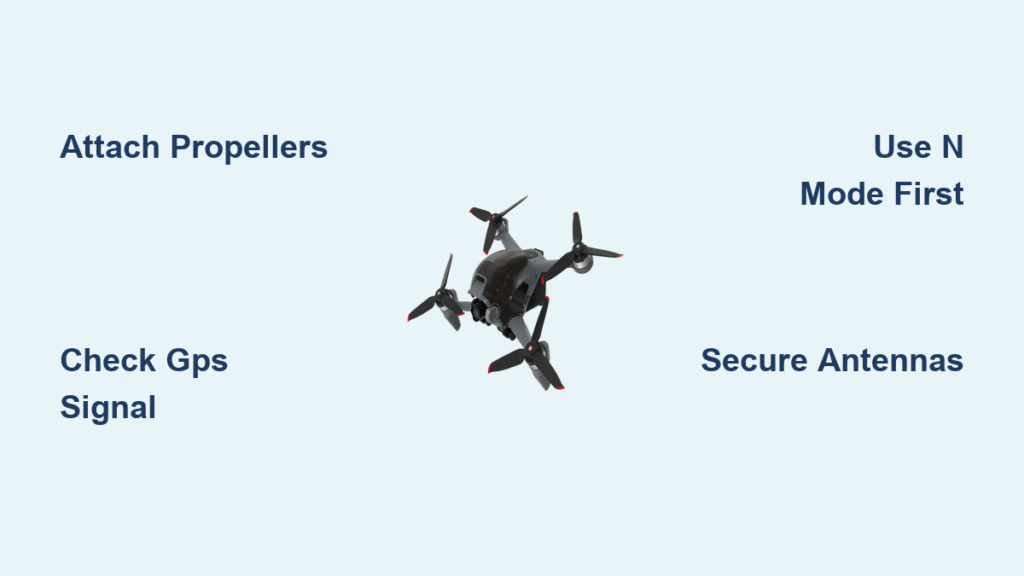
Attach Propellers with Correct Orientation
Each propeller has specific motor compatibility markings—matching these prevents catastrophic failures mid-flight. Align the white dot on the propeller with the white dot on the motor, press down firmly, then rotate clockwise until secure. Your DJI FPV drone won’t arm motors if propellers aren’t properly attached, so always double-check this critical connection before attempting takeoff. Incorrect installation is responsible for nearly 30% of beginner crashes according to DJI’s support data.
Secure Flight Battery with Audible Confirmation
Slide your intelligent flight battery into the rear compartment until you hear a distinct “click”—this confirms proper seating. The battery should sit perfectly flush with no visible gaps. A loose battery during flight guarantees an immediate crash, so develop the habit of physically wiggling the battery to verify security. Always check this connection after every landing, as vibration can sometimes loosen the fit during flight.
Goggles Configuration for Clear Vision

Antenna Positioning for Stable Video Feed
Your DJI FPV Goggles V2 ship with four removable antennas that must be hand-tightened (not over-tightened) for optimal signal strength. These antennas directly impact your video feed quality—loose connections cause pixelation or complete signal loss during critical flight moments. Before each flight, gently wiggle each antenna to confirm they’re secure; damaged or loose antennas are the most common cause of video issues for beginners.
IPD Adjustment for Single-Image Clarity
Use the IPD slider on the bottom of your goggles to match your eye spacing—move it left or right until the display appears as one sharp image, not doubled. If you wear prescription glasses, DJI offers corrective lenses that snap into place for crystal-clear viewing. Proper IPD adjustment reduces eye strain during longer flights and improves your ability to judge distances accurately—a critical skill when learning how to fly DJI FPV drone at speed.
Remote Controller Setup for Responsive Control

Flight Mode Selection for Safe First Flights
The left-side switch toggles between three critical flight modes: N Mode (Beginner), S Mode (Sport), and M Mode (Manual). For your first 10-15 flights, keep this switch firmly in N Mode position—this activates obstacle detection and limits speed to manageable levels. Many beginners jump straight to S Mode, only to crash within minutes when the drone responds more aggressively than expected. N Mode’s safety features give you breathing room to develop muscle memory before advancing.
Emergency Button Location Practice
Locate the red Flight Pause/RTH button with your thumb before takeoff—it’s your panic button when disorientation strikes. Press once to stop and hover immediately; hold for two seconds to initiate automatic return-to-home. During initial flights, consciously practice moving your thumb to this button without looking—you’ll need this instinctive reaction when flying at speed. This single button has saved countless DJI FPV drones from tree collisions and water landings.
Activation Process That Actually Works
Battery Activation Sequence
Before first use, connect your flight battery to the charger for a minimum of 60 seconds—this completes the internal activation sequence. The charger LED turns solid green when activation is complete. Skipping this step is the #1 reason new pilots can’t get their drone to power on properly, so don’t rush past this critical initialization phase.
Device Linking Without Headaches
Follow this exact sequence to avoid connection issues:
1. Power on aircraft (press once, then hold power button)
2. Power on goggles using same sequence
3. Activate remote controller
4. Connect OTG cable from goggles to your phone
5. Open DJI Fly app and follow activation prompts
The devices link automatically, but ensure all three show solid connection indicators before proceeding. If connection fails, power cycle all devices and try again—forcing the connection usually creates more problems.
Critical Pre-Flight Safety Steps
GPS Signal Verification Before Takeoff
After powering on all devices, wait for the goggles to display “GPS Signal Strong” in green text—this typically takes 30-60 seconds in open areas. Weak GPS means unstable hovering and potential flyaways. Never attempt takeoff with fewer than 10 satellites detected; the number appears in your goggles display. This step separates responsible pilots from those who lose drones to flyaways.
Proper Takeoff Positioning Technique
Position your drone on level ground with the rear (red lights) facing you—the front should point away from your body. Simultaneously push both control sticks down and inward to start motors, then gently push the left stick up to lift off. Begin with short 3-4 foot hover sessions to build confidence before attempting directional flight. Most beginner crashes happen within the first 30 seconds of flight due to improper takeoff technique.
Mastering N Mode Flight Fundamentals
Basic Control Inputs Explained Simply
Left Stick: Controls altitude (up/down) and rotation (yaw left/right)
Right Stick: Controls forward/backward and side-to-side movement
Start with tiny stick movements—your DJI FPV drone responds immediately to input. Practice hovering in place for 5-10 minutes before attempting directional flight. The key to smooth control is using just your fingertips for subtle input rather than your whole hand. Many beginners crash because they overcorrect with large stick movements.
Landing Procedure to Prevent Prop Damage
Reduce altitude gradually using the left stick until 2-3 feet above ground, then descend slowly to touchdown. After landing, hold the left stick down for 3 seconds to disarm motors. Wait 30 seconds before approaching—props continue spinning briefly and motors remain hot. Rushing to grab your drone after landing causes more prop damage than mid-air collisions among beginners.
S Mode Performance Flying Techniques
Speed Transition Without Panic
When you’re ready to switch to S Mode, do it at high altitude (50+ feet) initially. The drone accelerates faster and turns more aggressively with no obstacle detection. Expect immediate changes in responsiveness when toggling the flight mode switch—your reaction time must be significantly faster. Practice gentle turns first before attempting any high-speed maneuvers.
Cruise Control for Cinematic Shots
Press the Start/Stop button once to enable cruise control—the drone maintains current speed without stick input. Use the right stick forward/backward to adjust speed smoothly. This feature allows for professional-looking footage without constant stick adjustments. Press Start/Stop again to disable when you need precise manual control for landing or obstacle avoidance.
M Mode: When to Consider the Leap
Manual Mode Readiness Assessment
M Mode unlocks speeds exceeding 80 mph with zero safety features—only attempt this after at least 20 successful N and S Mode flights. Access requires:
– Watching DJI’s official M Mode tutorial
– Adjusting F1/F2 screws behind throttle stick
– Custom mode setup through goggles menu
Most pilots need 3-6 months of regular flying before safely handling M Mode. The jump from assisted flight to full manual control is significant—don’t rush it for the sake of bragging rights.
Return-to-Home Navigation Essentials
RTH Activation Timing
Hold the red RTH button for 2 seconds when you’re disoriented or low on battery. The drone immediately climbs to preset altitude (default 100 feet), then flies directly toward the home point. Always verify your home point location before takeoff—the marker should align with your actual position. Incorrect home points lead to flyaways that account for 15% of lost DJI FPV drones.
Landing Sequence Monitoring
During RTH landing, the drone descends slowly over the home point. Be ready to take manual control if the landing zone becomes obstructed—birds, people, or vehicles might enter the area during flight. The aircraft stops 3 feet above ground; you can lower manually or let it complete auto-landing.
Post-Flight Best Practices
Battery Maintenance Protocol
Charge all three batteries (drone, goggles, controller) after every flight session. Store batteries at 50% charge for long-term storage—never leave them fully charged or depleted. Check battery contacts for debris after each flight; dirty contacts cause power issues that mimic more serious problems. Proper battery care extends the life of your $200+ flight batteries by 50% or more.
Flight Log Review Process
Connect to DJI Fly app after each session and review your flight path. This helps identify areas for improvement and tracks your progress. The app also flags any error codes or unusual behavior for future reference. Serious pilots treat each flight log like a flight instructor’s notes—studying mistakes prevents repeat crashes.
Troubleshooting Critical Issues
No Video Feed Resolution
Check all four antennas are secure and undamaged—loose antennas cause 80% of video issues. Verify goggles link to aircraft by looking for the solid green connection indicator. Restart all devices in sequence if the link fails to establish. Never attempt flight without a stable video feed—flying blind with a DJI FPV drone guarantees a crash.
Drone Won’t Arm Motors Fix
Confirm propellers are correctly attached with matching dots aligned. Check that the battery is fully seated with audible click. Look for error messages in your goggles display—common issues include weak GPS signal or gimbal cover still in place. Resolve these before forcing motor start, which could cause dangerous propeller engagement.
Final Note: Your first flights should focus on smooth, controlled movements rather than speed or distance. Master N Mode completely before advancing to S Mode, and give yourself at least 20 successful flights before considering M Mode. The DJI FPV combo rewards patience with incredible flight experiences, but rushing the learning process leads to crashes and costly repairs—most beginners replace at least one propeller set during their first month of flying. Keep your flights low and slow until your muscle memory develops, and you’ll enjoy years of immersive FPV experiences without unnecessary damage.


