
Ever found yourself frustrated watching your RC car collect dust because you lack a proper place to race? Creating your own RC car race track transforms weekend hobby sessions into thrilling competitive events right in your backyard or garage. This practical guide delivers everything you need to construct a professional-quality RC car race track that accommodates various vehicle classes and withstands regular use. Whether you’re a beginner looking for a simple oval layout or an enthusiast planning a competition-grade circuit, you’ll discover actionable steps to build a track that elevates your racing experience without breaking the bank.
Choose Your RC Track Location Based on Space and Surface
Your RC car race track’s success starts with selecting the right location—get this wrong and you’ll face constant maintenance headaches and inconsistent racing conditions. Outdoor spaces offer more room for high-speed sections but require drainage solutions and weather-resistant materials, while indoor locations provide climate control but demand careful ventilation planning for nitro-powered vehicles.
Calculate Minimum Space Requirements for Your RC Class
Before breaking ground, measure your available area and compare it against minimum space needs for your intended track type. A simple oval track for 1:10 scale electric cars needs at least 40×60 feet of clear space, while technical road courses with elevation changes require 60×100 feet minimum. Competition-grade tracks often span 80×150 feet or larger—always add 10 feet of buffer space around the perimeter for safety barriers and spectator access. Pro Tip: Sketch your space on graph paper at 1 inch = 4 feet scale before committing to a design.
Evaluate Surface Conditions and Drainage Patterns
Existing ground conditions dramatically impact construction complexity and cost. Concrete or asphalt pads provide ideal stable bases requiring minimal preparation, while grass fields need extensive leveling and foundation work. Walk your potential site after rainfall to identify problem areas where water pools—these spots will become soft sections that damage vehicles and disrupt racing. Address drainage issues during initial preparation by grading the entire area with a 1-2% slope toward collection points, preventing costly repairs later.
Design Your RC Track Layout for Maximum Racing Fun
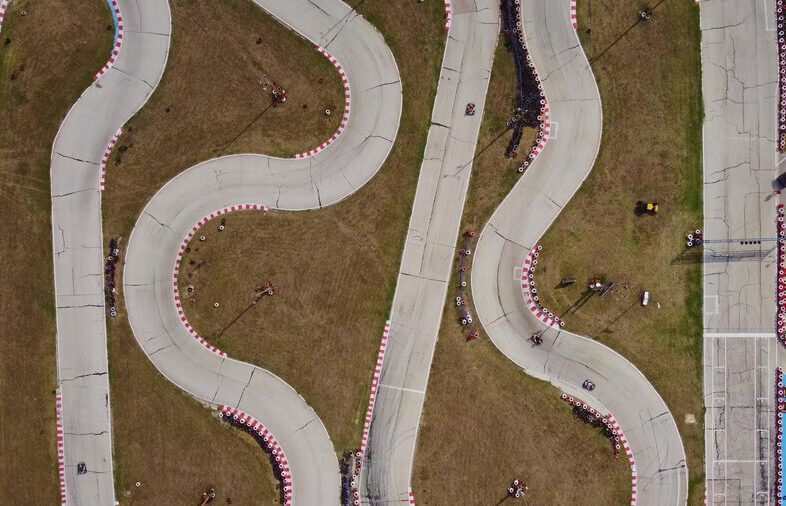
The track layout makes or breaks the racing experience—boring, repetitive circuits quickly lose their appeal while well-designed tracks keep racers coming back for more competitive action. Create a layout that balances high-speed straights with technical sections to challenge different driving skills and vehicle setups.
Select the Right Configuration for Your Skill Level
Oval tracks provide the simplest construction and ideal learning environment for beginners, with predictable racing lines and straightforward timing setup. Road course layouts featuring hairpin turns, sweeping curves, and elevation changes challenge advanced drivers but require more space and precise construction. Drag strips focus purely on acceleration testing in a straight line, making them perfect for small spaces but limiting racing variety. Off-road tracks with jumps and whoops sections simulate natural terrain but demand specialized suspension tuning on your RC vehicles.
Incorporate Essential Layout Elements
Every competitive RC track needs specific features to create engaging racing. Include at least two hairpin turns requiring heavy braking and precise throttle control, plus sweeping curves that reward carrying momentum through corners. Design your main straight to be at least 30 feet long for 1:10 scale vehicles to reach legitimate top speeds. Position corners to create natural passing zones where drivers can outmaneuver opponents, avoiding long sequences of turns that prevent overtaking. Critical Mistake to Avoid: Don’t make corners too tight for your vehicle class—this creates constant collisions rather than skillful racing.
Build Your RC Track Surface with Durable Materials

The racing surface directly affects vehicle handling, tire wear, and overall enjoyment—choose wisely based on your budget, location, and expected usage frequency. Different materials offer distinct advantages but require specific preparation techniques to ensure longevity and consistent performance.
Asphalt and Concrete Surface Construction
Asphalt provides the most professional racing surface for high-speed electric or nitro vehicles. Excavate 4-6 inches of existing soil, add 2 inches of crushed stone for drainage, then apply 2-3 inches of asphalt base followed by a 1-inch finish layer. Concrete offers superior durability with less long-term maintenance—use rebar reinforcement and finish with a light broom texture for optimal tire grip. Both surfaces cost $3-$6 per square foot but last 15-20 years with proper care. Warning: Never race on freshly paved asphalt—allow 48 hours for curing to prevent tire damage.
Outdoor Carpet and Dirt Track Options
Modular plastic tiles or outdoor-rated carpet provide excellent temporary or budget-friendly solutions. Interlocking tiles drain quickly and assemble in hours, while carpet attaches directly to prepared subbases with adhesive. For off-road enthusiasts, properly prepared dirt tracks using 60% clay and 40% sand provide authentic handling characteristics. Compact the soil thoroughly with a plate compactor and maintain moisture content by watering before events. These options cost $2-$4 per square foot but require more frequent maintenance than hard surfaces.
Install Safety Barriers That Protect Your RC Vehicles
Proper barriers prevent expensive vehicle damage during crashes while creating the professional appearance that makes your RC car race track feel legitimate. Plan barrier placement during initial design to ensure smooth transitions between track sections and consistent protection throughout the circuit.
Effective Perimeter and Inner Barrier Systems
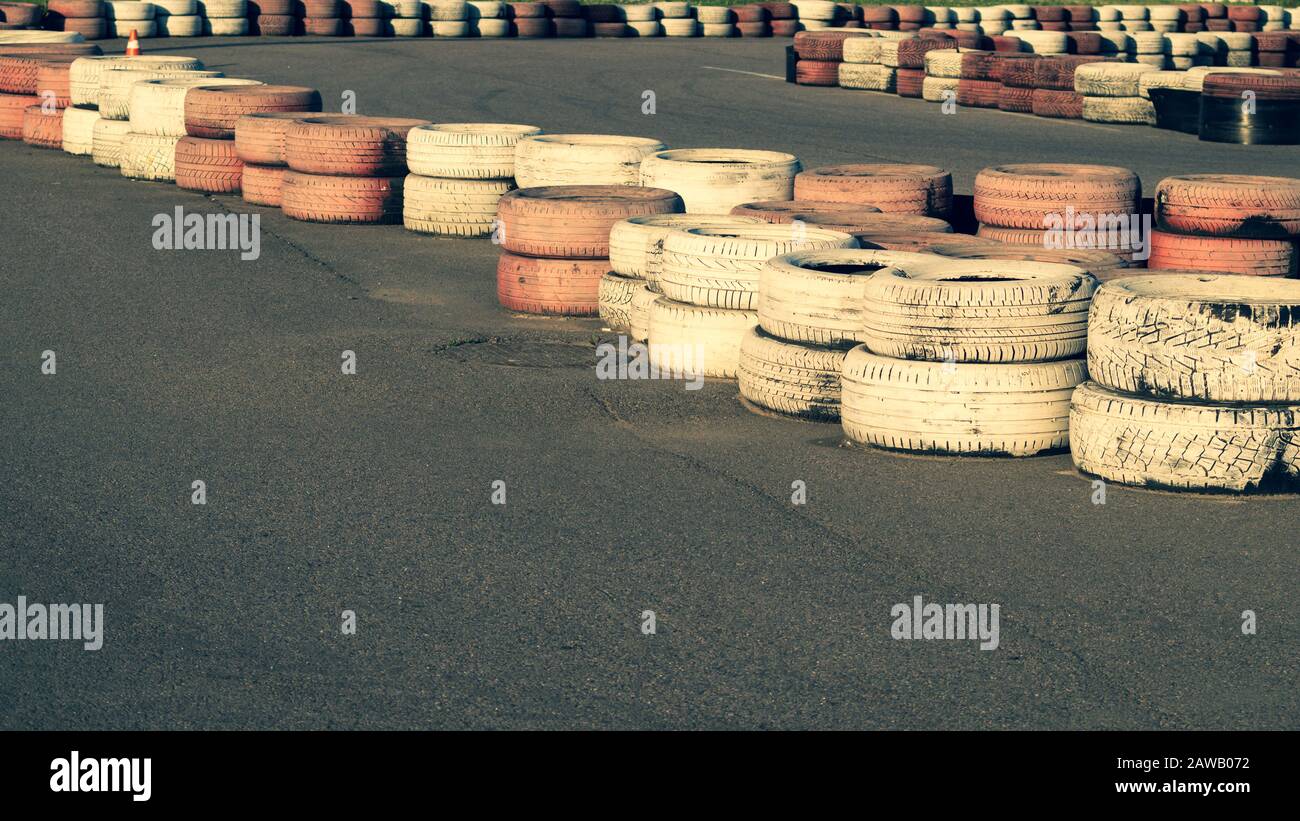
Chain-link fencing provides durable perimeter containment at $8-$15 per linear foot—install 4-foot-tall fencing extending 6 inches below ground to prevent vehicles from escaping. For inner track boundaries, stacked tires mounted on 4×4 posts remain the most popular choice, absorbing impact energy effectively. Space posts 4-6 feet apart and stack tires two high for adequate containment, securing layers with landscape fabric ties. Pro Tip: Position barriers at least 12 inches outside the racing surface edge to provide recovery room and prevent vehicles from hitting fence posts directly.
Barrier Installation Best Practices
Miter corners at 45-degree angles rather than creating sharp 90-degree turns that vehicles cannot navigate smoothly. Leave regular gaps in barriers for track marshals and emergency access during multi-car incidents. Install reflective markers on barriers for tracks used during low-light conditions. Test your barrier system by intentionally simulating crashes at various speeds before hosting races—adjust placement or add additional cushioning where needed to prevent vehicles from bouncing back across the track.
Add Essential Features to Your RC Track
Beyond the racing surface and barriers, several critical features transform a basic layout into a functional racing facility that supports competitive events and regular hobby use. Prioritize these additions based on your intended track usage and available budget.
Starting Grid and Timing System Setup
Mark a minimum three-car-wide starting grid with painted lines on a straightaway section with sufficient length for vehicles to reach racing speed. For competitive timing, position IR beam systems 10-15 feet before the start/finish line—budget $200-$800 for basic systems that track lap times and manage race formats. Concrete or asphalt pads at each grid position prevent vehicles from sinking into softer surfaces during launch.
Pit Area and Drainage Solutions
Designate concrete or gravel pads for your pit area with electrical outlets on waterproof pedestals—one 20-amp circuit per four charging stations. Install French drains along track edges where water naturally collects, channeling runoff away using buried corrugated pipe. Grade the entire track surface at 1-2% slope toward drainage points to prevent water accumulation that damages surfaces and interrupts racing.
Maintain Your RC Track for Years of Reliable Use
Regular maintenance preserves your investment and ensures consistent racing conditions session after session. Different surface types require specific care routines, but all tracks benefit from systematic inspection and proactive repairs.
Weekly and Seasonal Maintenance Tasks
Inspect racing surfaces weekly for cracks, potholes, and debris accumulation—sweep or blow the track clean after each event. Address small cracks immediately using appropriate fillers before they expand into major problems. For dirt tracks, recompact high-traffic areas monthly and regrade the entire surface quarterly. Before winter, clear leaves and organic debris that stain surfaces and clog drainage systems. Expert Note: Reseal asphalt surfaces every two to three years to extend their lifespan significantly.
Building your own RC car race track brings the thrill of competitive racing to your doorstep. Start with careful planning that matches your space and budget, focus on proper surface preparation and drainage, and maintain your track consistently for years of racing enjoyment. The initial effort pays off through countless hours of competitive fun, skill development, and community building with fellow RC enthusiasts. Your finished track becomes more than just a hobby space—it transforms into a hub for learning, competition, and shared passion that keeps you and your RC vehicles active year-round.


