
Imagine your custom-built RC car zipping through an obstacle course, perfectly tuned to your specifications because you created every critical component yourself. Learning how to make RC car parts unlocks this level of customization and satisfaction that off-the-shelf models can’t match. Whether you’re a hobbyist seeking unique performance characteristics, a parent guiding a STEM project, or an engineer prototyping vehicle concepts, mastering DIY RC part fabrication transforms your relationship with remote control vehicles. This guide reveals practical techniques to create functional, durable RC components using accessible tools and materials—no factory equipment required.
You’ll discover how to build essential parts from scratch, modify existing kits for better performance, and troubleshoot common issues that plague homemade RC creations. By the end, you’ll have the knowledge to craft custom RC car parts that meet your exact specifications while avoiding the pitfalls that frustrate most beginners.
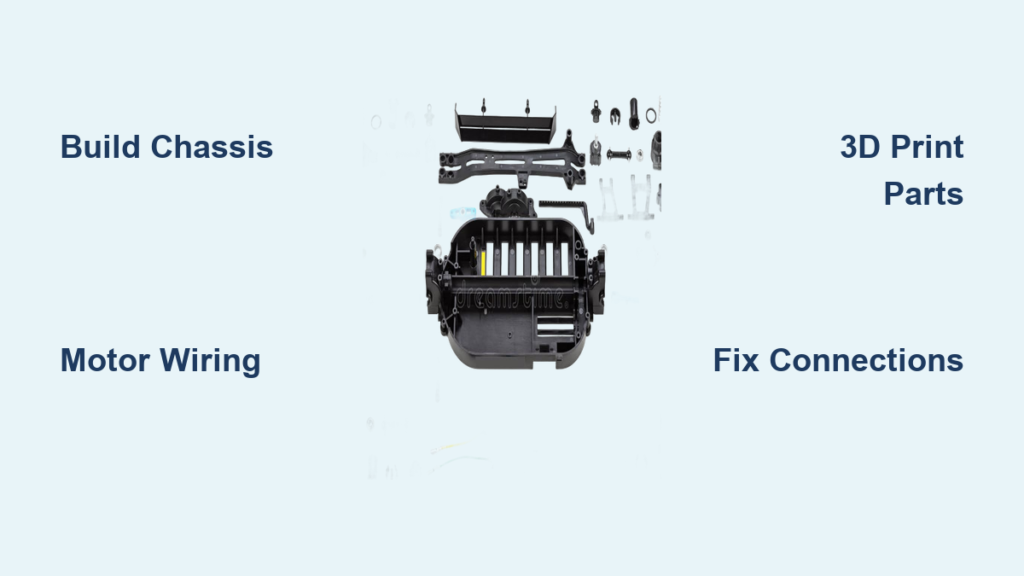
Essential Components for DIY RC Car Part Creation

Your journey to make RC car parts begins with understanding the core components that every functional remote control vehicle requires. The basic electronics package forms the nervous system of your creation, consisting of a radio frequency receiver unit that interprets signals from your handheld transmitter. Most entry-level kits like the STEM Inventions DIY RC Parts Kit include three high-torque motors designed for pulling power rather than speed, which many builders find too slow for their expectations.
Mechanical elements complete the foundation for your custom creation. Two wheels with rubber tires provide essential traction on various surfaces, while an additional pulley wheel expands your build configuration possibilities. The plug-and-socket wire system with color-coded connections ensures proper polarity during assembly without requiring soldering skills—perfect for beginners learning how to make RC car parts. Before starting your build, verify you have all necessary components with dimensions of approximately 11.2 by 4.1 by 3.3 inches and a weight around 11.8 ounces.
How to Connect Motors for Proper Vehicle Movement
Motor wiring configuration determines whether your RC creation moves forward, backward, or spins in place. Connect wires of matching colors together—red to red, black to black—to ensure correct polarity and circuit completion. Reversing these connections changes motor rotation direction, which forms the basis for differential steering where opposite motors spin in different directions to turn your vehicle.
For standard two-wheel drive setups, connect both drive motors to spin in the same direction. When building four-wheel drive configurations, you’ll need to reverse one side’s motor connections so all wheels propel the vehicle forward. Test each motor independently before final assembly to confirm proper rotation—this simple step prevents frustrating troubleshooting later when your RC car unexpectedly spins instead of moving straight.
Tools Needed to Fabricate Custom RC Parts

While the plug-and-socket connection system eliminates soldering requirements for basic builds, having the right tools makes creating advanced RC car parts significantly easier. A small Phillips head screwdriver secures components to chassis elements, while wire cutters handle excess cable length. Needle-nose pliers position small components in tight spaces, and a small flathead screwdriver assists with connector insertion.
Budget-Friendly Workshop Setup
You don’t need an expensive workshop to make RC car parts—organize these essentials on any table:
- Basic hand tools: Small screwdrivers, pliers, wire cutters
- Measuring devices: Digital calipers for precision part fitting
- Adhesives: Super glue for quick bonds, epoxy for structural repairs
- Cutting implements: Hobby knife, small saw for material shaping
- Safety gear: Safety glasses when cutting or drilling materials
This minimal toolkit costs under $50 and supports most DIY RC part fabrication needs. As you advance, consider adding a 3D printer for creating custom chassis components, wheel hubs, and mounting brackets that perfectly match your specifications.
Building a Functional Chassis Without Specialized Equipment

The chassis forms your RC vehicle’s structural backbone, protecting internal components while providing mounting points. Start with lightweight materials like balsa wood, acrylic sheets, or corrugated plastic that you can cut with basic tools. Trace your design on material using a pencil and ruler, then cut carefully with a hobby knife or small saw.
Reinforcement Techniques for Durability
Basic chassis designs often fail under stress, so implement these reinforcement strategies:
- Cross-bracing: Add diagonal supports at 45-degree angles to prevent twisting
- Layered construction: Glue multiple material sheets together for strength
- Strategic weight distribution: Position heavier components (batteries, motors) near the center
- Shock absorption: Mount components on small foam pads to reduce vibration damage
For quick prototyping, modify existing kit chassis with custom brackets rather than building from scratch. This approach lets you test designs before committing to permanent fabrication—essential when you’re first learning how to make RC car parts.
Troubleshooting Common RC Part Failures
Even well-constructed RC components develop issues that prevent proper operation. Motor-related problems represent the most frequent frustration, with slow operation being the top complaint across multiple customer reviews. If your RC creation moves sluggishly, check these three critical areas before assuming motor failure:
- Battery condition: Weak batteries dramatically reduce motor performance
- Wheel resistance: Ensure tires rotate freely without rubbing against chassis
- Connection integrity: Loose spade connectors often work loose during vibration
Electrical connection failures cause intermittent operation that seems random but follows predictable patterns. If your RC vehicle suddenly stops working after running fine, inspect all wire connections—particularly where they attach to motor terminals. The plastic spade connectors included with many kits can pull loose during operation, breaking the circuit. Secure these connections with a small drop of super glue or heat-shrink tubing for permanent builds.
Integrating 3D Printing for Precision RC Components
3D printing revolutionizes how to make RC car parts by enabling custom geometries impossible with traditional manufacturing. Start with simple replacements like wheel hubs or motor mounts before advancing to complex chassis designs. PLA filament provides adequate strength for most RC applications while remaining affordable and easy to print.
Custom Chassis Design Principles
When designing your first 3D printed chassis, follow these guidelines:
- Include mounting points: Design specific slots or holes for each component
- Optimize weight: Use lattice structures instead of solid material where possible
- Consider accessibility: Ensure batteries and electronics can be removed for maintenance
- Test incrementally: Print small sections first to verify fit before committing to full prints
The STEM Inventions kit dimensions (11.2 x 4.1 x 3.3 inches) provide excellent reference points for your initial designs. Many builders report that custom 3D-printed chassis significantly improve component security compared to basic kit hardware while reducing overall weight.
Upgrading Basic RC Parts for Professional Results
Stock components included with entry-level kits serve educational purposes but limit performance potential. Motor upgrades deliver the most noticeable improvements—replace the included high-torque, low-RPM motors with higher-speed alternatives matching your voltage requirements. Most kits operate on 4.5-6 volts, so select replacement motors within this range to avoid damaging your electronics.
Power System Optimization
Extending your RC vehicle’s runtime requires strategic power management:
- Switch to rechargeable batteries: Nickel-metal hydride AAs provide hundreds of charge cycles
- Implement external battery packs: Lithium-polymer packs offer higher energy density
- Add voltage regulation: Protect sensitive electronics from power fluctuations
- Minimize electrical resistance: Shorten wire runs and use appropriate gauge wiring
These upgrades transform basic kit builds into serious RC creations capable of extended operation and improved performance. Many experienced builders report doubling or tripling their vehicle’s runtime through careful power system optimization.
Maintenance Techniques to Extend Part Lifespan
Regular maintenance prevents small issues from becoming major failures in your homemade RC creations. After each use session, inspect critical components for wear that might compromise future operation. Check these three areas thoroughly:
- Wheel bearings: Clean debris and apply light oil for smooth rotation
- Electrical connections: Verify all wires remain securely attached
- Structural integrity: Look for cracks or stress points in custom parts
Motor maintenance becomes crucial as operating hours accumulate. Brushed motors develop wear on commutator surfaces that eventually requires cleaning with specialized tools. For custom RC car parts incorporating upgraded motors, follow manufacturer maintenance schedules to maximize lifespan.
Creating your own RC car parts combines technical knowledge with creative expression, producing vehicles that reflect your unique vision and requirements. Start with simple modifications to existing kits before advancing to full custom fabrication. Each project builds skills that prepare you for increasingly sophisticated creations. With the right techniques and tools, you’ll soon make RC car parts that outperform commercial alternatives while delivering the satisfaction of true craftsmanship. The journey from basic assembly to advanced customization awaits—your custom RC creation starts today.


