
That muffled smartphone audio ruining your vlog? The DJI Mic Mini transforms shaky recordings into professional-grade content with broadcast-quality sound in a package smaller than your thumb. This wireless lavalier system solves the universal creator struggle: achieving crystal-clear audio without complex setups or bulky gear. Whether you’re filming interviews in a bustling cafe or capturing adventures on mountain trails, learning how to use DJI Mic properly means your audience hears every word clearly—no more straining over wind noise or clothing rustle. In the next few minutes, you’ll conquer pairing, positioning, and pro techniques that make traditional audio gear obsolete.
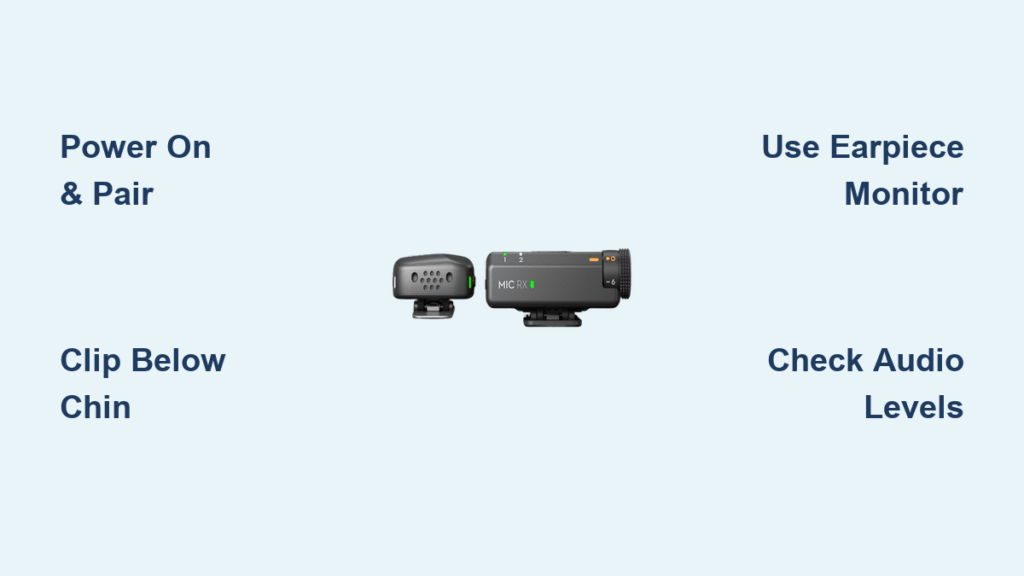
Power On and Pair Without Headaches
Instant Wireless Connection Setup
Press and hold the transmitter’s power button for 3 seconds until the LED glows solid blue—no menu diving required. Your DJI Mic Mini automatically pairs with the receiver within 10 seconds, confirmed by matching blue lights on both units. Skip confusing button combinations: this system uses smart pairing technology that eliminates manual frequency selection. If lights flash red instead, check both units have fresh batteries and maintain them within 1 meter during initial pairing.
Device Connection Cheat Sheet
Smartphone users: Plug the receiver directly into your phone—Lightning ports need the included adapter while USB-C phones connect natively. Open your camera app and verify it recognizes “DJI Mic” as the audio source (no extra apps needed). For Android users, disable “USB charging only” mode in settings if the mic isn’t detected.
Pro creators: When connecting to DJI Osmo Action 4 or Pocket 3, navigate to camera settings > audio input > select “External Mic.” Avoid common mistakes like forgetting to disable internal mics—this causes echo or double audio tracks. Always test connections by speaking before filming critical shots.
Perfect Mic Placement for Studio-Quality Sound
Clothing Clip Technique That Eliminates Rustle
Position the 12.8g transmitter 15-20cm below your chin, clipped to your second shirt button or collar seam. Angle the mic toward the corner of your mouth—not straight ahead—to avoid plosives and breathing sounds. Before recording, rub your clothing near the mic: if you hear scratching through the earpiece monitor, reposition it under a smoother fabric layer. For jackets, clip inside to the lining to block wind interference.
Critical mistake to avoid: Placing the mic directly over fabric seams or zippers. These create constant rustling that ruins audio. Instead, choose flat fabric areas like the center of your chest. When filming interviews, hide the transmitter by threading the clip through a buttonhole—only the top 5mm remains visible while maintaining optimal sound capture.
Smartphone and Camera Connection Guide

One-Step Setup for iPhones and Androids
- Connect receiver via Lightning/USB-C adapter
- Open Camera app (or Filmic Pro for advanced users)
- Tap audio settings and select “DJI Mic” as input source
- Speak normally while watching input levels—adjust until peaks hit -12dB
Android users: Disable “USB audio routing” in developer options if audio cuts out during recording. For iOS, ensure “Reduce Loud Sounds” is OFF in Settings > Sounds & Haptics—this feature distorts mic input.
DJI Camera Integration Checklist
- Osmo Action 4: Plug receiver directly into USB-C port, enable “External Mic” in audio settings
- Osmo Pocket 3: Use the included 3.5mm adapter, set gain to 65% for quiet environments
- Range test: Walk 50m away while monitoring audio—obstacles like walls reduce effective range to 80m
Never exceed 200m line-of-sight distance during critical shots. Film a 30-second test clip first to confirm audio sync—DJI’s digital transmission minimizes lag but verify with visual cues like hand claps.
Real-Time Monitoring That Prevents Audio Disasters
Earpiece Setup for Flawless Recordings
Plug the included earpiece into the receiver’s 3.5mm jack before filming. Press the receiver’s volume button to set monitoring levels—start at 30% and increase until you hear your voice clearly without overpowering ambient noise. This live feedback catches issues like wind interference or clothing rustle before they ruin takes.
Pro tip: During interviews, wear the earpiece under one ear to hear audio while maintaining eye contact. If you detect distortion, reduce gain immediately rather than repositioning the mic mid-conversation. Always carry spare foam windscreens for outdoor shoots—pop one on within seconds when wind picks up.
Battery Hacks for All-Day Shooting
Fast-Charging Protocol That Saves Time
Plug both units into a 18W USB-C charger for 15 minutes to gain 2 hours of recording time—perfect for last-minute shoots. The LED turns solid green when fully charged (1 hour total). For long sessions, enable standby mode by pressing the power button twice: this auto-activates after 5 minutes of silence to conserve power.
Critical warning: Never store units fully charged or depleted. Maintain 40-60% battery for long-term storage to prevent capacity degradation. Always power off transmitters when not in use—idle units drain 15% battery per hour even when paired.
Outdoor Recording Fixes for Wind and Interference

Instant Wind Noise Elimination
Snap the included foam windscreen onto the mic capsule before stepping outside. Position yourself with your body between the wind source and the microphone—this natural barrier cuts wind noise by 70% without sacrificing clarity. In heavy gusts, angle the mic downward 30 degrees toward your chest rather than directly at your mouth.
Interference troubleshooting: If audio crackles near buildings, move 3+ meters away from metal structures and Wi-Fi routers. Test locations by walking the perimeter while monitoring through your earpiece—metal surfaces reflect signals causing dropouts. For city shoots, avoid filming near microwaves or 2.4GHz security cameras.
Fix These 3 DJI Mic Problems Immediately
No Audio? Follow This Diagnostic Flow
- Confirm both units show solid blue LEDs (flashing red = pairing failure)
- Check physical connections—dirt in USB-C ports causes 60% of “no sound” issues
- Verify your recording app isn’t using internal mic (common iPhone Camera app glitch)
- Power cycle both units with 10-second button holds
If problems persist, force-repair by holding both power buttons simultaneously for 8 seconds until lights flash rapidly. This resets the connection without losing firmware settings.
Distortion and Clipping Solutions
When audio sounds tinny or distorted:
– Reposition mic 5cm farther from your mouth (closer than 15cm causes overload)
– Reduce gain to 60% in your recording device’s audio settings
– Move 2+ meters away from Wi-Fi routers—their 2.4GHz signals interfere with transmission
Pro insight: Distortion often occurs when filming near refrigerators or elevators—these emit strong electromagnetic fields. Relocate to the opposite side of the room for clean audio.
Interview and Vlogging Workflows That Shine
Professional Interview Setup in 60 Seconds
- Clip transmitter to interviewee’s lapel 15cm below chin
- Conduct 30-second sound check asking “How’s the audio?”
- Enable dual-channel recording for backup safety track
- Monitor through earpiece while operating camera
- Keep receiver within 10m for rock-solid connection
Always record a hand clap at the start for perfect audio-video sync in editing. The dual-channel feature lets you record identical audio on both channels—crucial when filming unpredictable environments.
Mobile Vlogging Optimization
Attach the transmitter to your collar with the mic angled toward your jawline. Connect the receiver directly to your phone and open your camera app—no external recorder needed. Leverage the 200m range for dynamic shots: have a friend hold the phone while you walk 50m away, maintaining perfect audio clarity. Before posting, check for clothing rustle by reviewing audio waveforms—smooth lines mean clean sound.
Maintenance That Extends Your Mic’s Life
Daily Care Routine After Shooting
Wipe the microphone capsule with the included microfiber cloth to remove skin oils and moisture—never use alcohol wipes. Store all components in the protective case with cables loosely coiled to prevent USB-C port damage. Check clip tension weekly; replace immediately if it can’t grip fabric securely (loose clips cause mic swings and rustle).
Monthly deep clean: Use a dry cotton swab to gently clean USB-C ports on both units. This prevents charging failures caused by pocket lint accumulation. Always remove the foam windscreen before storage to avoid moisture trapping.
Firmware Updates for Peak Performance
One-Tap Upgrade Process
Download the DJI Mic app (iOS/Android), connect your transmitter via USB-C, and tap “Check for Updates.” Updates install in under 2 minutes—never disconnect during this process. New firmware often adds critical features like extended battery algorithms and interference resistance boosts.
Pro tip: Enable auto-update notifications in the app settings. DJI releases quarterly updates that fix common issues like Android audio dropouts or iOS compatibility glitches. Updating monthly ensures you leverage the full 200m range capability—older firmware sometimes limits this to 150m.
Your audio transformation starts now: With these how to use DJI Mic techniques, you’ve turned a simple wireless system into a professional audio powerhouse. Position your mic 15-20cm from your mouth, monitor through the earpiece, and leverage dual-channel recording for foolproof results. Remember that great content demands great sound—your audience notices muffled audio before shaky video. Start with smartphone recording today, then explore 200m-range drone shots tomorrow. The 6-hour battery life and pocket-sized design mean you’ll never miss a moment worth capturing. Grab your Mic Mini, clip it on, and hit record with confidence—your clearest audio is just one setup away.


